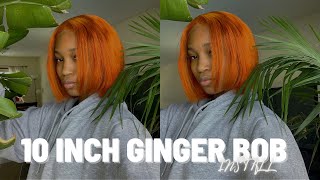
Beginners Only!! How To Achieve Custom Scalp Lace Frontal Wig Placement Installation And Measurement
- Posted on 20 June, 2021
- Lace Closure
- By Anonymous
Hey guys!!!
In the video I showed you how to achieve custom scalp lace Frontal wig the correct placement how to do the Installation yourself and measurement of frontal and how to cut
All tools and methods where mention on the video
Steps to take and how it been done
i hope you enjoy it... Please watch in 1080 HD for best quality... Let me know what you think and videos you want me to make in the Comment section below don’t forget to subscribe, like ,comment and share :)
—————————————————————————————
➡️ K E E P I T U P W I T H M E
Instagram - chiyormah
Tiktok - chiyormah
Twitter - chiyormah_
Snapchat - chiyormah1
➡️ F O R B U S I N E S S E E N Q U I R I E S
➡️ M Y P R E V I O U S H A I R V I D E O
Key to a successful wig is styling and styling to me is everything when it comes to hair. Here comes hey guys. It'S chiama here, welcome back to my channel. If are new you're welcome dear how you doing welcome back to another hair video, so um, this video is a self explanatory step by step ways to step up your week, making game your frontal wing making game basically for beginners, it's a beginner's friendly in wig making There are basic steps you should take. If you really want your results. Looking nice, there are three basic steps that i just feel you should know or for beginners one should take so the first one is the foundation. I call it foundation because that is the starting point of your wig, this foundation of a thing comprises of the tools you're using and how you start up your wig making. That is what i call foundation number two process: jesus saying: um, how you lay your bed, so you lie on it. I think process is the. When you mean how you lay your bed, so you lie on it. That is what i call process. If you don't get the basic process when it comes to big making, the finish is rubbish, you won't get, you won't get and um. How do i play good finishing? Yes, you won't get a good finishing number. Three, which is finished. For me finish is everything, and finish is what i call styling styling in wig making is everything like if you're building a house, for instance, let's use house, for example, if you're building in-house and um the finish is not there like, they don't end up, maybe washing Some parts that the paint has already touched on, that's what i mean by finnish when it comes to house my sister, my brother, your wig, your hate will not come out snatch. Your styling is not killer. If your styling is not snatchy, if your styling does not speak, that's hair, no matter how much you got it for don't come out like the way you want it to come out. The results is everything when it comes to hair. Like your finish, is everything to a successful wig is styling and styling to me is everything when it comes to hair in this video i broke everything down in sections for better understanding. So if that sounds like what you want to watch or what you like, then you definitely want to keep on watching under foundation. We have products, so these are the products i'll be using. I have my bleaching powder. I have the developer. I have a purple shampoo to stop process. I have the mixing bowl. My shampoo, my conditioner treatment oil. I come first to get the hair out of my face, so i don't basically dye any strands. So this is the quantity of bleaching powder i'll be using, and i go in with the developer to mix after mixing. It gives me this consistent, thick results here, then i go into bleach, just the lace, and i have this particular line i'm trying to create. I don't go beyond that line and i bleach this stage is very critical. I try to watch it closely. Bleaching is a process. In this stage. I try to watch when my hair strands are getting the bleach absorbing the bleach here absorbing it. So at this point you can see i'm getting results, so i just got to wash it because i don't want it to be pure white, so this is the result i want. I go in with my purple shampoo to wash and stop the process of the bleaching. I come through rinse out and i go in with my conditioner. Conditioner helps softens the hair. So at this point i condition i rinse out and i add right, moving on to measurements. First thing i do is use this wax stick to lay this hair properly and push everything backward with my hot comb. I take measurement of my own head, which is 12 and my lace, frontal is for thin, so i'm picking out two inch of it, but i still want this to lay properly on my head. I would take out one and half inch instead of two inch on each ear: it's an air to air frontal, so i'm taking one and a half inch from each instead of two, so i'm taking out three inch from it. I don't know if i will try to explain properly on the screen so yeah. I have a inch smaller than my air frontal, but you know frontier is going to elastics elastic. It will grow to my size. So on week twos i have my canvas head of 23 and there is another for 22 and 21 23 is my normal size. 22 is a smaller size. A medium size and 21 is for people that have smaller head. For me, i use 23 and i've taken my measurements already. These are two different caps. One is the mesh cap, the other one is normal net cap i use net cap when it comes to um. Placement from frontal mesh cap is better for closures. Here is the measurements uh. I told you guys. I would give you guys a proper tutorial on this measurement. It'S not something you can rush into so for frontal placement. I take my hair it an inch forward from the normal cap. Just one inch forward like this and i take that round and go in with my marker to give my sorry this mark, i was not bright enough to show you guys so i'll give you guys proper, um tutorial when it comes to this. So i'm going to sew in wigging my hair, a proper tutorial i'll, be on this on the cap measurements week. Making machine and marking of the dome cap styling is a bone of contention. First thing i do is blow dry, my hair from the beginning, to the end, pushing back all strands of hair to its placement, like placing them backward properly. Next thing you want to do is getting your plug from plucking skills, ready the tools for everything you're going to be plucking, and i plug from one strand to another, and i spray water to make it soft. And so i don't get to tear my lace. Water makes it softer and easier to comb if you're still here with me, please hit the subscribe button and like if you have not moving on after plucking, i feel like i've gotten to a stage where i want so then. The next thing i have to do is trying to straighten my hair. One thing about straightening is that you have to go over it at least four to three times to achieve the proper look you want. I go over this like three to four times even more, depending by make sure i go over it like more than twice products for styling as the treatment oil stick wax spray, so i add very little quantity, little quantity of the oil i'm putting to just give It a little shine, i'm going in sections adding my um work, stick and going multiple times with my straightener to get the exact look doing this. I do this on every section i cut out so um. Lastly, i use the same wax stick to apply on every single uh side. Then i go in my pot to give me moving on to installation. Since i'm doing my hair, i first of all pop it up on my head: try to check the measurements and know the sides of where i'm working on then next is going my goal to be glue. I apply it all round and place my hair on it. Dry, it up and yeah. That is it basically. So let me allow you watch from here. This is a self explanatory video that when you see what i'm doing you take steps, you get the steps right and you look so that is it for today's video. Thank you so much for watching. I hope you enjoyed it please like share and comment smash. The subscribe button to join the family. My instagram is on the screen. I'Ll see you in my next video bye. You


Comments
Mahtilda Chimaobi: Omo I cannot do frontal to save my life . You explained this so well
Mahtilda Chimaobi: Ahhh I like this ur new intro song oo
Mahtilda Chimaobi: Notification gang ooo