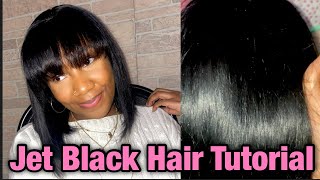
How To: Oreo | Black And White Highlights | Lace Closure Install
- Posted on 24 September, 2021
- Lace Closure
- By Anonymous
HEY DIVAS!!!
TODAY IM GOING TO SHOW YOU HOW TO EASILY MAKE THE "POPULAR" BLACK AND WHITE WIG THAT HAS BEEN SEEN ALL OVER INSTAGRAM!
SHOP
FOLLOW
PERSONAL IG: EVALYNROSE_
BUSINESS IG: EVALYNROSEHAIRCOLLECTION
TIC TOK: EVALYNROSEHC
EMAIL: [email protected]
FOR ALL WIG, BUSINESS AND PROMOTIONAL INQUIRIES
Oh my gosh y'all this unit. I love it. It'S giving me very much cruella, very much oreo and very much cookies and cream, hey divas and welcome back to my channel. Today we are going to make this custom unit and i'm going to show you how to get that infamous black and white highlight look that everyone's kind of been wearing on instagram lately. It'S super easy we're going to start with these three bundles of black hair. One bundle of 613 in this 5x5 hd lace closure, so to start off with the color we're going to be using revlon in the color number 10 black. This is my favorite brand to use for jet black hair color and then for the 613 bundle. We'Re going to use willa charm in the color t27 to prep my lace closure, i'm going to start off by saturating it with some water um and i'm just going to spray the water onto the lace closure through the top and all the way down to the Bottom, this is a very important step, because this helps you use less color and it's easier to apply the black onto the hair. So with this comb i just put a little bit of the black color inside of a bowl and i'm going to take the hair color on the comb like i'm, showing you and then i'm going to put it a little bit on the hair. As you see me do and then i'm going to comb it through. I do not start with the comb on the actual roots, that's touching the lace or basically the knots. I start a little bit before and then i go back to the knots and then i comb through this is the, as you can see here, like i'm putting a little bit on the hair, and then i comb through. This is the way i do jet black color or any color at all that i'm trying to get close to the knot, but to not color the knots in the lace. So much so i don't do the whole spray it down for three thousand times with got to be spray or got to be gel or vaseline or whatever you've. Seen honestly, if you just take your time and comb it through it'll be perfect, you won't have any stains on the lace um and then any stains that you could possibly get on the lace once you bleach the knots after it'll make it go away anyways. So this is my technique on how i color jet black hair, whether it's the frontal wig frontal closure red hair, blue hair. This is the technique once it's all done. This is what it'll look like a simple application of me just putting jet black on the hair. Next, we're going to move on to the bundles and i'm pretty much going to do the same thing but except i'm not combing it through, because the bundles are just bundles and i'm sure most of y'all have colored bundles jet black. Before but again, the main thing here is that i'm making sure that the hair is wet. I am going to wet the bundles turn the water off and i'm going to use those same two bottles. So, like i said, i use less product because the hair is wet, it'll, actually seep through versus being dry. I hope y'all kind of understand that concept, because this was what this is. What works? I don't use four and five bottles so for three bundles in a closure i was able to use just two bottles of box hair dye and that's because the hair was wet. So i'm just gon na fully make sure that i'm rubbing it all the way through on all the hair and pretty much let it sit for about 35, probably about 40 minutes. I basically moved on to the other steps and then once i came back from doing everything else, the black was very pigmented, so you can do the same, and this is what the black bundles look like. After about 45 minutes super black, you can tell next i'm going to move on to the 613 bundle and i'm going to use the willa in the color t27. I'M gon na dump it out into a bowl and then i'm going to fill it up twice because that's the parts per measurement which is also on the box um and then i'm going to mix it all up. And i already have my bundle in the back and it is also wet. So i'm going to do the same thing with that and i'm just going to um put it in and rub it around same motion, nothing major! So you kind of get the concept super easy super, quick. Now that they're all done as you can see, we have a tone 613. We took the yellow out and then we have three bundles of jet black and it's gon na very much give the highlighted. Look that we're going for i just love jet black hair. Look at the natural luster that this has this no product looks so good, so silky, it's just my favorite. Next we are going to move on to making the unit. So i'm making this on a dome cap which i do not use anymore. So don't ask, but i do not construct units on don't capture anymore, but i am going to start to construct a unit and basically i'm going to sew it on i'm not going to show you a lot of my sewing, because basically i teach this. So if you want to learn how to sew on a sewing machine, you can book a class with me online, but i'm going to basically do most of it black at the bottom. This is how you're going to get the highlighted look and then, when i get more towards the top, i started doing white black white black and then i let the last track before the closure be white, because you want more of the white at the top. It doesn't matter, don't start the tracks low because you won't be able to get the effect at the top moving on i'm going to trim my ends. I know y'all like to keep the hair as long as possible and that's cool, but i promise you taking one inch off is not gon na not make the hair look long. You need to cut these ratty ends, so i'm gon na use my razor because i don't want a super sharp blunt cut, but i do want them trimmed evenly, so i'm going to trim it evenly. I actually went up a little bit further after this video, because that's what i wanted to do so you know make sure you trim those ends. You don't want to leave them looking crazy. It helps look more professional once you trim and then here i'm just showing you that to get some more blonde at the top, because if not you'll have a straight black closure on top of all of the white and whatever's at the top is what's going to Be seen the most, which is why you want to put your um when you're doing your white black you're, going to put more of it at the top. So i sew two bundles, i'm sorry two little pieces into the lace closure, which is what i'm showing you right now. So i can have that more color in the front. So next thing is tinting the lace you know with my lace, mask spray, quick and easy. Nothing major you've seen this 100 times so make sure you shop that i don't use makeup on my lace because it is messy and i just don't like it so yeah. Moving on to the install to install this unit, i'm going to be using a lace, grip, wig band, and you can also purchase these online at checkout. This is the most clueless way ever to install your unit, and i do this for every single lace closure unit. I wear there's not one wig, i wear that does not have a lace, lace, um band, underneath it i've been doing this since i started youtube. This is the best way to have a glueless fit that you can take on and off every day, i'm going to cut this lace the same way. I always do i just clip the end and then i'm going to use my eyebrow razor to go across it. If you're using scissors just make sure you do a zigzag motion, it just helps for it not to have like such a harsh line. Next is baby hairs um. So usually, i do like a super small amount of baby hairs and y'all see this, which this is still kind of thin, but i never do like a long amount. You know what i'm saying so you can see like this is what like, by almost the length going down, is almost two inches or inch and a half, and so i wanted the longer baby hairs, because i seen someone on instagram like that and her baby hairs Were so cute, so i was like i'm gon na try this and see if i like it, i don't know if i'll continue to do it, but it was cute for this look. So you know that's what i'm doing so. I'M measuring i'm just showing you how long i'm cutting my um baby hairs remember to always cut baby hairs longer than you actually want it, because if you cut them too short, then you're, basically just messed up and then you'll have to figure out how to work. It next i'm going to flat iron but kind of do like a bump with the baby hair. So it can be easier for me to style to the direction that i want, so i'm curling them under. Usually i use got to be gel on my baby hairs, but today i wanted more soft baby hairs and if you want that and not a sticky one that sticks to your forehead, you have to use some type of styling foam. Usually i use nairobi, but today i try a different brand because they are local um. In my city it's called silky straight, so i'm just using that and then i'm going to tie it down with a strip. While i'm doing that and it's drying, i'm going to use my heat protectant spray that i always use in this little cute little comb thing um, i basically just spray my hair and then i use the comb to help press out my hair, and everyone knows that When you're pressing out your hair - and you want to be super silky straight - you must use a comb as you go down with your flat iron tip 101 for bone straight hair. Okay, make sure you do that so now that the baby hairs are a little bit dry actually was headed out to a cookout. So i'm rushing you'll, see my family come in and out in the background, because everybody was trying to get dressed, but now i'm going to trim them. How i want - and this is your best bet, if you're not good, with baby hair, start like this start long and then trim. If you want them to swoop to the left and then swoop to the right, then you need to trim them. That way, don't cut straight and blunt just see how i'm going like down angle it and then trim it. How you want it? How short, however, and then go back to swooping it it's easy to swoop it again, because the hair has already set from the mousse. You see what i'm saying so see how clueless it is. I could just move it on around and i'm going to just you know, fix it up straight in part and then i'm going to, of course use my wax stick to flatten out and then re-flat iron and that's pretty much. Basically it the wig is installed. Lastly, i did want to show you that i cut some little layers in the front, just section off a little piece again start long and then go up if you want to that. You'Ll never go wrong, you're just going to angle it down and then you're going to match it to the other side. So all i'm doing is taking my eyebrow razor or any razor. You can do scissors too and then you're going to just feather it down at the angle. Most people start off around their chin. I wanted longer layers, so that's what i did um and then right here, real quick because i was leaving. So you can see that i'm just trying to show you that i'm just making sure that i'm going to go to the other side and i'm going to see where this part ends in the front. The very first one i'm going to match with the other side and i'm going to raise her down and do the same thing to the other side. Very easy - and this is the final look after i put on a little bit of makeup - we were headed to the cookout and it was so cute. It'S giving me exactly what it's supposed to give it's giving highlights it's giving a little pop of color, and i honestly like it. You can do this with any color. So if you want to do red, just take the blonde bundle and put some red on it, but anyways um. The unit is flat regardless of this track sold in between, and i really wanted to add this to my custom collection, but for some reason i could foresee someone giving me drama about the track being sold onto the lace. It does not damage the lace. It'S not going to rip it, but i already see that so i said you know what never mind. I'M gon na give you a tutorial and you can do it yourself, here's the hair! I didn't want to speed it up, because i wanted to show you how beautiful and silky it is and how it moves very full for the four bundles and yeah. I love this. Let me know what you think about it make sure you subscribe and comment and let me know, and then also i just wanted to show you this little dress. I got on what you kind of seen it already, but i got this dress from she and y'all and it was like nine dollars and it was tea at the cookout honey, so make sure you shop there too, because i love me a bargain. Anyway, shop evelyn rose for your custom units and yeah. Thank you so much for tuning in and always hanging out with your girl, bye. You

Comments
Erica Lodge: Where did you get your hangers for your bundles?
Keishae Ayanna: