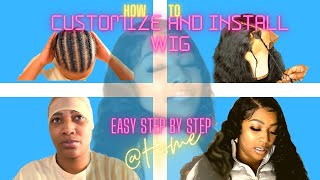
How To Fix/ Repair Torn Or Ripped Lace Closure/Simple And Easy
- Posted on 22 November, 2022
- Lace Closure
- By Anonymous
Hi Lovelies, good to have you here. Please consider subscribing to my channel. I have more amazing contents coming up.
Please understand that when fixing a lace closure, it depends on where it got ripped and the condition of the closure. This video explains how to fix a lace closure torn in the middle.
MUSIC: With you in the morning
Musician: Carl Storm
Please click on the link below to watch the Video on "HOW TO REVAMP A SYNTHETIC" WIG, using the wig in this video
Foreign and because the enclosure has ripped, I need to fix it first before everyone going into the river and when you're done with this video, I'm going to link in the description how I fixed this synthetic wig for my client. So we just go ahead and watch that video when you're done so you can see - I will fix this from this and how I turn this into a better looking wig right. So this video I'm going to show you how to fix this. This closure, you can see it reads and if you look here, it's kind of falling, The Ripped part is almost in the middle of the closure. So what am I going to do now? I only need three things to fix this: I'm going to use my Invisible Thread this one and my regular needle you can use the curve needle the one you use to make your wigs right. So so I'm just going to get a lace and use it to fix it so I'll be using the thread, the my needle here, your regular needle and lace for make for closure making. So this is a squeeze lace for Collision making. So I'm just going to cut a small portion of something that is going to fit this part just a small part of this lace from my left on my hand right now, and I'm just going to put it here, then I'll use this Invisible Thread. True sew. It and make sure it's covers this tone or ripped Parts, because it's already the root closure is already kind of in the middle. So we cannot just leave it like that right. So I'm just going to cut a small portion of this just small. So here we have it. I believe this is enough to cover this tone cut, I'm not going to place this on it like this, and I'm going to sew it using my thread and I've already put straight in the needle, so I'm just going to sew it like just the way you Sew your normal, both right, so I've done the wig inside house because I need to sew the lace I just cut. I need to sew it on this on this ripped parts. So here we are now and I'm going to use my t, pin tool to hold this extra lace on top I'm going to use it to pin it down. I don't know how it feels when we're falling in love with you in the morning I Wan na Wake Up another life. You can see I've sewn down these parts, so I detached the needle. So I'm just going to cut I'm going to tie this part. Now, I'm going to note it very well and I'm going to cut off the thread, see I'm done with this part like this. I hope you can see it. I'M done sewing on this part, so I'm going to do it like it's going to be a four corner like I'll sew here, as you sew here and sew it down here. So the same way I I did on this part is what I'm going to do here and everywhere, so that everything is going to be properly this lace, this extra laser, so I'm so into it. It'S going to be properly secured and when I'm done, I'm going to cut off this extra lace on this side, so I'm going to show you how it looks when I'm done. We are sewing it to the already made closure. This is what you are going to do: make sure that this hole the hole on this one, the last hole here you are using it to hold the last, the very closest the closest oil to this one. On top, so I'm going to pick the two hole on this: the normal closure now, the old that is very close, the last one that is close to this extra um lace, adjusted on top. So that's what I'm just going through! I'M just going to um sew together, so it's not like I'm taking very I'm, making the hose very far from each other. No, it's the very the old that is close to this extra less I'm picking and I'm picking the old that is close to it on this one. So I'm picking them together, so I'm just using the thread to sew them together. There'S nothing wrong without you say to me, so I'm done as you can see. I'Ve sewn it round for corner. So I'm just going to cut this thread now. This Thread is called Invisible Thread right, but I can still see it. I don't know why. I think it's just because it doesn't have a specific color, it's kind of transparent. So when you want to get yours, please um look out for it. Look out for the invisible just say, Invisible Thread. They will know what to give you and but you really can't see it when you, when you're done, I'm going to show you I'm going to show you on the other side. So you really can't see this part. So what I'm going to do now, I'm going to take off the Tipping and and cut up this extra lace. You have to be careful while doing this, so that you don't cut what you've done so here we have it now. You can't see the part that was done like that, so all you have to do now, you're going to create a clean path here on the middle part of this closure and you're going to ventilate on this part. Let me place it on the don't be here. So that you can see what I'm doing now look at this. This is the middle part to pass right of this closure, and this is the tone part that we just fixed. We know we already sewed, we've already put another lace underneath so what you're going to do now, this small part here this small part here just going to ventilate on it, so that it's going to cover your computer. You know you already have another lace underneath so you just ventil it on this list and I'm going to show you how it looks and if you don't know how to vents later, I have videos on this channel that show you how to eventually. So you just watch, you guys go to the videos on my channel and you will see how it's eventually so I'm just going to ventilate on this and show you how it looks at the end. What I'm trying to do now is to ventilate on the list that is showing underneath on of that ripped part. So if you are wondering where did I get the hair from, I ventilate a lot, so I have bundles um very similar to this. So I'm just going to use them cause part of it. I use it to fill up this particular space when you're ventilating on these parts. Here these extra lace underneath that were attached to it, underneath this one to make sure you have you see this part, this part the one on top The Ripped part. You pick one hole from the one underneath, I'm sorry, it's not showing very well on the camera, but from the new lace, underneath you will hook it. We will hook it with your ventilating needle to The Ripped part of this, of the one on top the one that was on top, so so that you can just use your air through the air strands to hold them together, you get what I'm saying use the S trans, to hold the new lace underneath and the parts the tone part the one on top of this one, then you ventilate on the space in the middle, so guys I'm done ventilating on the new lace. I attached to this on to this side underneath so and I when I was ventilating like I said earlier, I joined the one on top, so the one underneath as I was ventilating you get what I'm saying right so look at this. You can see how neat you can see how neat it is now. I am done with the ventilation now it remains revamping of this wig, it's a synthetic wig, so I'm just going to show you guys I'm going to do this and I'll link the video of this with green button in the description and if you have any question, Please and please drop it in the comment section I'll, kindly give this video a thumbs up. If you enjoyed this video And subscribe, please consider subscribing to this channel. I have more content like this. Coming up and I'll see you in my next video. Thank you. Bye,


Comments
Lassalete B: Try the needle for ventilate. It’s more practice. ❤❤❤. Well done , you’re amazing
Aina Blessing: