No Lace Closure No Frontal | How To Make A Wig Without Closure
- Posted on 12 November, 2022
- Lace Closure
- By Anonymous
Hey loves ❤️
In today’s video I’ll be showing you loves how to make a wig without closure.
I hope you find the video helpful
Please do subscribe, like, comment and share .
Items used:
* Life mate hair extension
* Wig cap
* Pins
* Bonding glue
* Got2b spray (optional)
* Thread or wool
____________________________________
CONNECT WITH ME :
Instagram: https://cutt.ly/WZdtQQ7
Twitter: https://cutt.ly/sZdtxsS
__________________________________
VIDEOS YOU MIGHT LIKE:
How to make wig with old braiding hair
How to make 3D cubic braids
How to braid your hair yourself
——————————————————————
MUSIC USED
Music: Girls Like Me (Jamin OTB Remix)
Musician: AAPOfficial and Leo Valentine
Site: http://pixabay.com/music/-girls-like-m...
Music: All Yours All Mine
Musician: Young Ginseng
Music: Number One (feat. Lena van Woods)
Musician: BZMT
Music: Fire
Musician: Shades
#closurewigs #wigtutorial #bridalhairstyle #wigsforeverywoman #wigsinstall #wigreview #straighthair #affordablehair #affordablewigs
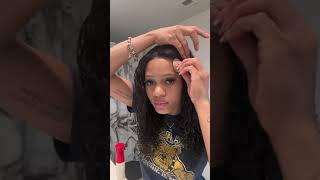
Girls, like me, hey, loves, welcome back to my channel. It'S a girl is zero in today's video I'm going to be showing you loves how to make a wig without closure. So this is the extensions I'm going to be making use of. It'S called The Life meat extension now they say this extension is 100 human hair, but it's definitely not 100 human hair. I got this for 3500, so it's very affordable. If you want to use this extension, I also have my pins. You can get those pins from any Bookshop, it's very easy to get. I got that for 350 naira. I have my wig cap with a little bit of closure on it, and I got that for 250 250 naira and I also have my bonding glue. I got the bonding glue for 900 now, so it's basically very very easy for you to have these things lying around, just get them and just have them so right now. What I'm just doing is that I wasn't really satisfied fight with the closure lace. I had so, I decided to extend it even more, so I measured five inch and I placed a pin just where it ended and then drew a closure from it down to where the closure was that's just basically. What I did for this part is so the next thing I'm going to be doing is that I'm going to measure the closure. So it's a six five by two closure that I'm going to create and I wanted to get middle of the closure, which is one inch one inch apart. So I just measured that so that I could be able to draw a line um through the two parts. In this now, after getting the middle you're going to draw a line, this will help you, when you're, trying to create your closure. Now this isn't really compulsory. If you're actually good at knowing where the middle is, then you don't need to do this, but man I had to do this for myself. So this is how it's looking and I'm going to put place two pins at each end of the middle, and then I'm going to make use of a thread. Now I made use of Brazilian wool, you don't have to make use of Brazilian wool. You can just make use of a thread it's just to secure the middle so that your bonding glue won't touch the middle, the middle line, rather so, after doing that, I just um - I just secured it so that it doesn't come off while I'm trying to make The hair, so this is how it looks it was looking nice I had to adjust it because definitely, that line would have been too wide for the closure. So I unraveled one of the extension and I'm going to show you guys something now, because this extension is synthetic um. There is a difference between the front and the back I'll show you what I mean by that now, when you look at the front, when you look at the back, you can see that there are some pieces for wires when you look at the front. It'S quite neat at the back, isn't really neat so because of that you have to double this extension, so I'm using my bonding glue, I'm going to apply it on the whipped and after doing that, I'm then going to just put them together so that it could Get doubled, I know. What'S on your mind, we knew it is both so after doing that, we're just going to start placing the extension on the recap. So what I did first was to measure the amount of hair I'm going to be needing for each um placement. After figuring that out, I then cut it into a lot of pieces. I didn't just show me cutting it into a lot of pieces on camera, but I did cut it into a lot of pieces so that I didn't have to start going back one by one to get each piece. Rather so, after doing that, I just applied my bonding glue on the hair, and then I just placed it on um on the closure area. That'S why I'm going to keep doing. I make sure that they were closely placed together, do not place them far. Apart. Do not minimize um extension for the closure because it will tell so that's why I just kept doing we're fine. You know now, when you get into the curve. Normally they make like a whole closure where they make a whole round stuff, but that's not what I do. What I do is that, instead of me um placing the extension straight, I start to place it diagonally, so um, I think showing you guys is best. I don't know how to explain it, but, as you can see, this is how I'm plating it I'm not I'm placing it slanty and I'm not placing it straight. So that's how I'm going to keep doing it and keep doing it till I get to the end. That'S what I did throughout you call me crazy now, but you don't understand, Feel the Fire. The mouse is down again. So this is how it looks guys when you're done, I'm just going to bring you closer so that you can see what I did see. It'S very very nice and neat, so I'm just going to repeat the same process at the other end. This is what it looks guys when you're done with both ends and then what I'm going to do right now is that I'm going to gently remove the wool. This is where you get your closure, so you want to be careful while doing this just carefully remove the wool or the thread you placed in the middle and voila, you already actually have your closure just that you want it to look more realistic, because, obviously it Looks white, it doesn't look like um like there's any skin tone or skin color or needs. So I'm just um brushing I'm combing out the the extension and then I'm going to trim out every um hair sticking out so that we can have a very neat look. So that's why I just basically did, and after doing that, I'm just going to make use of my Foundation. You can make use of it concealer, but I actually made use of a foundation instead. I actually prefer that because it goes with my skin tone. So the thing now is that you're, just going to gradually just apply just a little bit just apply it in the middle and then I'm going to use my fingers to blend it in after applying it in the middle. So that's just basically that's what you're going to do and then, after doing that, you're going to then go to the back and finish up with the back now, there's something that you have to do. After doing all these things, but I'm going to be showing you guys after making the back fire fire, I know. What'S on your mind, we knew it is down. So what you want to do now is apply your bonding glue on on each doubled. Extension. Do not use a single leg extension please so that you don't have hair sticking out. It'S quite disturbing honestly, it really is so try doubling your extension before using it. Don'T complicate things, keep it simple, hold it down. So now I realize that um applying got big glue on each with actually makes a whole lot of difference. But if you don't have it, you can make use of the spray there's a spray that comes with the bonding glue. You can make use of that one. So now, when you get to the top, you want to place it really close to the closure. That'S from one side: that's the left side to the right side so that it would not show any space foreign, so we're done with our beautiful wig and it's looking really really good. So the next thing we're going to do is that we're going to use an iron on the lowest heat, to kind of make the hair slip down jump in your car and we drive to the beach now. Another thing I should make mention is when trying to place it on your hair, like this, be very careful because you don't want to drag it too much. If you drag it, it's going to remove that's why I'm using my hand to hold the hair so after that this is how it looks guys it's so beautiful and so nice. I hope you found this video helpful. If you did, please do like comment and share I'll see, you loves in my next video


Comments
AB: Oh my goodness. I am going to try this. I love the method ❤
Ada mmiri Mmiri malu ugo: Definitely trying this out
NGOZI ATTAMAH: Wow, I love this..
chidumije beatrice Ikerionwu: Nice one...how long will the bond last plz...wat oil can I use to maintain the hair?.....I can't download it...plz why
Yusuf Grace: ❤❤❤
Hope James: ❤❤❤❤