#002 Quickweave Bob W/ $10 Lace Closure!
- Posted on 03 July, 2017
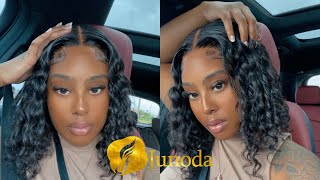
- Lace Closure
- By Anonymous
Music by kinemaster
$10 lace closure (beauty supply store)
Milky Way Q hair color #1b
Weave wonder wrap by Salon Pro 30sec
Follow me IG @ epitome_of_london
Facebook @ epitome of London & London Brown Wilson
Hey love, so I'm back again with another tutorial, so here's my client, she is currently natural. We are not certain whether she's going to grow it out or relax it or what we're going to do. So we did decide that in the meantime, we'll go ahead and do a quick leave and it will have a partial sewin since we'll be using a closure. So this is her before, and this is her now with her top braided. I'Ve made a few con rows going to the center of her head and I believe there were only six of them, so I did the width of this closure and this particular closure believe it or not. She got it from here, so it was only like ten bucks, so we thought hey. Why not? Let'S give it a try, see how it is so currently right now. What I'm doing is I'm anchoring the closure down? It'S a center Park closure, so we didn't have free range to part it anyplace else. So I want to make certain that it's not off centered or crooked. So I'm going to stitch one side of the closure down just about a half an inch down and then move to the other side of what you see me doing here and stitching this end, and this is the kind of keep it taut on both sides so That it doesn't shift as I continue to slow, so the closure down so right now I've finished both sides and I'm going across the back and I'm going to go right across these braids and I'm doing like a little X stitch across each braid just to secure It this song, this out of closure, scuse me with a little bit of a challenge, because it had like some type of barrier up underneath, so it didn't make it very easy to sit through right. Now I am applying is like latex face it's very equivalent to Morning Glory, but this one is it Morning, Glory and I'll put what it is down in the description box. I pulled her in a ponytail just to kind of give me a lot of service to pull the solution on and to keep the hair kind of taut, and I'm just going to cover all of her here that I'm going to be tracking on. This is a great barrier to protect from the glue. It also makes removing the tracks a lot more easier right. Now I am going to create a French braid and I'm going to go from this right side all the way to our left side, and this is typically how I do all my quick leaves, especially if the hair is really short or really stick or better. Yet if it's natural, because usually isn't lay as flat as I would need it to I'm sure you can do this with a Conroe. I just choose to do a French braid. I think it gives me a flatter surface to work with and, I'm being sure it's also tough, those straight in from the Kong roads from above into this french braid. Her back is you can't tell, has already been shaved. I did that, right before I started this entire process. That just gave me less work to do right now, I'm just moving and reinforcing that, and then I'm going to wrap her with this wrap cap and sitter under the dryer, usually no more in about 10 to 12 minutes. So this is her apathetic Kappas been removed. It usually drives black, but it's white from me removing the rap cap. It tends to stick to the cap, so make certain you wear that this is the Milky Way brand of hair that I'll be using, and she has two packs of this. So I'm going to ask adhere some glue to the track and place it everywhere that I have this solution on her head. I'M placing your tracks! You want to make certain that when you apply your glue, that you don't over saturate it and some with this product that I have on there, it actually helps the glue to stick better. So I'm just going to smooth it with my thing is a few times just to secure it and then I'll spray it down with these bottles pump it up. I'M going to use my clippers here to create a guideline I like to do this when I'm doing Bob's it just kind of helped me figure out exactly where I need to start my cut once all the hair is installed. Sometimes, when you have all that hair and there it's kind of hard to see the clients neck and really where you want to sort of stop and start at, and this helps you from having to lightly cut too. Sometimes you cut the first time and it's not long enough or not short enough. I think, have to go back in and recut it or vice versa. So you end up cutting it too short, so creating that line is perfect to prevent that from happening. So I am now in the second back of her head and I'm going to use the remaining just to close everything up and I am going to track her all the way to that closure so right across the braids as well. So now that I'm done I'm looking for that guideline that I have underneath here and I'm going to take my Clipper and cut the remaining here now, I'm just using the Clipper just for the center. She wants to go a little bit longer on the sides and so I'll be using my razor to do that. I believe that length of hair she purchases 12 inch fossa. So, as far as the actual closure itself, we decided later that we kind of didn't like it. As I said, it had like a leather or pleather stripping underneath it and it made it not only hard to slow down, but it also prevented it from being super flat, which is how I, like my closures. Usually I order my closures and I are the ones that you can park anywhere and they lay you really really flat. So now, I'm going in with my shears and I'm just not cutting, because I still want to keep that razor. Look on the end. This just helps them to clean it up and fit a little bit of the extra limbs off and then I'll. Also after reading this, I go in with my shoes as well and clean up our left side and some of the back, as you can see. I must be a really gentle hairstylist because she was able to sleep through what your heart, you have the the service, that's a good thing. So, right now, I am just pumping it out and then on the sides I'll put a light little twist in it. Just to give us soft flowy, like beach waves, very messy kind of tousled, not really neat and in place slide on that, I'm using it to eat a piece that I believe I love this flat on. It is excellent, especially on pressing out on natural hair. I do all my foot presses with it and I like how well it worked with till wheeze because it doesn't take much force, you put a little curl in so this is the finished. Look, that's what I just lightly put some girls in the side and in the bag, just kind of a messy be cheating flowy wave, nothing that she would have to do a lot of work with and then just in here, a little closer up again pretty nice. Overall, I probably rate this closure, honestly, maybe four or five I mean it gets the job done, but I just I felt like it didn't have that real natural look that I like, but it served its purpose, and this is the closure little closer up, as you Can see it had a little bit of a hump, it didn't lie quite as flat as we would have preferred to her head, but it's pretty good for a ten-dollar closure. I must say I hope I'm watching. You learn something and enjoy this video. If you like to see more like this and others to come, please don't forget to Like share and most importantly, subscribe thanks for watching love. Hope to see you in my next video bye,

Comments
dshondarj: Great job! I love it.
Alisia-Isaiah54❤️: You are so talented I wish you could do my hair? I just have a feeling your not located in Detroit lol
LadyQ Burnette: the cut is botched...
tomika shell: Where are you in South Carolina??