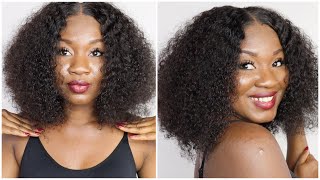
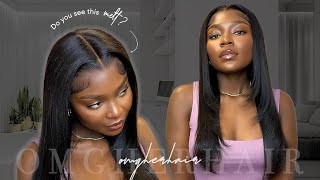
How To Do A Closure Quickweave | Ft. Organique Mastermix
- Posted on 03 April, 2021
- Lace Closure
- By Anonymous
Welcome to my channel ! In today's video I'll be installing another closure quickweave using Organique Mastermix, purchased from my local beauty supply store. Make sure to like the video and leave a comment with any wigs that you would like to see me install or review on my channel. Don't forget to subscribe and join The Nyx Clique !
Links :
I purchased mine from my local beauty supply store but here are links to the hair used:
Closure: https://rb.gy/46hv6p
Closure with bundles: https://rb.gy/o23dmu
Three bundles: https://rb.gy/svsrzh
CHECK OUT MY OTHER QUICKWEAVE TUTORIALS:
Affordable Closure Quickweave ! Ft. Organique Mastermix https://youtu.be/9yr2ljnsi_8
HOW TO: Side Part Closure Quickweave Ft. Organique Mastermix https://youtu.be/kTaGrUv4brw
Connect With Me On My Socials
IG / Twitter / Tik Tok / Pinterest :
NyxNise_
*For business inquires*
Email me at: [email protected]
#MiddlePart #NyxNise #OrganiqueMastermix #ClosureQuickweave #QuickweaveTutorial
I do not own the rights to any music played in this video.
Hey guys and welcome back to my channel so today we'll be doing a quick weave using the organic master mix. One pack does it all. It comes with three bundles and a 4x4 closure, which is pretty good quality for an affordable price. This is what my wig caps are looking like in my braid pattern, underneath this is what the closure looks like right out of the pack. I just wanted to show it to you guys it's actually pretty good quality. These are my bundles. I got them in 14. 16 and 18 inches - and this is how thick they are. So i like to start off by measuring each track. I usually do it from like temple to temple and i measure first and then i will cut the track and apply the glue i like to lay mine down on the table and i'm going to use the 30 second salon pro hair glue. Then i just glue it down to my head and i keep repeating those steps until i get a little bit closer to where i'm going to put the closure, i usually like to spray spritz on my wig cap and then apply the track with the glue on It or spray the spritz on the track directly with the glue on it, but i didn't have any spritz for this video, so i just blow dry it until it's dry and it still holds pretty well. So now i'm going to cut the black part of the cap to reveal the brown cap underneath i like to do it this way, because when i put the closure on it makes it look a little bit more natural, especially since i have tried to put makeup On this type of closure before and it didn't really show so this is an easier method for me and this time i didn't use any makeup on the brown wig cap. It was actually a good color, so i didn't have to do that step. But if you feel like it's, not the right color, of course you can apply a foundation shade or contour shade that matches your skin tone. Once everything is cut off, i go in with some got to be just to melt the edges of the wig cap down to my skin. Here, i'm just showing you what the closure looks like up against my skin before i go ahead and glue it down. I'M going to go in first with a layer of ghost bond right in front of that brown, wig cap and kind of spread it out with the end of my comb until it's a thin layer, i did two layers of go spawn in total and when that Was tacky, i went ahead and put the closure down. I stuck the closure in place and then i tied it down with my elastic band to hold it. I like to glue the lace on first before i glue on the closure, because it just makes it a little bit easier for me with the closure being held in place already. When i add the glue it's just, it lays flatter once i've added all the glue on the perimeter of the closure. I like to just pull it straight back and lay it against my wig cap and then blow dry into place until it is stuck down once the closure is all stuck down. I like to continue putting on my tracks - and i angle them as i glue them on just so that they can lay in a way where they cover the tracks below and everything is seamless and hidden hey. Once i'm finished going on the tracks, i take off my last band and get started on the closure. This is what it looks like up close after i've parted, my hair i'll go in with some mousse. It'S the ors olive oil mousse, and i just put that on the baby hairs that were already pre-cut in the closure. Just to put those back and out of the way before i go in and cut off the lace, i usually use an eyebrow razor to cut off my lace. It just cuts the lace a little bit more jagged so that it's not just a harsh line. That'S very noticeable, then i go in with the got to be high, hold hairspray and spray that on any areas of my closure that were not completely glued down before. After that, i went ahead and straightened one side of my hair, just so that i can show you guys what the hair looks like straightened and what it looks like in the body wave texture. It can take up to 400 degrees in heat because it can only take up to 400 degrees. I could not use my hot comb on this hair, so i'm going to show you how i got it sleek and flat on the other side wow, once i got closer to the top, i would part the hair in smaller sections and use my wax stick. It'S just like a eight dollar wax stick, no specific name brand and i would just flat iron the roots very well and then just go down the length of the hair and that's how i got it flat on the top without using my hot comb. My me once everything is all flat ironed. I went ahead and took off my scarf and i had already did my baby hairs off camera. They were a little tricky for me to do this time around, so i didn't show them, but i will make a separate tutorial on how i do my baby hairs, and this is what everything looks like up close. I hope you guys enjoyed the video and please leave any comments or suggestions down below. Thank you so much for watching you.


Comments
Timy Love: BEST video I’ve seen using this hair and doing a quick weave. Girl you got straight to the point and you slayyyeeeeddddd! I love it! ❤️
Kelly Larney: This looks great thank you for this perfect tutorial!!
Island Beauty: Great video. You were to the point. I just bought the pack of hair and imma do mine tomorrow. So nervous how long the hair will last. But now i know how to do a quick weave thanks girl ☺️
Ganstarellaa Tv: This was a great video , I’m about to follow the same method ♥️♥️
Neasey Hendrix: Absolutely gorgeous hun just bought this hair
Aja Mari: Organique is becoming my favorite beauty supply hair! It looked really good on you as well
Nyx Nise: Whose tuning in to my affordable quickweave series?!
Tamira Johnson: I’m going to definitely try this thanks sis
I AM Pinkie: Love it❤️
Brenda Morton: Your hair looks so beautiful I was wondering which one did you start off with the longer or shorter length? I get confused with that step. I think I would like to have the layered look, so not really sure which inches to start at first? You have a blessed day sweetie and stay safe ❤
Cne Ross: Okay sis . I got the hair but I’m nervous so we’ll see what happens
Brianna Banks: I’m gonna attempt to do mine tomorrow pray for me yall
nunya bizz: U did THAT!
Nikki c: SLAYYYED‼️
Jalyn Gardner: How long did it last?
Gabby Lee: What do you use to make the black cap stay down?
Indiana jasmmyne: Gre at video!! How long did it last may I ask?
Last Namé: Very nice
Dakota Dragneel: Did you bleach your knots?
I AM Pinkie: How long did the hair last?
THERESA BLESS: It looks good
Selena Hambrick: Beautiful what store you buy the body wave? cant find it...
Dominique Armstrong: Why do you use two wig caps, and not just the brown one?
Jaimie' Lanita: He’ll tf yeah ♀️♀️♀️♀️