Quick Weave| Lace Closure Method
- Posted on 03 November, 2017
- Lace Closure
- By Anonymous
Click here to see a lace front wig install tutorial:
https://www.youtube.com/watch?v=EF4ZtX...
Shop Royal Envy Hair and follow along with my next tutorial!
Shop:
She is wearing a diana straight lace closure and 3 diana straight bundles. This was her third install with these bundles
Book with me in Jacksonville, FL:
https://www.royalenvyhair.com/book-on...
Instagram: https://www.instagram.com/princess_the... Hey Queens, I just want to say thank you for tuning and and showing your love and support! If you have any questions feel free to visit any of my social media pages and dm me, or you can just leave me a comment and I'll be sure to reply!
I try to make all my tutorials beginner friendly! All Wigs and Extensions are from Royal Envy hair unless otherwise stated! You can purchase them by visiting www.royalenvyhair.com
**NEW VIDEOS EVERY TUESDAY AND FRIDAY**
Purchase hair or wigs: https://www.royalenvyhair.com
Glue: https://thehairdiagram.com/
Follow me on my other social media platforms
Instagram:
https://www.instagram.com/princess_the...
https://www.instagram.com/royalenvyhai...
Facebook:
https://www.facebook.com/RoyalEnvyHair...
SUBSCRIBE! SUBSCRIBE! SUBSCRIBE!
Make sure you hit the bell button to be one of the first to get notified when I upload a new video!
FREE SHIPPING FOR ALL ORDERS OVER $100!
If you are having issues ordering online,contact us!
Feel free to stop by https://www.royalenvyhair.com and shop with us. We have the best and highest quality hair and the best customer service. Dont forget to subscribe to our mailing list on the website and recieve 10% OFF your first purchase
⇢ For business inquiries such as company sponsors or reviews please feel free to email me at:
Want to send me stuff?
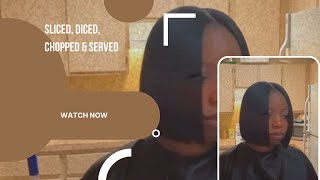
Hey Queens, it's your girl, princess T and I am back with another hair tutorial. So if you would like to see how I install this quick weave in slave, this lace closure stay tuned because you don't want to miss it doing a quick weave with a lace closure, but today we've got to make it happen. So the first thing you want to do is start off with your braid pattern, so I'm just braiding the hair down to the sides and connecting them in the back and then after I finish connecting them. I'M gon na do like a circular pattern in the middle to get everything taken. Care of you can choose whatever braid pattern you like and with some shoot, but this is what works for me in order to install the closure you want to line up that part. That'S on the closure, with the part in your clients head and then make a small part in the beginning of the closure, leaving a small amount of hair out so that when you sew underneath the braid in the closure, you won't see the thread peeking through. So now I'm just gon na break. Excuse me, I'm not very net than already Brady, I'm going to sew three or four stitches on one side and then sew three or four stitches on the other side, using a looping method with the part in your clients head. So that you won't see any black spots in this way, you won't have to use anything like concealer or some type of makeup to cover up the black, and it will blend perfectly with your clients case. Not all the way make sure you do not cut off. All of the lace, because you want to keep a little extra piece of the lace so that you can sew your lash track onto it, which just provides extra security so that your closure doesn't move around or wiggle. It gives me peace of mind to make sure that my closure won't be out here, shifting and moving and looking crazy, because we ain't got time to be. Are you looking crazy, after that? I just did two twists on both sides of the closure to pin it forward so that, when I put the caps on the hair from the closure won't get in my way, while I'm trying to glue it down plus, I don't want to get any glue on The hair from the closure because it gets clumpy and lumpy and then, if I try to comb it out, it might pull too many strands out from the closure. Then I'm just taking some visible concealer and outlining the perimeter of the braid. So I know exactly where I want my tracks to lay, and I won't have to guess where to stop the track and it just causes for a smoother and faster install, doesn't matter what brand you get, because they all work the same. If you ask me and I'm using some pump it up spritz in my blow-dryer, so basically I'm just taking the track, applying some hair glue, placing it where I want it to be, sealing it down and then and hitting it with some spritz and then going over It with a blow dryer and I'm gon na keep doing that all the way to the top. Until I reach the lace closure well, actually I'm gon na stop one track before I get to the lace closure, because I want to sew that last track down and begin to lay down our final track. Doing the loop and stitch method that I use on the lace closure - yeah, please excuse money. She just would not sit still doing this video and you will see her running back and forth throughout the video, but please just disregard but anyways. So once you get to the lattice track, you are going to put one stitch underneath the braid to secure the thread and then you're going to go ahead and finish right: the weft and take your needle underneath the braid and then on top the closure. You want to go on top of the closure so that you don't have that excess lace hanging over your width, because then, when you calm down the lace closure part you'll see the little lace piece sticking out. You want that part to be as hidden as possible. Same thing, all the way around the closure to make sure that it is completely secure, and once you finish with that, go ahead and cut off the excess thread and the excess track got four house like this. Closure is y'all, like, oh, my god, go ahead and cut off the remainder lace, that's in the front and do not forget to go back and cut off the rest of the cap, that is on the perimeter of your car Nassif. Thank you for watching my video and, if you haven't already make sure you subscribe and if you would like to see how I styled and cut this Bob stay tuned, because I will be back with another tutorial.


Comments
Gorgeous one: How long did it last