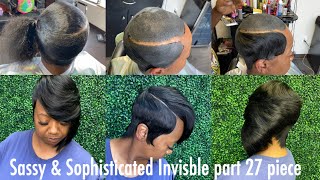
How To| Invisible Part Quick-Weave (Very Detailed)
- Posted on 04 July, 2022
- Lace Closure
- By Anonymous
AS Requested by @BVV
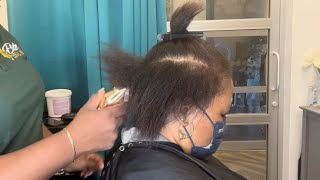
Hey you guys welcome back to the channel today we're going to be doing a blunt cut bob with the invisible part it was requested by one of you guys. I can't remember who um so it's going to be pretty speeded up um because i'm just going to get to the point for the um part. So much of it is going to be pretty speeded up so anyways, you guys know how i break down. You know how i find the tracks for the bob, because it's a few um videos on here but anyways, if you're new, here, welcome if you're returning, don't forget to like comment subscribe click that notification bell, if you already have it and without further ado. Let'S finish, this look up: okay, so right here, i'm showing you um what size the pieces were. I split the tracks down the middle with a razor blade and i pretty much just showed you how i um cut the pieces in the size of the pieces, but you can make them as short and long as you want. But this is the way i did it to get the look that i did and now i'm just flat ironing those tricks at the top. So once i complete the invisible part, i won't have to go back up under that part and try to flat out those tracks. So i went ahead and did it first and now i'm just concealing the part before i start placing the tracks. Okay. So now i'm going to start placing the tricks um. I had my client to hold them and i just went ahead and spritz the area where i'm gon na start at first, just so the um tracks can the glue can tack to the cap fast as soon as i start pressing them. That way, you won't have to go back in and try to fix anything, but sometimes you have to but anyways the spirits just make it stick faster and i'm burning those parts left to right, starting from the um. I start from the the part. Instead of from the trek, i just start from the part and just keep going up like stairs until i go all the way back and complete the loop, so so so so, okay, so someone was asking how i closed in the top. So pretty much once i complete the part i go ahead and um take the hair. I take the lace glue, put it in the hair, put it on the last two tracks that are um, that completed the invisible part, and then i just go ahead and cut some hair off the track and place it right in that spot, where the glue is And it'll um solve the tracks. It'Ll cover those tracks, so that's pretty much how i complete the invisible part to cover the tracks that are exposed once i do the part on both sides. Once i lay the track on both sides, i just take some lace glue. Put them on those last two tracks that are exposed, then i just cut the hair off the track and place it where the glue is and then that'll hide those tracks. So that's pretty much how i do it and that's pretty much how you can do it to cover those tracks unless you want to do all around the world closure look which is, i don't, i think it's stupid, but yeah. That'S how i do it and the look will be completed and it's fast speed. So i hope you guys enjoyed this video and i hope you learned from me see you guys in the next one. Okay, so right here, i'm doing my finishing touches um just to give you the final look and boom here it is hope you guys enjoyed and learned something new from this video don't forget to like and subscribe see you
Comments
jamika green: If I may say so you’re ability to manipulate the hair falls under a different umbrella than other stylists. Years ago when I first saw your styles I was amazed. Yet and still you always kill every head you touch! Not sure if I’ve told you this before but you are definitely gifted and thank you for doing these videos Xoxo from Texas
Celeta Cruz: Hair style is on point. Thanks for sharing