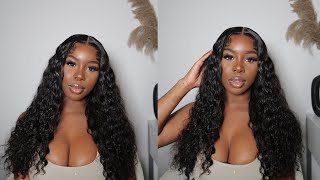
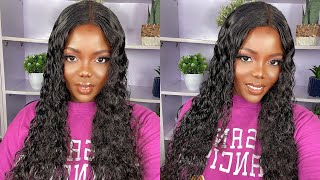
Diy Frontal Quick Weave | Westkiss | Extremely Detailed
- Posted on 02 September, 2020
- Lace Closure
- By Anonymous
Hair in Video: Curly Wave 24 24 26 28 +20inch 13*6 lace frontal
Direct Link→https://bit.ly/2WIEraG
Pre-made Curly Wave 13*6 lace wig→https://bit.ly/3fDud40
New Arrival Wigs 49% Off →https://bit.ly/3dyaLnj
#WestKiss Official Site Huge sale Big Discount
❤ Follow West Kiss hair on social media :
Instagram @westkiss_hair_store:https://bit.ly/3fCCJjF
YouTube @West Kiss Hair: https://bit.ly/2YcFSAx
Wholesale WhatsApp: +86 17719937631
Hey y'all, it's keisha and today i'm going to be showing y'all. How i did this quick, weave, frontal, install super natural super cute. It looks so bomb. This was literally my favorite hairstyle of the summer and i'm going to be using wes kiss hair. This is not my first time using their hair, um y'all already know i mess with them heavy. They have bomb frontals. This is a 16 6 by 13 frontal and they sent me over four bundles of hair. I'M gon na um include the lengths on the screen, because i don't remember right now, but anyway you know. I braided my hair straight back. I'M just gon na jump right into putting those wrap strips on my hair to make sure when i put that cap on and i'll start gluing the glue doesn't get on my hair at all. So, yes, i'm going to take one wrap strip and i cut it in half to make those two pieces and then i'm going to take a full long, wrap strip to put the top and tie around my head now. Don'T worry, i'm not gon na keep it like this, i'm end up cutting access off, so i'm just gon na throw the cap on and i kind of eyeballed where i thought six inches was, and i was right on right on with it. If you need to measure using your um frontal, but i didn't need to so yeah, i went ahead and i just sewed it down on both sides. Well, all the way around i sewed it down and i'm just going to be cutting off that excess cap and the excess wrap strips and then i'm going to use some gorilla, snot and slick back. My edges, you can use whatever kind of gel you like to slick back your edges, but i like the gorilla snot because it dries super fast and it holds all the hairs in place. Then i'm going to be taking a new stocking cap cutting some ear holes using some got to be glue spray to tack down the cap. To my head now keep in mind, i don't do this method anymore. I do the glue method now, but this is a video that was literally recorded in like june. I know i'm gon na. Let you all know where i've been just just give me a little. Second, to you know, get back into the hang of doing videos and i'm gon na do a where i've been video, so yeah, i'm just gon na be tacking that cap down to my head and blow drying it in place, and then i'm going to use some Makeup that is my skin color and then once it's all dry and everything i'm going to cut off the excess cap, you're going to see me using the scissors to get it as close to my hairline as possible. But i'm making sure that i don't go too far, because i don't want to cut the cap and my hairline be exposed. You just want to get close enough to where you cover up the hairline, but you know you don't need it all on your forehead. So um yeah, oh okay, so i'm going to be wiping off my skin with some rubbing alcohol. I was just showing y'all. It'S the makeup. That'S on there! You want to rub it until that alcohol pad is clear. So i'm just going to be putting my frontal line. I had to cut some of that lace off because i couldn't see through it, but yeah, i'm just going to be putting my frontal on my head and looking to see how it lines up to make sure that it lines up good and that i don't need To plug any extra hair out or anything so i'm just putting it on my head, lining it up and then going to the side and cutting out those um ear flaps. Now, if you want to glue it down first and then cut out the ear flaps, you can do so. I just didn't in this video, so i'm going to be using a little bit of oil free, make sure it's oil free makeup to put on the inside of my lace and i'm going to be using some hold me down adhesive. So i'm going to be using four layers of this adhesive also, like i said, keep in mind that i don't use the spray method anymore. So now, what i would do is use one layer of glue to lay down the cap and then use three layers of glue for the actual lace. But i am now on this frontal that you're looking at now, i'm using this one layer of glue to lay down the cap after i already tacked it down with the got7 spray. So after i do this one, i'm going to do three additional layers. On top of this layer, exactly on top making sure that i don't go past, where i stopped it on my hairline and also making sure to let the glue underneath dry completely clear before i put another layer on that is the key to having a nice glue Down and making sure that your glue, doesn't, you know, isn't white and apparent underneath your lace, you have to let it dry all the way clear, even if you need to use your blow dryer or whatever go ahead and do some. This was a huge mistake. I tried to slow it down, but yeah. I accidentally recorded laying the lace down using time lapse. That was a huge mistake. I was not trying to do that. I slowed it down as much as i could so so so sorry, oh okay, so i don't know why i thought it would be a good idea to turn on the blow dryer. While i was actually telling y'all what it was that i was doing that really didn't make any sense so yeah, i'm gon na use the voiceover to talk through this part. Considering that you know i did the dummy um yeah, i was just saying that i was blow drying my lace on hot heat and that's pretty much all i was saying um yeah. So now it's time to cut off the lace. What i'm going to be doing is cutting my lace into like strips. I think i cut like six little mini sections, and i just cut that so that i can take my time and cut the lace a little bit at a time. So what i'm doing is parting, where my glue is because there's some hair, that's outside of the lace where the glue is, and i don't want to leave little bitty stubbles of hair so parting. It alleviates that. So you don't have that. You know really really short pieces of hair right at the front of your lace. You want to make sure you get a nice clean cut and it may not look clean right now when y'all looking at it, but i promise we're going to really melt this lace in so don't be alarmed, don't be afraid, we're really going to be it's really Going to be late, okay, y'all, it's really going to be late, don't don't be alarmed! I know that the lace does look a little pale but, like i said, we're really gon na get it together, so don't be alarmed anyway. We'Re just also i forgot to mention. I'M obviously using an eyebrow razor, but i do go back and forth between the scissors and eyebrow razor because sometimes eyebrow rays, you get to a certain part and it ain't cutting how you want it to cut. So you need to use the scissors a little bit and then get back into cutting using your eyebrow razor. I definitely recommend using a brand new eyebrow razor yeah, but anyway, i'm just parting. If it's some hair in the way i'll just part it out and then cut along that glue, make sure not to cut behind the glue but right on or in front of the glue, because it's easier to add a little bit of glue. If you miss a spot, but it's really hard to take off the glue, if you cut your lace too far back so yeah, i'm just gon na keep and cutting. Until i get all that excess legs going and then i'm going to repeat that same process on the opposite side of my head - oh uh, okay, so i'm going to be taking some got to be glue spray and just spray. My hairline! This is really going to melt that lace now keep in mind. You cannot use, got to be glue spray on on your lace with every type of glue. Now i i know that i can use it with the um hold me down by erica j glue, but it's you may not be able to use it with some other glues. It can turn the glue white so be very careful and make sure that you can use that type of glue. I mean you can use the spray with that type of glue, but anyway, i'm just going to be sewing. The back of my frontal down to my head, starting in the middle and going to the right and then going to the left, or vice versa. Whichever way i think i was going to the right then to the left yeah. So then, whatever i had left over by my ears, i just went ahead and cut off and yeah you're gon na get a closer view of what i did with the cutting right here. So yeah i cut off the little excess and then what's left over. That'S kind of sticking up, i'm just going to be sewing it down to my last little braid on the side. To make sure you know, i have a seamless, install okay. So after i take off my little elastic band that i tied on my head, i actually forgot to mention that i tied that, but i know y'all saw it. It'S just a little elastic band. I'M just gon na cut off that excess cap. I mean you can sew onto the cap if you want, i mean glue onto that cap if you want, but i decided i didn't want the new cap to show. I mean to be back there just in case i may have missed the spot and then glue right. I just didn't want that new cap to show you can kind of get away more with it. If you have a black cap and considering that it was hard for me to see the back of my head, i didn't want to make a mistake like that, but i just want to let y'all know that i'm using these bundles, they are folded in half. So i am gluing in two tracks at one time you can glue your tracks in one at a time but honey. I was not trying to be all day doing my hair okay, so i was like i'm about to glue these tracks in two. At a time. I wish i could have did three or four i would have if i could, but i'm not. You know, i'm not that talented now, i'm the bomb, but i ain't all that okay, so yeah, i'm just gon na be gluing. It all the way up to the frontal is really no special way to do it other than kind of like gluing in a smile then, once i got to i guess you would say a little more than half i started to kind of more so go across. Instead of going along the shape of my head, i hope that makes sense, but yeah that's pretty much it i just glued the tracks in and then that was really the easiest part. Okay. So once i was done gluing my tracks in, i went ahead and i combed the front of my frontal just to kind of loosen up where i sprayed that got to be glue spray and i'm going to start doing my baby hair. So i'm just going to be parting out a thin section of my hair all across the front um. Some people do like little sections where they know their baby hair is going to fit. But usually i don't know how my i don't know exactly how i'm going to do my baby hair until i actually do it, especially when it's on myself now. I might have an idea of like how i want to do my clients, baby hair. So that's kind of different, but on myself i like to do a whole layer of hair, that's cut because it makes it easier to slick back. Even if i don't use all of the hair as actual baby hair. It makes it just easy to slick those little bitty hairs back, so i just cut out a whole layer um, so the layer is going to be pretty thin. You don't want to have like your baby, hair too thick, but on this side i noticed that i didn't pluck as good as i did on the other side, so i am going in and plucking some more and i'm also going to part it again and then Pluck a little bit behind the part and pluck some of my baby hair as well. Okay, so now that i've separated my baby hair from my hair using a hot comb, i'm gon na go ahead and cut those baby hair um. As you see, i'm cutting my baby hair. Pretty short, i guess you would say, like the shorter, the baby hair, the more natural they look, but you really just kind of want to play it by your face because or if you're doing it on your clients by their preference, everybody doesn't prefer to say anything. Also, i'm using stuck on you jail by erica's by erica j as well um, i'm just going to be slicking it down, also keep in mind. You cannot use this gel with any glue. I have definitely tried using this gel with the bow hole. It is not a good pair, but it works wonders with the erika j glue. So keep that in mind when um using this gel or you know any, i guess any glue or any gel, just making sure that you have a good mix. But anyway, i'm just gon na be smoothing my baby hair down. You know guys i normally like to do extremely extra baby hair, but i tried to keep it to a minimum this time to keep it looking more natural. So you know my little sideburns are pretty thin and i'm doing like you know, baby hair that i would do if it were. You know my real hair, and maybe i don't know this may not be natural to y'all, but it's natural for me because honey. I goes all out when i do my little baby hair, so this was really natural for me, but you pretty much can slick your baby hair out. However, you see fit, but my the key that i would give is just to make sure that you use a eyebrow razor to cut those baby hair down, so that you won't have a blunt look, but that you can also go back and cut it some more. If need be, you can use it and be careful when you buy your eyebrows, because we don't want to accidentally cut our eyebrows but yeah, i'm just going to be slicking it down girl, i'm playing it by not playing in my ear, but i'm just you know Doing it as i go along, i really don't have a plan, i'm just slicking it. You know slicking it down making some season just seeing how it looks on my face and if i like it, i keep it and if i don't, you know i kind of just play with it till i get it to look good to me and i think That'S just really how you should do it yeah, so that's pretty much it for the baby. Here, i'm going to use my elastic band to tie my edges and also i'm going to be putting a little bit of gel on the hairline to keep those edges down. Nice and neat okay, pluck it a little bit right there, ain't gon na plug too much, because i need you know these fronts could go bald so anyway, tying my hair up and putting that elastic band around my edges that really melts that lace honey. This is key. You cannot forget to use the elastic band baby, you cannot forget it and then, on top of that, i'm going to put a little extra reinforcement using the west kiss hair wrap. I also have cajun may beauty hair wraps too, but since they sent this one over, i decided i would use it for this video, but i'm just going to be using a little bit of water and some mousse to you know wet down his hair and detangling And everything - and i know y'all - saw that little before and after honey that hair was dry, but now it is moisturized, then you know good to go. I also would recommend washing the hair first if you would like, but i didn't. Oh yes, honey. Look at that lace, it's lay lay laying yes, okay, we're gon na comb out the baby hair and get it looking real natural, and i'm gon na show y'all how my parts are looking and yes give y'all some looks and then we're gon na do a little Style just to show you how versatile this frontal is and how much this really is scalp. You feel me and that's pretty much it for this video y'all, i'm not gon na. Do too much more talking. I know y'all didn't talk to our ears off, but i really really missed y'all, okay and i am back and i'm ready to put out more videos and keep it going. I know i haven't, you know seen y'all all summer, it's been a long summer. Okay, but yes, i hope y'all enjoyed this tutorial. I really am just excited to be posting again. I hope y'all enjoy. I love y'all.


Comments
Zaquria Birks: We’re glad you’re back!!
princessayomide ikoe: this method seems so amazing and quick.. but my worry is the glueing part!! what if the track falls out because of the glue!
Emily Valentin: Damn you did that!
Janae Madison: yassss
ChristinaJay Tv: missed your videos!!!! yeessss
Danyta Townsend: Ok boo I see you