Closure Quickweave Install Using Beauty Store Hair | Ft. Organique Mastermix & Laflare 4X4 Closure
- Posted on 12 October, 2021
- Lace Closure
- By Anonymous
W E L C O M E B A C K
Hey Babes! Today's video is NOT a tutorial. Sorry, lol this Is my first attempt on a CLOSURE QUICK WEAVE using Organique Mastermix Shake&Go Straight Bundles 30inch. Laflare 4x4 Closure Loose Deep 12inch 100% Human Hair. This video is an over voice of me explaining what I am doing to achieve this side part style and my review on the hair. Everything I used in this video can be found at your local beauty supply store.
*I AM NOT A PROFESSIONAL HAIRSTYLIST*
PRODUCTS USED IN THIS VIDEO:
BabylissPRO Nano Titanium 1 1/2 inch flat irons
BabylissPRO blow dryer
Rattail comb
Robert's Diamond Bond Protective Shield
Stocking Cap
Organique Mastermix Shake&Go straight bundles 30inch- $10.99/bundle
Laflare 4x4 Closure Loose Deep 12inch 100% Human Hair $27.99
L'OREAL Paris Infallible Full Wear Corrector shade cashmere 360
Cover & Care Kiss New York Cream Foundation shade Toffee
Super Hair Bond Glue
GhostBond Glue
Eyebrow Razor
Scissors
BB Pump it up Spray
GOT2B Glue freeze Spray
GOT2B ultra glue invisible styling gel (black bottle)
FOLLOW ME ON SOCIALS
INSTAGRAM:https://www.instagram.com/imher_tots/?... (@Imher_tots)
TIKTOK: https://www.tiktok.com/@tatianaflores2... (tatianaflores2.0)
MUSIC USED IN VIDEO (I DO NOT OWN RIGHTS TO THE MUSIC USED IN THIS VIDEO)LINKS BELOW
"Music by SouthStreet24-Media"
Vlogs | Vlogger | vlog Channels -YES
Any non for profit videos - YES
Cooking Channels - YES
Beauty Channels - YES
Health and Fitness Channels - YES
Commentary Channels - YES
To advertise a product/service - NO (must acquire a license from me)
To reupload instrumental as your own - NO
Singer / Rapper / Vocalist - MUST GET A LICENSE FROM ME
MUSIC DESCRIPTION:
Free Background Music ~ Intro Songs [Non-Copyrighted | Copyright Free]
--------------------------------------------------------------------------
Drake - Fair Trade ft. Travis Scott (AlexV Lofi/Instrumental Remix) [No Copyright Music]
-----------------------------------------------------------------------------
Usage
All of my beats are 100% free to use. You can sell your song on Itunes, upload to Spotify, Youtube exc.
You can use for background music in a video for Snapchat, Instagram, Facebook, Youtube exc.
Feel free to use my beats to help you succeed in whatever you do in life.
Leases are available for a low price, however they are not needed to use.
If this beat is used by a major label/artist, I reserve the right to keep my publishing rights and writers share. This beat is the intellectual property of Jay Netic.
--------------------------------------------------------------------
#nocopyrightmusic #copyrightfree #freeuse #FAMUSIC #GIVEON #Whyyouwalkoutmylife? #HEARTBREAKANNIVERSARY #tiktokmusic #tiktoktunes #tiktoknewmusic
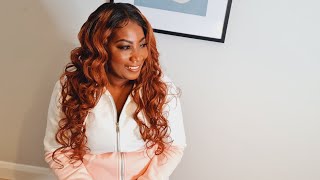
Hey y'all welcome back to my channel. I know it's been a very, very, very, very, very, very, very, very very long time since y'all seen me since i posted but listen. Let me tell y'all something i needed my hair done right for the weekend, because i'm going to maryland for a friend's birthday right and i needed my hair to be done, like i didn't - have the funds to just cash out on here, like i usually do so. I decided to you know i was looking on youtube trying to find like the best little like cheap weaves. I can you know, use to do my hair to do a quick, weave and y'all. Look look at this. Yes, so, as y'all guys can see in the description, this is a closure, quick, weave, okay, it's the 30 inch. All of that good stuff i'll be mentioning in the bio look at the hair like come on and i did a little job. I don't even do here. Okay, like this is my first time attempting this and this came out fire fire. Okay, i might start doing my own hair for now on, because this is fire period. Okay, so if you want to um, see how i achieve this look continue watching um, i really probably won't be talking i'll, probably do it over voice, though um most of the video will be sped up. Because again, this is my first time, so i'm not teaching y'all like how i do this. This is my first time so you do gon na be watching me mainly achieve this fire race side. Part that i did because your girl got it like. I know your girl got skills for real unhidden skills that i'm just discovering so period continue watching miss y'all, hey guys, um, as i mentioned in the beginning of the video. This will not be a tutorial, but i will be just talking through the video explaining what i'm doing and the products that i'm using, and i will talk a little bit about the hair a little bit down the line in the video. So here, as you can see, i did braid down my hair, creating a side part because that's the parting that i'll be doing in my hair. I use a wig stocking cap that i got from the hair store and i use that stuff i'm putting on my hair is the robert's diamond bond protective shield. It'S supposed to protect your hair from when you're doing, gluings or quick weaves from you know the glue damaging your hair when it's time for you to take it out. So i'm after i get done applying this protective shield bond to my cap, i'm going to blow dry it and make sure it is completely dry. Now this process can take a little long because um it takes a little while to dry, but you want to put that blow dryer on high and you know just keep applying it to your hair until it is fully dry. So next thing i'm going to do is apply the got to be glue free spray onto my edges to make sure that cap is intact. It stays down. You know, so when it's time for me to blend it can blend. You know really well to my scalp making it look like scalp and i'm gon na use the blow dryer on a cool setting this time for the spray, because i don't want that spray to um. Like turn white and now i'm just going to cut off the excess cap that i would not be using and i'm going to um cut this cap multiple times throughout the video. Now i am adding my color foundation. This is a um cream foundation that i am adding to the um cap. That'S close to my skin color and here i'm using the gossipy glue, styling gel on the edge of the cap and pressing it in with the tail of my rack comb and using a blow dryer on a cool setting to help blend that cap into my skin. This technique, i've seen a lot of youtubers do and i actually really like it. So i decided to give it a try and i would definitely recommend using that technique when trying to blend your cap in with your skin and next i'm going to try on the closure, you know place it and you know try to figure it out like how I want it to be styled where i want to place it at right correctly and, as you can see, i'm going to continue cutting off this cap to make sure it's not too trying to much the paint okay. So here i am using the ghost bond glue. Um i got this from the hair store as well um. I apply it in little dots where i would like to lay the closure - and i do this three times um. Of course, after each time you want to blow dry it on a cool setting making sure it is dry, but not all the way dry. Of course, you still want it to still be tacky, but you want it to be clear. So it's best to use the blow dryer on a cool setting when doing this. So after i tried on the closure - and i placed it where i wanted to be placed again - trying to create this side - part um - i you know gently put on the closure onto my head. Using a comb to you know, gently place the closure onto my scalp, making sure it is completely laid down, and the next thing i'm going to do after i lay it down, is cut off the excess lace that i will not be using using the eyebrow razor Um, creating that zigzag line, because you do not want to cut your lace um, you know straight. You wanted the the um the lining to look as natural as possible and i'm sorry, if i'm not using like the correct terms, because i'm not a hair stylist again. This is just stuff i just see youtubers use, so i'm just um trying to explain the best way. I could getting this. You know together and just you know, trying to talk to y'all and walk through y'all on how i did my hair. So after i lay down the closure, what i'm gon na do next is um. You know glue down the rest of the closure using regular hair glue. So, as you can see, i just apply the hair glue just on the edges. The edge part of the closure um use the blow dryer on a cool setting, and then i just gently place that closure right on the head and making sure all of the sides are glued down. Because again, this is a closure quick weave. So i'm not going to sew it in and then i am going to tie it down to keep it in place. While i um you know, gluing the rest of the tracks so um. While i grow up my tracks, i'm just gon na talk a little bit about the hair, my um review on the hair and um yeah. So first i'm going to spray the um. What is this the b? What is it the bb2 or b2 spritz spray? I'M sure a lot of you know this spray. You can get it from the hair store, i'm going to put that over my cap. So when i'm going down my tracks, it definitely helps keep your tracks in longer. I measure out the tracks before gluing it in and then i apply the glue to the tracks and then i just place it on my head, where i want the tracks to lay down um after a few tracks. I do use the blow dryer to make sure you know all the tracks are completely well. All the glue is completely dried and all the tracks are intact and you know they won't be like coming out. So i definitely this hair hair that i use is the organic straight. We 30 inch master mix shake and go. I got this from the hair store. The color i got was a one. These bundles are 10.99 a piece with a 30 inch. Of course, it's cheaper. The shorter length you go, the hair is mixed with a synthetic hair inside of it. I know that it says that it is safe to curl, with the curling iron up to 400 fahrenheit, but um. Honestly, from my experience, i wouldn't um put too much heat to it, especially that high, because when i was straightening this hair, i couldn't leave the flat irons a little like too long on the hair. I had to like quickly like pass the flat irons through it, but honestly, this hair is really like soft and straight, like you really do not need to pass the flat iron through it at all um the closure. I can't think of the brand right now. On top of my head, but i will get the information for you guys and it will be down below in the bio um. This hair definitely tangles a lot. You would have to keep a brush on you to continue combing it out. I did this only for the weekend, because i was going to maryland for a friend's birthday and i just wanted my hair to look really cute and um. I definitely kept a brush on me everywhere. I went and i continued to brush it out because it does um tangle a lot. You know um but honestly, like once you brush it out. The hair looks like really good. So if you want something cute and quick, you know for the weekend. I definitely would recommend this brand, but again you have to keep a brush on you to continue brushing out the hair um. As far as the amount of bundles, you would need to create this style or any style. I would recommend getting four or five bundles um. As you can see, the bundles are pretty small they're, not, as you know, thick as regular, bundles, so um. Here i only use three but um. You know i kind of made it work. I love the thickness of it with just three to be honest, but i did go out and buy um a fourth pack after i had gotten after i got done this and i ended up adding. You know like some tracks, some more tracks in between, because um, especially more like at the top. I was running out of hair, but i made it work, but um yeah. I would definitely recommend four or five bundles to get that nice, full look and just to make sure you have enough hair. So here i'm working on the closure, i'm creating my part, i'm going to work on my edges. I definitely wanted like that deep side. Like part um, i know you guys could see that the cap is brown. I did try to bleach it, but honestly bleaching, this um closure. It'S like not worth it um. For some reason, when i had laid down the closure, i don't know something had been created. Like this lump, so i had to pull the closure off and re-glue it down, making sure it was completely flat because there was like a lump like in the middle of it. I don't know how that happened, but um yeah. Just please make sure, when you're laying down these closures that you are pulling it like, hardly you know like hard back and making sure it is completely flat like you do not want a lumpy enclosure at all. Okay, so here, as you guys can see, i am tweezing my um edges, i'm going to also tweeze my part um. This closure. Didn'T i mean it said it came pre-plugged, but honestly it needed to be plucked even more so um yeah, i'm just sitting here. You know wetting it when you wet your uh closure and you're plucking it. It gives you a you know. It helps you better when it's when you're tweezing it to create that good line. As you guys can see, you see, i keep brushing the hair because it really like tangles up like a lot. It hangs a lot honestly. This was my favorite part like working on the closure like i was so excited to get to this part, because i just wanted to see like what my hands can really do so here, i'm using a wax. Stick to you know in my hot comb to just flatten out that top area, because you know you always want your installs to be nice and flat and just good okay, just looking real good um. I know you guys see that bald spot on the closure. Plucking too much hair um, but you guys are gon na see later on the video. How i definitely like fix that and make it look real good. I am using the the baby bliss flat irons and the blow dryer with baby bliss as well um. You know to get this straight like yes, this is looking good, like you guys see that ball spot that i was talking about um, you guys are gon na see what i do soon to it to uh fix that hey! Look how good this hair looks already like by itself. I get not even passing the flat irons through it. It looks really good when you see me like i'm combing and combing they're coming to come and come in like right there. It was a big night. It was burning me out, and here i'm just doing my edges, you know laying down my baby hairs, making sure they look good. I can't wait for you guys to see like how i you know got this part together and fixed that ball. So i did that ball spot look crazy. It looks crazy, um, so here um to fix my part and to fix you know how dark it is. I'M going to use my mascara to fill in any bald spots. You know just gently brushing it. You don't want to like brush it too harsh and just gently brush it until it fills in and then i'm going to use my concealer actually, because you know your scalp is lighter than your actual um like skin color. So i use my concealer to just draw that line out and look how perfectly like, like look how good that looks it like you, wouldn't even know you wouldn't even have known. So i do spray a little bit of the got2b blue freeze spray onto the brush and brush down my hair. Just to you know, lay down any flyaways that the closure may have. You know um, i don't know, got for me, cutting and plucking um, so yeah and like this is just the final result here. I hope you guys really like it um. If you want a more detailed um video, please let me know um, i will be doing more hair tutorials after this. After like doing my hair this time around, i see like i really like doing my hair so um, and i really want to get into doing closures and stuff. So there will be more videos of me doing quick, weaves and practicing like how to do closures on myself. But again, thank you for watching and see you soon.

Comments
MeliexRose: I just love the look ❤️❤️❤️ it looks so nice!
Jenny Rosemond: Just subscribed! Love the quick style!
flawlessBeauty: Wow this is really informative; love this video.