Fringe Bang & Lace Closure Tutorial W/Yvonne Hair
- Posted on 16 January, 2014
- Lace Closure
- By Anonymous
Product information and Links down below!!!
H A I R - I N F O
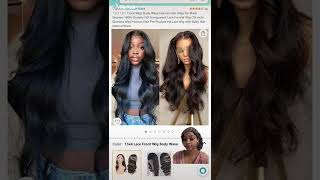
"Yvonne Hair" on Aliexpress
3 Bundles of Peruvian straight - 3 x 22" + 20" closure (direct link below)
http://www.aliexpress.com/store/produc...
4 x 4 Silk Closure (direct link below)
http://www.aliexpress.com/store/produc...
C O N T A C T - I N F O
Business Inquires Contact:
Follow me:
https://www.instagram.com/shev.co/
Thanks for Watching!!!
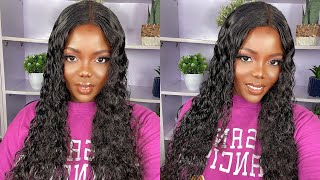
The hair that I'll be using for this tutorial is by Yvonne, hair and I'll leave all the links to the seller in the description box, as well as all the measurements of the hair. How many bundles I received and the measurements of the closure? Now I always start off my wigs with sewing onto culture first, and the reason I like to do. This is because I like to sew my wife's in accordance to how I have placed my closure, whether it is a middle part, whether it is a side part, it kind of gives you a guideline of what to do now, because I am doing a bang, and I would like my closure to fall in my face. I'M gon na show it on the front, which is no different from what I would do if it was a middle part, and I'm just gon na leave that there until the end - and I will position it - how it should be for the bed. The construction of this unit is quite easy to achieve for the simple fact that you are just sewing the weft in a u-shape form until you get to the top. At that point, you would use the hair from your lace, frontal or closure, and you would just comb it over so that you see no wax at all, but basically you're, just going in a u-shape form until you get to the top until there's no room left And then you are done in the event that you're using longer here for your unit, I would say 18 inches and up 18. 20. 22. 24. You will find that there's going to be less hair on the West, so at that point you can either buy one more bundle of hair or you could space out your wax in the back and when you get to the top, you can sell them a bit Closer, if you want the the fullness in the top and not so thick and heavy in the back that completed the entire unit, and I just have it in the back on a ponytail which is actually coming out. So I'm just going to retype. I sectioned out the portion of the hair that I want to need the bang, it's basically the closure. The closure is as wide as I want it to be for the betting. So if I pull it back, you can see the line for the closure. Imagine I work like this held up, so I have it like this now, but I need this part to be covered. So what I'm gon na do? I'M gon na take this rat tail comb and I'm basically going to just wet my hair first initially, because I want everything to be laid, so I'm gon na wet this portion of the hair. So it can be more mobile. What I need to position it in LA so I'm gon na wet any memory back. So I just went this section. I didn't want this because that doesn't need to be wet, but this section in particular so that I can kind of place things where I wanted to go and I'm just going to take some pieces out the parameter of the hair. Now you don't even need too much just enough to cover pieces of a truck okay, and so then, I'm just going to smooth that out now. This is the bang that we're working them just gon na comb it out a bit while the hair is wet. This is actually a perfect time to cut the back, so I'm actually gon na be using razor start a little bit lower and then work my way up. So I'm just gon na section off the sides here so, but I'm going to be doing now is just re: wetting, the hair, the top the bag, everything and I'm just going to take a silk scarf and I'm going to tie it down for a couple of Hours so I can set in the position that I want to right now. It'S puffy and I just need it to be like laid. So that's what I'm gon na do next so keep watching. Okay. So I have this on and keep this on for maybe about two to three hours and let it completely is set. This is how it is and you're pretty much done after that. You


Comments
L A: I was searching for a tutorial like this. Thank you so much for sharing.. I was very helpfull... Great video
Shanice Mantey: Awesome I'll be making mine today thanks for this vid
JeNeevaLove: love watching your videos... so detailed....
Gladys Agboro: thank you for this video, giving it a goal
Funke Adefope: Hiya your hair looks great! Did you use a center part closure or an all back closure? If you used and all back closure did you place it on normally or back to front so the hair falls on your face?
afini30: Can you please do a review on the hair, was looking for some straight hair. Love your videos.
Nia: Nice tutorial!
Monique Shuntae: Yassss sis ! Love it
TheSarahIR: Great Info Thank u!!
Kay and Isobel: love your vids!!
Tracey funny fox: you did a wonderful job
brnize1969: So pretty
Naffie dibba: did you turn the back of the closure to the front?
IcedLipGloss: did you sew the upart on or use clips?
Latoya Dobbins: hi did you cut the cap from under the closure or did you leave it.
lea Tanoh: gorg hair!!! can i have the details of the hair company pls?
Destiny Tatiyana: If you wanted could you part the closure on the side and in the middle after cutting it I've really wanted to try this method but I don't wana just stick to one hairstyle
MoFlave: You got it LAID!!! I want to try full bangs now.
Destiny Tatiyana: If you wanted could you part the closure on the side and in the middle after cutting it I've really wanted to try this method but I don't wana just stick to one hairstyle
Marcus Anthony: thts one of the longest closures i think ive ever seen on youtube.
Jamicia Brown: Df is that get in the picture at the end