How To Make A Wig (With A Lace Closure And Bundles) Very Detailed From Start To Finish Wig Tutorial
- Posted on 16 January, 2018
- Lace Closure
- By Anonymous
*C O N N E C T W I T H M E *
INSTAGRAM → https://bit.ly/3ugWuDO
TIK TOK → https://bit.ly/2PQCcCl
TWITTER → https://bit.ly/3mnXgfB
FACEBOOK → https://bit.ly/2PX12Ao
SNAPCHAT → @YunnieRose _
EMAIL ME FOR BUSINESS
WRITE ME OR SEND ME GOODIES!!
---------------------------------------------
Popluar Videos!!
VERY DETAILED LACE FRONT WIG INSTALL USING STOCKING CAP METHOD: https://youtu.be/2149f5PYdt0
WATCH ME TRANSFORM | BUSTED TO BEAT FACE: https://youtu.be/CR2tIyCsxvA
Easy Flawless Drugstore Makeup Tutorial on Dark Skin | Beginner Friendly: https://youtu.be/Kc3u3X65qmY
Glue-less! No Hair Left Out! Full Lace Wig Customization: https://youtu.be/EzB4wXwfVHk
Watch me Transform | Geek to Everything on Fleek | Beating my face to the GAWDS!!: https://youtu.be/U3TUc1afIFA
HOW TO MAKE A LACE FRONTAL WIG | START TO FINISH | VERY DETAILED FOR BEGINNERS! | VanityBox Hair: https://youtu.be/bY0c9SEQtDI
Watch me Transform | BASIC TO BADDIE!!! | How to make a lace frontal wig look natural: https://youtu.be/RzFbrb6bPeQ
ALL ABOUT MY WIG! | Updated Review on Ali Pearl Hair: https://youtu.be/lmEBpRLDFPs
GRWM | BEYONCE FORMATION WORLD TOUR 2016 | VLOG: https://youtu.be/LINJ_duIY84
Easy Smokey Eye Makeup Tutorial for Beginners ft. ItsBritxoxoxo: https://youtu.be/KX7ff2CjzVk
Pregnancy Prank on Boyfriend GOES WRONG!: https://youtu.be/KMpoCxa1Kjc
-------------------------------------------------
COUPON CODES:
OVAL BRUSHES: http://amzn.to/2c7MTKt
SHOP SIGMA!! SAVE 10%
http://sigma-beauty.7eer.net/c/244687/...
Shop FashionNOVA : code "xoyunnie" for 15% off
---------------------------------------------
FAQ!
Name: Yunnie
Age: 23
Public Relations
Camera: canon 70D
Software : final cut pro
Lighting: neewer ring light
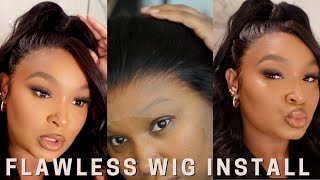
Welcome back but as you can see it today, I'm going to be showing you know us how to make a twig but the the catch honey the catch is today I will be showing you know us how to make a closure wig. So I um - I did this on my channel like years ago, but I thought I would do it again, because a lot of people aren't into frontals and then some people are getting tired of frontals raise his hand, um front. Those are really really flawless. They really are cute, but honey. It takes forever to put them on it's just too much. Sometimes so. Closures are really good for low people that want a little bit more low maintenance when it comes to their wigs and especially for it to be like ghoulish. You can put it on and go and it's like literally flawless, so right now, I'm going to take you into the hair. I got the brand how I bleached the front. I mean how bleached the closure and how the hair came and all that jazz and we will get right back and I will show you how I install it. The hair following me on snapchat do so go ahead and follow me on all my social media platforms. As Instagram Facebook, snapchat and Twitter, all that yani rollers they follow me on snapchat. You would have seen the creation and me making this unit, and everybody was here for it. When I say is flawless, it is a photo. I let honey and do not forget to go ahead and hit that subscribe button down below. If you want to see more hair do's from me, of course, but let's go ahead and jump to the tutorial. Are you dolls? So their brain is a lie. Julia - and this is how the hair came in a pink little cute box in this standard like past plastic packaging, so we're gon na go ahead and bleach the night. So what you're gon na need is some type of bleach. I use W to a creep developer at 40, color corrector drops and we've got to go ahead and get started so just place one cup of bleach. Then you want to add your developer in slowly, so you can really mix it in and I use 15 drops of the color corrector and I just make sure I really really mix that all in and you want to make sure that your consistency is super thick Because you don't want it to seep into your closure, so this is the closure right here. As you can see, you can see through it. It looks really good. It'S really thick, but not too thick, so we're gon na go ahead and add the bleach on. So with adding the bleach on like I said, you want to make sure that your consistency is thick. So it's sitting on top of the knots you do not want to make your consistency too runny or pressed too much on the actual closure, because the bleach will blend in and seep through the knots and you do not want black hair with a burl on roots That is not the look we're going for so just take your time and get an even coat and make sure that the bleach is sitting on top of the knots. So what I like to do is just go on my phone and the clock app go to the timer and set a timer for 20 minutes, because nine times out of ten twenty minutes is a good enough time to let the bleach you sit so once the Dirt timer is done. You want to just make sure that you check your bleach. So what I like to do is just scrape it off and look for those blonde knots. That'S gon na ensure that you got it right, so the shampoo I like to use is blonde a brilliant shampoo. It is a cool tone, lathering shampoo, so it's just gon na color correct those that orange a shade of the bleach. It is gon na make. It look more skin like and not too orange on your actual skin tone, so once you rinse it out just make sure that you got it color correct it really good and just put it on your skin to make sure that it is sitting perfectly as you Can see this looks flawless so onto the wood construction Ric is now on threat because it's not going to soak the moisture out of the hair you're going to need a curved needle, so measuring tape to make sure that is measured for your head. A razor for your baby hairs or just thinning out the closure, if you need to some clips a paddle brush and then to shut the wig you're gon na use a dome cap. So what I just do is just put my dome cap on my mannequin head or your foam head, and then you want to measure and place it down. So, let's a measure the back to the neck first and my measurements is 12, but I always just add an extra into for security, and then the perimeter of my head is 22. So, as you can see, this is a 23 foam hit, uh, medic and head. So what I like to do is just pinch it in the middle. That'S just gon na take a extra inch off so that my wig lays securely and flat on my head and is the perfect size. So, with the securing your closure down, I like to use the two little lines on the mannequin heads to make sure that the close our closure is in the center and that is gon na lay flat. And I also pull it in the back and put a tee pin down, because with the closures, you really want to make sure you take your time and make sure that you're pinning it down flat. So it helps with your stitching later on. So with the stitching, you want to do one side at a time with the closures, because you want to make sure that they're super flat and not bulky. So I like to do the loop method with my stitching. It has always worked for me all out of all the years I've made wigs. It just ensures that your wig is laying flat and that the stitches are flat. So when you brush or comb your hair you're not snagging it. So what I mean by that is you go through the closure and the cap and you go through like under the thread so you're creating like a loop method, so your stitches lay flat. So whenever I start off a new trend, I'll go through the cap first and then through the actual track. This way, the ends of your tracks aren't like bulky and they're not getting snagged, because you want to make sure that you're creating a nice flat construction for your wig. So it doesn't look like sue Whiggish and bulky and high on your head. So I do use the flip over method with our tracks because you can get shedding if you cut your tracks too much. So what I like to do is just create a loop. It didn't go backwards, so I stitched backwards twice and then I go forward as if I'm just normally stitching it. I have always did this technique and it has always ensured that whenever I do the fold-over method, my tracks, they still lay super flat, and I don't have you need like bulges from when from where I actually folded over the track to start a new rope. So once you get about two thirds of the way kind of where your ear is going to be is where you want to start going down on the band. You don't want to do this all the way through, because you will wait. You will run out of hair because the longer you do the hair across the more hair that you're using. So you want to maximize your hair, but once you get to like the ear area, you want to make sure that you're placing it on the band so that it lays super flat by the ear area and you're, not seeing any of the band. If you need to push your hair back or something like that, so I like to do the last three rows I like to do in singles. So it's super flat on the top of your head and when I get to the last a track I go through. The base of the closure and then under the last track, this is just going to ensure that the last track is super flat. That way, it's easy for you to get the closure over that last track. So the last step that you want to do is go ahead and cut this excess piece off, because you do not want this under your closure. You want your closer to be touching your skin, so it can look super natural and it lays super flat once you're done with your wig. So, as you can see, I'm just cutting it off, but when cutting it off, make sure that you leave in a good enough space before your stitches, because you do not want to risk them coming loose. So this is how it should look. So now you just want to plug. So if you have a hard time with plucking your frontal or closure just bleached your knots when you bleach your knots a loosen up the knots a little bit, so it helps your plucking super y'all. It just helps your plucking to be flawless, so, as you can see, I'm going backwards whenever you pluck a frontal or closure just make sure that you're plucking backwards and you're using little bitty strokes, because you want it to be nice and gradient and fade it like A natural hairline and just keep going until you feel as though it is plucked enough and it looks gradient and natural. So, as you can see, it looks really really good. So right now, I'm just showing you the parting. It looks flawless. The the bleach turned out beautifully and it looks really really skin like so. This is the finished product. The wig looks really nice. The hair was so sleek and beautiful. So right now, I'm gon na show you those how to install it all right. You know so now that you have seen how I got the hair. The hair is a flawless when I say flawless and how I customized and constructed the wig and customized the closure and things like that. Let'S go ahead and install it y'all. When I say this is literally about to take like two seconds when I say this bout to take two seconds says it's about to be a lick, so here we have Ashanti, that's what I call it her y'all. We have a shot see right here. Let me zoom y'all out a little bit all right. Oh so we have Ashanti right here: 26 inches of beautifulness y'all, look literally gorgeous. So this is the wig right here: looks bomb bomb, dot, freaking um y'all, oh good, alright! So I'm just going to go ahead and put this on my head. So one thing that I love about closures is that you can kind of place them anywhere. It is going to look flawless, so I can leave this as a middle part or if I wanted to. I can just pull the wig over right here and I can have a side part, but I want a middle part for this particular unit and it fits so good on my head. You would have seen how I measured it and got it to fit super tight and securely on my head, like y'all, it's literally look it's literally so flat on my head and so snug. It is so freakin pretty. So I'm just gon na go ahead and just pull this back, but I'm gon na go ahead and cut this lace off. When I said it's gon na take two seconds, y'all look. The part already looks like supernatural: it looks so good it bleached so well. So what I'm just gon na go ahead and do is cut SuperDuper close to the hairline. You zoom, you dog, so as you can see, let me move with a little baby here. I'M just cutting super close to the hairline y'all. Look at that look at that. It looks literally so good, so what I'm gon na do is kind of pin this back and I'm just gel down a little bit of the baby hairs to make it look even more realistic all right. So what I did is just take a wet toothbrush and I'm just used a little bit of mousse, literally when I say a little bit of mousse like the tiniest amount. So I already had created a little bit of baby hair. So I'm just want to pull them out a little bit any time I just swoop it just make this wave with a it's a bit more realistic. So if I go like that, you see how it just changes up to the front to look it's just not that sharp line across. So I'm just using a little bit of mousse, like I said I'll, pour down those baby hairs that we created just sweep it make a tiny little swoop. Well, look how close, I am. The part, looks so good y'all. Look how good this part looks and its not gelled down it's not glued down. I didn't use any guys to be any glue any nothing it's, so it fits so good on my head that it just looks freakin amazing, so I'm gon na hit go ahead, and so you know that helped all right y'all. I wish I could just look so good. This hair is literally bomb. It'S so easy to install y'all can't tell me that closures aren't the new new okay, they're they're new new, okay cuz. Anybody got time to try to put on a frontal all the time and see since I put the tracks so close once you start getting to the closure, you can either go like this and then your hair is out it's literally bomb dot, freaking calm. So I will be wearing this unit a lot because it fits soaked y'all if y'all could only just feel how let it is it's so flat. This hair, I didn't get any in, and it's Hangul in it flat on really really good. Once I washed it y'all it, it's just bomb, absolutely love it so yeah. If you want to see more videos like this, just let me know down in the comment section down below. I hope you dolls learn something in this video. If you did, let me know what you learned down below and let me know if you're over frontals down in the comment section down below, do not forget to give this video a big thumbs up. If you want to see more hair, tutorials and hair reviews from me and if you want to see anything different like a coloring or a styling video, let me know let your sis know. Oh, we don't enjoy this video and I will see you my next one.


Comments
YunnieRose: if you all dont know, my instagram was hacked so please go follow my new page @yunnierose_ ....I was working on a big deal so me getting my following back up quickly is very important so if you would like please go follow :) thanks for all the support and encouragement this week.
AllyiahsFace: You already know im over the frontals lordt.
Toni Shelton: I’m so glad people still wear closures. Frontals is not for everyone.
De'Andrea Allen: You saved my MF LIFE AND Pockets. Sis I'm tired of spending money to get my wigs made. The most detailed video thus far
Cyanna Nation: I make wigs and I’ve also watched so many wig making videos. This is hands on one of my favs. So detail.
BasicallySomer: Yesss bihhh .. finally a tutorial that's not complicated
Dachief Keisha: You made this bih look so easy .
Keyanna Morrow: This was perfect until I couldn’t see where you started to sew
Keey The Diverse Creator: been wanting to do this for myself but scared . made my sister one this weekend & it came out boooomb ! i learned to measure head & stocking cap in future & how to check if bleach knots are ready .
Nizzy Mac: If this ain't the most slayed tutorial ever?!? Okay sis!! Notes taken!
Jurnee E'lyse: this is literally the best tutorial of making a wig that i have ever came across. my biggest problem was always getting it to fit my head perfectly and this helps a lot!
Danny McClendon: This video was very helpful in making my first wig. I just wish I would have known not to pull the thread too tight cuz hunny lol but it came out good just a little too tight.
Bre Necole: Baby I was holding my breath with them scissors
Sassy Moi: I’ve been over Frontals they lift at the most unconventional time. Have you looking crazy. Yes, it was originally installed correctly. One time I looked in the mirror & the whole thing had slid back
Jimmine Johnson: You should make merch that says “literally flawless”.
Ahteyona Hines: My closure units never fit right and now I know what I’m doing wrong. So therefore I am doing my closure unit over tomorrow, thank you for this tutorial
It's Jade: you sound like keke palmer
Shay.baby: this tutorial just saved my life!! i feel like i can make my own wigs now s/o to you!!!
#GetitRight 1k: That look easy. I’m going to try today thank you
Lyric Lachelle: I love you yunnie literally inspiring me hunny
Jessica Higgins: I AM SO TIRED OF FRONTALS. THANK YOU FOR TAKING YOUR TIME I ENJOYED THIS VIDEO‼️❤️
sheisher: I really appreciate how you gave the tip about adjusting the wig. That was really helpful
The Life of Sunshine: The broken nails at the beginning distracted me! ♀️But you nailed the wig.
freebabe: Omgg! What is your into? I love it but can’t find it.
Latoya Henry: New subbie here♀️♀️♀️ loved this video makes me wanna go create my own Ashanti ☺️☺️☺️
Pamela Scott: I'm real late almost 2 years. However thanks love this. I for one came to utube to learn how to do wigs and makeup. My first yr was good, but here lately it's bad mouthing, gossip, and tearing others down. So PLEASE PLEASE PLEASE!!!!! bring us more tutorial on wigs and your bomb makeup.
Sinclair Gailliard: This tutorial i love it! I’ll stick to frontals because i feel like those are easier for me. Also i really want to know what song that is in the intro ♥️
Mrs. Cinnamon Everett: I’m over it. and the mess! Love the video. I’m thinking who hit the thumbs down button. Some body not as dope as you. Uh!! I’m back to creating my own wigs using closures. I have the 2x6 deep part. I love it!!
chicken nuggz: Ugh THANK YOU i wanna make my own wig but im scared lol
Rosa Erminia Mendoza M artinez: Hola donde puedo oirlo y verlo en español
Keishanna Michele: Loooooooooooove this! How long did it take to make it? I just purchased my first closure - I was just so scared because I didn't know how it would turn out but u made it look so easy
Self Love Queen: Yooo!! The hair is soooo bomb! Best tutorial ever
Wavy Max: One of the best tutorials I've came across so far. Great Tips!
Boss Lady Lexi’s Lifestyle Change: I’ve never had a frontal before so, I want to try it out
Bilmania Santana: Name of the color corrector drops please!!! This is literally my guide to making my wig i love you!!!!
Clean Keto Blog: Just.... WOW
Mia Benn: Yessss you did that...I love and it looks great on you...
Andrea Wilson: Love love it sis❤️❤️❤️❤️
Rashan Eiland: I like how you posted this on my birthday
Moinyaa: Thank you for these angles . I’ve been trying to understand the loop method and now i actually see what it looks like from the back thank you so much
Shonda Whitson: Love this video can I ask the name of the song in the intro I heard it before but can’t find the name
kisha mcdougle: This is the BEST one I have seen so far. Beautiful
tur sen cya: This look so amazing
Alana Reed: sooo helpful!! ❤️
Cici hall: Yes in so glad I watched this video I been doing sew ins for so long and I recently starting wearing frontals but with the lace front glue and got2b glue it literally took my edges out ‘ so I’m have to let the frontals go and go back to laceclosures !
The Lloyd’s: You made it look so easy!! I
Jasmine Carter: needed this video 2 weeks ago, THANK YOU!!!!!!!!!!!!!!!!!!!!!!!
SierraLeones12: Perfect fr!
krisywantjoy: So glad u made this video. My caps never fi right so I know how to measure properly thanks a lot
Rere Jenkins: Good job I love it❤️
7erenity: This was beautiful thanks
4everjazzi: Absolutely gorgeous
jordan smith: sis this closure is by far the best I have ever seen!
Kendra Carradine: Buuutiful wig. Thank you so much for sharing and being detailed
fanm kreyol Haiti Cheriii: Showing love from Haiti . Love it
Yo yo: You're beautiful
wanda j: Damn this look so good. Best wig on YouTube
Sarah-Justine Ward: Absolutely loved this vid!!
Nilaja Croft: girl girl girl, please tell me you make and sell them because I could neverrr
Hazel Shaday: best tutorial out of the hundreds i’ve watched lmao, love this
Tiffany Towers: ❤You do this super easy
Kashana Burke: Yes sissss I’m tired of frontals too
Jazlyn G.: This is the ONLY video i watched fully of how to make a wig
Youlovety__: New subbie you did that
Ms Kendra Martin: This was sooo helpful! Tweezing the hair backwards on the closure is what stood out to me the most. I just learned something I had been trying to figure out for months... Thanks so much for sharing that tip!
Deesha Bee: I LOVEEEEEEE THIS .!!!!
Brandie Lashae: Your hair is beautiful!! Made my first wig cuz of this video. Its came out fabulous!! Btw, what song is that you play as your intro? Im in love with it. I wanna download!!
Onyah Burgess: Over frontals ♀️ can’t wait to try this
Ama Pepsodent: I want the wig
stacia queen: FINALLY!!!..a start to finish, thanks girl for being true to ya title.
De: And I’m so over frontals now
theylovemichelle: so happy i came across this video!!! cant to make mine
Shug: Tutorial starts at 2:00
Xenolorde: Take a shot every time she says flawless, literally, and y'all
dajiah wr: Super helpful ❤️❤️❤️
TOSINKILLZ: sis I’m so over frontals #closuregang onlayyyy. and wow! no wonder my wigs be tight, I sew on the elastic!!
Denia Segrow: So when using a dome cap when it’s time to put the wig on you won’t have to add glue or anything
mr 347 dale: Omg do you make wigs??? I’d love to buy one from you!!!
ROCH H: What happens if you have band space? I messed up
Cheryl Pruitt: Love it! Taking notes
key med: bihhhh this looks amazing
Lavish Lashea: Girl you slayed that i swear
Brittany Darby: Love it, thanks for sharing
Amy J: Out of all the diy wig videos on youtube, yours hands down was the best. I was nervous about making my own with a dome cap but you gave me hope girl!! This wig looks great!
QueenGeGe Nature-al: Yes more hair tutorials please
ZaraChioma: Legit one of the best tutorials I've seen, so helpful thank you!
My’Keshia McCoy: So glad I ran across this video! Looks super easy and I cant wait to make my first unit! Keep up the great work queen. I subscribed to your channel!
JOHN MOSES JR: hello I truly enjoyed u today my sister yes u are a awesome beautiful got started making some wigs .
Shamaya Bradley: Omg I love this! It looks so beautiful and natural, thanks for this video so much help!!
Kayla E: Great video very helpful!!
Shanique Grant: Your nails
Coya Li: Yunnie this tutorial is bomb!!! I can’t wait to try this
Denesha Robinson: Newbie here ND I LOVE THIS...
Nyakor Kuony: FLAWLESS FIT
LexxKatria: Yesss sis for the closure slayageI’ve been over the frontal wave honestly
TNT Creations: Things you did... THAT!!!
Rochelle Neita: Kinda look like raven Simone
Dildred Suttles: I am a BEGINNER New to your Channel I really enjoyed your Video very Informative. Thank yiu
Shamesha Talley: Yesss boo! You did that!!! So detailed, love it... and yesss so over frontals!
Taylor Carter: this is the best I’ve seen I had to comment