How To Make Your Lace Closure & Frontal Look Like Scalp Using Got2B Gel
- Posted on 18 July, 2017
- Lace Closure
- By Anonymous
Hey Beauties!
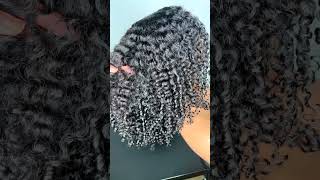
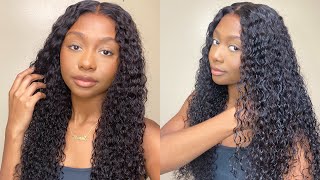
This video is how I use Got2B Ultra Glued Invincible Styling Gel to hide the lace grids on my frontals and closures. Hope you enjoy this cool trick!
You Will Need:
1. Lace Closure or Frontal
2. Got2B Ultra Glued Invincible Styling Gel
3. Your choice of tinted makeup (foundation, concealer, tinted moisturizer, or BB cream)
4. Thin make up brush
5. Blow dryer
6.Hair clips
Frontal Information:
Cynosure Hair (Aliexpress)
https://www.aliexpress.com/store/produ...
-FOLLOW ME-
Instagram: @blissbeautyox
Website: www.blissbeautyox.wixsite.com
-MUSIC-
1. By: Philmatic
https://soundcloud.com/user-634102872/...
2. By: Flamingosis
https://soundcloud.com/flamingosis/run...
-CONTACT-
Business Inquiries Only
Hey beauty, so I am back after three thousand and one years. Ah, I had a baby, so I have to take some time off pretty right now I am wearing a frontal from a company on Aliexpress up with the details in the description box, because I actually really like this frontal. I made this into a unit, so, if anyone's interested in seeing how to make a unit like this, I can make a video on that as well. For today's video, pretty much I'm going to show you how I got my what the calls how I got my part to look like scope, I'm not going to discuss bleaching the knots, but if you do want to be a video on how I specifically bleach the Knots for this frontal, you can comment that down below as well, but yet I bleached a lot on this already and I already did the method that I'm going to show you guys on this frontal. So for this video you're going to need a makeup item of your choice, I choose to use BB cream because that's what I use on my face as opposed to foundation - and I also like my parts on my closures - to look more like the uniform color on My face, as opposed to my actual concealer color, because it's a lot lighter. Obviously so I just use my BB cream, but you can also use foundation. You can use a tinted moisturizer and then you can of course use your concealer but yeah. I choose to use BB cream you're also going to need a makeup brush, so the one that I chose is really thin like you can see from the side there and that's just going to help a precision for what I'm about to show you. I have a fine till to fine tailed fine-tooth comb, which I'm going to use the part, the closure and make sure all the hairs on it appropriate size. I have a piece of plastic that I'm going to put the mixture on top of, and I also have two of these silver duckbill clips or whatever, and I should still hold the hair to its respective size and then last but not least, you're going to be Using the got to be gel so for this tutorial specifically, I you need the black one, because it's clear if you want to experiment and try the actual, yellow one you can personally, I'm not sure if that's going to work, but I've used the black one and That'S what I'm going to recommend for this video I'm going to use the link, that's currently on my head. What I'm going to do is create another part. I might do a middle part this time so without further ado, keep watching and yeah okay. So you want to start by making your part there's two ways you can do this. You can either make a part or, if you're, working with a closure or a frontal, that you want to do multiple parts on you, don't have to worry about making a part or just apply the mixture to the complete face area. If you are choosing to do the part method, just secure each side with those duck-billed clip scenes next, you want to grab your piece of plastic or your container or whatever you choose, and you want to add your make up item of choice. You just want to put a little bit like look how small that is. You do not want to use too much color and I'll. Show you why, later on in the video? After that, you want to add a decent size of the got to be gel into the mixture and you're just going to mix them together. If the color is not to your liking or the consistency or the amount is not enough, just continue adding whichever product you need to add. So here the color was not dark enough for me. So I added a little bit more of my BB cream, and now the color is exactly what I'm looking for. The darker color on the left-hand side is what not to do that is when I added too much BB cream. So you want it to look like the one on the right that is paler in color right now, I'm just adding the mixture to the part that I created. You don't want to use too much because they can seep through the holes and then get into the hair. But you want to use just enough that it's going to fill the holes and you can see it looks kind similar to the other part. On the other side, and that's exactly what I want okay, so at this point now you just let it dry. If you're really in a rush, you can use a blow dryer if you do choose to use I'm so out of breath. Oh, my god, I just cannot. All I did was go upstairs and get the frickin blow dryer and I am out of breath one second, please. Okay, so like I was saying before I came quickly. Winded, if you do choose to use the blow dryer make sure you use it on the cool setting, because it will not dry the glue properly. If you use the warm setting the glue of the remains sticky and tacky, and that's not what we want, we want it to turn solid. So, for the sake of this video, I'm going to go ahead and blow dry just so I can have it done. Usually I still blow dry it because I'm impatient so I like to start on the bottom side of the lace, because that's where I applied the mixture primarily and so it's on the highest possible setting and don't forget to use cool and then when that underside or Whatever side you start on is dry, you want to flip it over and dry that side as well. Now at this point it was fully dry, but I looked at it and I could see some little holes, so I'm just going back in there and filling that in Oh push back into the back brake clutch all right. So that's funny! That'S not to do super simple and easy. In my opinion, I tried to put the wig on my head with a new part. Clearly I did not do it straight. I mean it's not that serious. I still filled it in you guys to see. I don't. I didn't put my baby here as proper. I didn't fix anything, it's still in a side part with form, but you can see how the scalp looks like it looks amazing, like I really wish. I wasn't lazy and just you know fix the part for you guys, but it'll actually looks pretty good, it's just not in the center, but yeah you get the point. I hope you guys like this video don't forget to Like comment and subscribe and I will catch. You guys later
Comments
Kim: side note. lol I use to feel out of breath when my iron was low.love this scalp method
Jamie Wilson: Would this work the same to cover knots that are not bleached ?