How To Make Lace Closure Wig||Beginner-Friendly
- Posted on 03 August, 2021
- Lace Closure
- By Anonymous
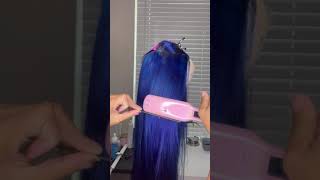
Hey guys, it's silly and welcome back to my channel in this video i'll, be showing you how i made this lace, closure wig, so stay tuned so guys i have my dome with cap. It'S one size and it's very stretchable. So when you're placing it on the mannequin's head, you want to ensure that you place it. You stretch it and place it all the way to the nape of the neck and over the ears, and all of that after i've done that, then i use my t pins to secure it to the mannequins here. The t pins are very important because it helps you to um stabilize the the wig cap and especially, if you're a beginner. If this is if it's the first time, you're making a wig, the tipping is very good. It helps you. It guides you in what you are doing. It helps you to secure your closure, your tracks, and it helps you to secure the the wig cap to the mannequin said this wig is for a client and she provided the hair. It'S a kinky curly human ear, 10. Inches three bundles with a 4x4 lace closure. I am going to use two bundles as she requested that the wig is not too full. So what i'm about to do is to sew in my closure. So i place it at the front in the middle of the dome cap and when you are placing the closure on the dome cap, ensure that the lace - that's the part, that you're going to remove, ensure that it is at least an inch below the dome cap. Before you sew it, so i use my t pins to secure it to the mesh cap. I place one on each side of the front and i place somewhere on the back, so so foreign so guys after i sew the closure in then i go ahead and sew the bundles in. So what i do is, i start all the way from the top where the closure is, and then i sew it all the way around to the other side. Up to the point where the closure is, i do that until i get to the middle of the mannequin's head, you so guys. When i get to the other side, you do not cut the hair, you flip it and then you continue to sew. You do this through the entire process so guys when i get to this part of sewing the hair you're not going to create the? U shape, you're, going to sew straight across from left to right or right to left and you're going to do that. All the way until it meets the closure okay, so this is how the wig looks so far after i've sewn the hair. I use two bundles along with the closure, so what i'm going to do next is to take off the wig and then i'm going to cut that part of the wig cap that is exactly below the closure. So what i'm doing here is to pluck and to get the baby here. So what i do is to partly the section that i want for the baby here then i use my tweezer to hold and pull so. It gives the hairline in a thin and more natural look for proper security of the wig on my client's head. I go ahead and i sew in these clips is i sew in three of them, one at the bottom of the closure and one on each side. Okay guys, so this is the finished look of the wig. I did not make any baby hair because i did not want to add any product to the clients wig before she is ready to install it so yeah. This is how it looks. So if you like it, then you can go ahead and purchase your bundles and make one of your own anyway. I want to thank you guys for watching this video. Thank you for your continuous support. If you are new here and you like what you have seen, then you can go ahead and subscribe to my channel turn on the notification. So you will get all my other posts remember to like comment and share i'll see you guys in the next video adios. You


Comments
The Jamayan Family: Talent overload u are great this looks so good
Love Burkes: This look so goodloving it, talent this enuh.....
Love Burkes: You made thissss!!!!!
Portia Smith - EduLIFE: Good job!
Dane Lynch: Love this hair dresser
Tenniesha Roberts: A who bless with talent sooooo
Hair By Cardi: Watch bad hairdresser ❤❤
Life with SherBer: How the cap look like brief so lol
MK FAMILY: aunty Tenniesha send me the link
Life with SherBer: Me affi go get one of them wig yah fi me bday
Annabella _Bless: Anesa over here again boo.......
Cooking Phenomenal: Girl well bad