Arrogant Tae | Jayda Inspired Messy Bun Hack W. Frontal Wig | Perfect Toned 613 Color.
- Posted on 21 May, 2022
- Lace Frontal
- By Anonymous
All over Instagram I see a beautiful blonde messy bun/updo and yall KNOW i just had too!!
Summer Mania wig sale JUNE 12TH @ 10 AM
ALL WIGS UP TO 30" WILL BE UNDER $399.. NO CODE NEEDED
_________________________
FEATURED WIG: https://evalynrose.com/collections/ful...
Top Selling Wigs:
_________________
Diva curly: https://evalynrose.com/collections/ful...
Ombre exotic wave:
https://evalynrose.com/collections/ful...
____________________
Products
* 30 volume developer
* Clarol professioal color 7G & 8 GN
* Bed head wax stick
* Bed hair hair spray
TOOLS
* Andis Hot comb
* Babyliss Curling flatiorn
* bobby pins
* razor
Lets get social--------- Follow my IG
Personal: EvalynRose_
Business:EvalynRoseHairCollection
TikTok: EvalynRoseHC
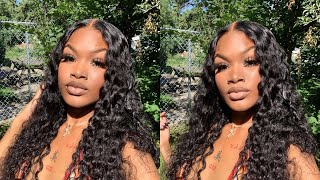
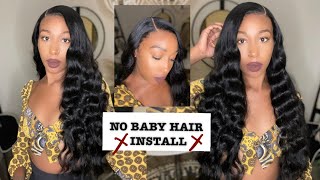
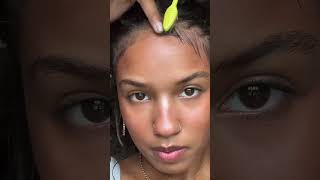
Hey divas welcome back to my channel today, i'm going to show you how i achieve this beautiful champagne blonde, along with this, like jada, arrogant, hate, slash, messy, bun, inspired, look um, it's definitely giving what it's supposed to give. I love it. I love it. I love it. I hope you love this. Video also make sure to like comment and subscribe as we get into the video today we're going to be using a wig from my hair collection, the evelyn rose, hair collection and i'm going to be using a 20 inch. 613 silky straight full lace, frontal wig, for this look today, as you can see, the hair is nice, silky and full as usual, and the knots are super small and always a very thin lace, so make sure to shop the collection. First, we're going to start off with coloring our hair. I use two bottles of 7g and then one bottle of 8gn by clairol professional. Also, i use a 30 volume developer and then the application bottle to put the color in so you're, going to follow the directions that it's on the box. So this spot is a one-to-one ratio. So you're going to be using one color bottle you're going to fill that bottle up to make sure that it's even which is what it means by one to one. So you're going to use the same, even amount and to do that versus just trying to measure. Just fill that bottle up and then put that developer in and we're going to be doing the same thing with all three bottles. Once you're done, you'll see what you have and then you'll just shake it all up and that's what we have to work with for our color next, i like to start off by sectioning my hair just to be able to get through it easily. So i have the bottom and then you see me have the middle and two sections and then the frontal. So this application is easy, because it's all one color. The only thing we're doing here in this video that i'm showing you is i'm making sure that the hair is fully saturated. Now, i'm not sure if you notice, but the hair is damp. I do dampen the hair just a little bit spray it with a little bit of water so that it's easy to maneuver and then you can get. You can spread your color better when it's a little wet. You don't want to like soak it. You just want to dampen it just a little bit and then basically, i'm going to just show you that i'm going to fully make sure that i have it covered, i'm going to be brushing the color through putting it everywhere, i'm just pouring it everywhere. Rubbing my hands through combing through to make sure that i have it and i'm going to do the same thing on the frontal. We'Re not worried about knots, because the whole thing is going to be blonde, so you're just going to keep putting that color everywhere. Once you're done with putting it everywhere, you're going to do what the box instructions say and you're going to let it sit or for about 25 to 30 minutes, and once you do, this is what it looks like now. I know y'all like what the hell but trust the process. Okay, you got ta stress the process. Color will always look darker when you're putting the color on and once it processes, but once it washes out, it washes out to be the color it's supposed to be, and what i have here is like a champagne blonde and it looks even better once i flat Iron it. So this is what we have and, as you can see, it's super pretty it's not that yellow blonde that it that you get when you get right out. The pack now out the pack is fine, but for me i'm just a toned kind of girl. I don't wear 613 right off the pack at all, so this is what it looks like after i flat ironed it and we're about to get ready to put it on and, yes, it is giving champagne. So it is time to install and, as you can see, i already have on my ball cap method and i'm going to start by using some alcohol to clean the area cleaning. The area is a very important step for your lace, and this just helps the glue. Stick really good and you don't want it to be oily because then that lifts the glue easier. So that's the importance of that step. Next, i'm going to be using my bold hold and i'm going to be applying two layers, because i'm only keeping this on for maybe a day or two but um you can use i've heard people use three to four layers. It just depends on how much you would like it or how much you, how good you would like for it to hold. So that's up to you and then, of course, the glue goes in front of your hairline on your skin. Does not go on your hair as we have here, so i use two layers and then i'm going to let it dry clear and then i'm just going to begin. The process of installing my hair y'all have seen a million install videos. So i'm just going to do the normal, which is you know. I have my comb, i'm pressing it in to get the lace uh nicely melted into my skin um. Then i'll move on with cutting the ear tabs and you know parting out baby hairs. I'M not going to actually talk through this one this time because i literally talked to each one of them and it's the same thing. So i'm just going to let you watch me, do the install and then i will be back to explain um the process of what i did to put it up into a bun to get the little messy look. So hmm, so do all right. So this is what we've been waiting for, so i'm going to start by parting, my hair down in the middle, because that's what i decided to do so. As you know, at the title i was attempting to do the jada um, or just it's been going around lately on instagram, just a little messy bun look with the either two pieces or you do the side part, and i decided to go more for the look That jada had so i did the two pieces in the front and then you know i'll be leaving a bunch of hair around the sides to give that effortless messy look. So what you see me doing here is just parting out attempting to part out even amounts of hair on both sides of the part, so i'm just double, checking it and making sure i have enough hair on both sides to make it even i'm going to be Just braiding that hair up to keep it out of my way, because this ponytail and putting up all this hair was a lot. So i was just keeping everything out the way that i wanted to. You know style. So i'm also going to do the same thing with my baby hairs and that's what you see me doing here and then i'll be doing the same thing with the sideburn areas. But this time i won't be doing sideburns like you know how you style it to make it kind of like slick down, i'm going to be leaving them out as like a messy look. So you'll see that soon. Now that i have everything parted out, i'm going to be using my hot comb to kind of just like make sure everything's flattened and going in the direction of the ponytail that i want to do so. The next couple of steps is basically going to be me. Just kind of like putting my hair up in a ponytail and in order for me to get it where i want, i have to flip my head down to kind of like move the hair forward, that you see me doing here and i pretty much just got It to the point where i wanted. I did not want it at the very top of my head, but i didn't want it at the back, so i just played with it enough until i got it that way, and i just kept using my brush along with my hot comb to you know just Kind of like mold it in a sense um i didn't like, so i was just showing you that i didn't want to put it like all the way up there. So i'm going to use some black rubber bands, nothing major and i'm going to put it up. The next thing i'm going to do is pull out hairs around because, as you can see, this is a frontal. This is not a full lace wig, nor is it a 6 30. I mean i'm sorry a 360 wig, so i kind of have to disguise that little hard rim that you see right there on the side, the back. I wasn't too much worried about because i knew the baby hairs. I mean well. The hairs on the back would cover it um i did slick up the my kitchen. Is that what you call it? You know how we call it back in the day, the little side area over there that you see that's black poking out. I did use some gel and kind of like just slick it up to make sure that it doesn't show and then to keep my hair down in the back. I basically kind of like bobby pin the wig down like to the gods like 10 000 bobby pins. So that i could keep it down um, but again i only wore this style literally for a couple of days like this day that i'm making this video, i went somewhere like two hours later um and then took it down. So it was enough for that day. Now i don't know if you're going to be going out of town and in the pool you might want to get you a full lace, wig or at least a 360.. So basically, what you see me doing here is: i pulled out some random pieces of hair. Some of them are in the middle, some of them at the top. Now, because this is a frontal wig that has tracks in the back. I did not pull all of the hairs down just in one area at the back, because obviously it would make the the track show, which is why i pulled some out in random spots and then i basically just used my razor to razor some pieces. I got some long, some short and i always start long with no matter what i do and then i continue to trim so just like now, you see me doing this. I curled it because i want to see what it's going to look like curled and then i end up going back later to trim some more and i always say in my videos when it comes to lace, baby hairs, cutting a style, it does not matter cut Longer than you initially think you need to see what it looks like and then cut more. If you cut short, that's yeah, that's it so same thing. Here, look at these baby hairs. They super long! I'M not going to keep them that long, but i mean i'm going to start long, because i want to see what i want to do. I actually wanted to do like the little curly even like i don't want the baby hair to be so uniform, because the whole look is supposed to be effortless messy. Not so, like you know, forced even though i forced the heck out of this wig, especially in the back, so i used my little small hot comb to curl the hair up to give the curls and you'll see what i mean and i'm only just kind of Like smoothing down the front and i'm leaving the curls so that it gives a messy look and you'll see some see right there, i just i want to leave those like up and free, because i want it just to be a little bit of a mess everywhere. So i'm gon na do the same thing to both sides and of course you know that nairobi, foam or any type of foam is going to make your baby hairs last longer, and i always put that on my hair and then tie it down to make it Last longer and to get rid of any extra flyaways, so that's always been my tip. So now i'm going to move on to the front and i'm going to just hot comb it out, because i had the braids in and then i'm going to go ahead and trim it to my desired length and go ahead and curl as well. All right! So we're moving on to the bun. Finally, so as you can see, i'm using my t3 curler and i'm going to just curl the ponytail in no particular way, um you'll see some that look like that, and then some will look pretty i'm just basically taking the straightness out of the bun to create A messy look, that's pretty much it so you know i'm not holding it with a whole bunch of heat, i'm just literally wrapping and curling, and then that's it all right. So now that everything is curled, i'm pretty much going to just like tease it a little bit with my hands, you can do it more with a comb and then i'm really just like you know if you've ever done, your hair in a bun you're, just like Going to try different ways and that's what i was doing you see, i put it one way, i'm seeing if i want to pin it like this, like what do i want to do so? What i decided was to just make um all the hair go around that you, like you, know completely around my head as you can see, and then i'm gathering it up and then i'm taking a rubber band and i'm going to tie it um like in a Mushroom cap, then i'm pulling it apart and then i have the curls and i'm just going to be moving them around pulling them through the bun. I'M going to be pinning some giving a little pin curl pulling pieces out to let it hang. You know i'm basically making it messy to my liking and um. You know there's no rhyme or reason. I just don't want it to look uniform. I want it to look messy. I want to look, you know cute and effortless, so just play with it and you know give it to what you're what you want to do. This is a messy bun. This is not an updo, so i didn't pin curl and pull you know. Everything like you would do with the actual updo, just a bun and i'm just making it messy. I had to gather the hair like this because the hair was 20 inches, so i still do recommend 20 inches. Maybe you could use 16 or 18, but i i just wanted it to be full and to have a lot of hair. So i use the 20 inches and that's pretty much it honestly. As you can tell, i gave it some height and i'm just kind of playing around with it loosening it up. You know i've never done a video and said trust the process, but seriously from coloring to putting it up. You know trying to figure out what the back is going to look like yeah girlfriend, just trust the process like that little piece back there. I tacked it down with a hundred pens, so i mean you just have to trust the process, and you know just you know just just do it. That'S all it's all like i always say just do it. You never know - and this is my final look after i got my makeup done and it is giving what it's supposed to give. This lace is laid um. This color is just giving what it's supposed to get. I mean i'm just oh, i love it so much. It'S so carefree, it's so effortless it's just giving baby doll so yeah. I hope you guys try this look out. Let me know if you do. Let me know how you feel about it and make sure you like comment and subscribe and follow me on instagram. See you soon bye,

Comments
Jequetta Zeigler: Thank you so much ! I’ve been wanting to try this today but everytime I looked for a video NO ONE WOULD SHOW WHAT TO DO WITH THE BACK! And that was my biggest concern ! You slayed sis !!!
Anita Agagwo: Definitely trying it tomorrow for a birthday party
B Kyria: Your the first video I came across that showed the back ! Thank youuuuuuu, looks good
Belidoria Belidoria: You have skills. It came out really cute!
Akilah Gabbie: Beautiful
Anita Agagwo: Love this