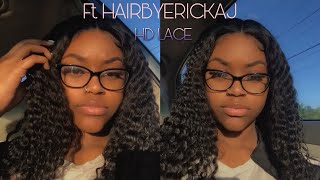
613 Half Up Half Down Frontal Sew In | 4 Bundles With Crimps
- Posted on 01 July, 2021
- Lace Frontal
- By Anonymous
subscribe to the mailing list to receive newsletters.
BRAID PATTERN TUTORIAL:
HOW TO SQUEEZE 4 BUNDLES SEWIN TUTORIAL:
Hair details:
4 bundles 30inch, 28,28,28, with 20inch 613 frontal
Direct Link Hair Link:
https://www.amazon.com/gp/product/B089...
Direct Crimp Iron Link:
https://www.amazon.com/Bed-Head-Wave-W...
Products Used:
Fantasia Heat Protector Straightning Spray
Fantasia Spritz Mega Hold Spray
KeraCare Wax Stick
Got2bglue Freeze Spray
#halfuphalfdownsewin #crimpedsewin #howtosewin4bundles #613crimps
Hey Doll Baddies,
BECOME APART OF THE DOLL BADDIE GANG
(LIKE, COMMENT, + SUBSCRIBE)
Business Inquires ONLY (email) [email protected]
______________________________________________
LET'S CONNECT:
IG: http://instagram.com/ellaabaddie/
IG: http://instagram.com/shopellabel/
SC: ellaabaddie
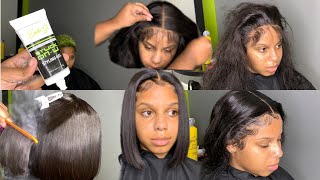
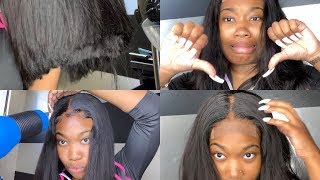
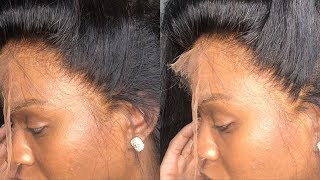
Hey die betty jumping straight into this video. Today we will be doing another frontal sewing where we are doing the completely 6 13. So right here, i'm just testing out the lace and just to see how good is melting without doing any customization. So i went ahead off camera and i added her foundation color onto the leg, and i pressed it in got it packed on real, real, real, real, real good and kept constantly checking and make sure when it's time to you know, melt this bad boy on that It'Ll be messing to the skin, so make sure you get indirectly on the knots and on the lace as much as possible. Everything that y'all need to know for this. Video will be in the description as far as where the hair from the um styling products and all that good stuff will be in the description box. So once i went ahead and got it to um, you know the color shade needed y'all did see me, um check, um check it out to make sure, and then i remove the lace, because i do like to install my laces without the extra lace being on There that's what works for me. I feel like you're not going to get a good result when the lace is still on there like it. Just doesn't work out so remove all the excess legs and then go ahead and add your first layer or glue and i am using ghostbun. So i went ahead and did my first layer. We are going to be doing a total of three layers and i am going to begin throwing on my tracks, so i'm about to soak in four bundles in the front of just like my previous front of sewing, like i showed you how i squeezed the four Bundles and got it to be slayed and laid and still flat, that's exactly what i'm to be doing with this install so right now, i'm just doing the lock method of this type of stitch. I'M doing and i'm just going to stitch. You know going back and forth and y'all see. I do like to knot up my um my thread when i begin the first bundle like when i started off just to make sure it don't come out and then, when i'm flipping it over, so that it ain't loose. So when i'm doing the flip over method, because i don't like to cut my truss, i'm making sure i'm not a need to be flat and secure. So do what you got to do to make sure that tension when you're doing your own sewing that you're doing a real good. You know tug pull knot and all that so now i already had did my third layer. Y'All just see me do one, and then i just did a third one, and now i'm showing y'all my lace and how much foundation i added just so that her lace would not have like a white flashback and it'll be melted. So that's you know the key of doing you know a 6 13 lace, especially if ain't got no roots. You need to make sure that that lace finna blend in into the skin, because you don't want you know it to be looking ashy and white. You know like white screen that ain't the move so customize it, but be careful that if you do add any foundation until the hair, all you got to do is take some alcohol in a wrap in a rag and just alcoholic until it's completely completely clean and Dry and then continue on so just be mindful. It is a little bit tedious because you know if it's straight out sister team blonde, you don't want no brown roots or brown smudges, so do be mindful. So i'm just go ahead and secure my lace front toe right there like that. So definitely like the ones i put it on blow dried it just so that it could just begin to adhere and have that strong hold on warm heat. And now i'm about to go ahead and sew down this frontal, so i'm just going to go ahead and make my stitches real, real, real, close um tight together, i'm not locked in because i don't be locking it as long as the um stitches is close together. It'S going to be a-okay and, as you'll see, i'm taking my left hand, as i'm sewing with the right. I'M using my left hand to make sure that the lace is real tight on to the head, so there ain't no lumps in his flat. So, as you're sewing, you need to be having some tension, not tension where you pulling the lace off or it's going, making uncomfortably tight but enough tension so that you make sure you ain't got. No, you know little airy lumps you know in between, because you want it to be as flat as possible. So, yes, and in the style that y'all obviously seen from the thumbnail, we is gon na be doing a half up half down and, yes, you can do a half up half down with a lace front. What a sewing you don't have to have a full length to do. No half up no half down so don't feel like you restricted, because you ain't got no lace and that you think your traps gon na be showing in this schedule. You could do it with tracks too, like a half of heavy and can be now. You just got ta make sure everything is covered in them properly, but when we get to that step, i'll show y'all. So i'm just gon na go ahead and continue making sure. I'M securing my lace and i'm making sure that even in the front as y'all seen um while i was rambling, my mouth, i was making sure that it is flat. So just you know making sure your lace is completely completely flat. The frontal part when you're sewing it down, because you don't want any lumps so that you'll be able to party any which direction that you want to when the time comes. If you want to change your style and all that so i went in and finished, you know sewing down my um doing my complete sewing off camera because i do have another detailed video of how to do a frontal sewing stuff. Y'All want to tap into that tap into the braid powder, your foundation, so you can have a good, secure foundation um to your installs, tap into that too. It will be in that i card above and in the description, but right now what i'm doing is molding. The hair to prepare for this type of headband, so y'all can see i'm taking my keurig wet stick and i'm parting in a horizontal motion: horizontal right, yeah, horizontal parts straight across the head and i'm literally hot combing everything bad. So i'm taking my wet stitch first, because the wax did really like with the heat it just really like melted, soak, a real flat and then just take the hog home and just push everything once it back to the bed to the back to the bed. So, just hot call me everything to the bed everything to the bed to the bed, everything to the back everything to the back of the bed, because you don't need no parts. So don't even worry about it, just hot comb. It make sure it's flat and be mindful that the heat that you are putting on your lace from the roots, it is a possibility that that foundation can smearge over so be careful you're, not letting the hot comb see. Unless, obviously, you don't want it to happen because one you don't want to burn the lace too, you don't want to burn your client, but like just run it through just real, quick or take it, you don't want the teeth to be pressed into the legs, because The foundation will smurge up smurge, merge smudge over, like it'll, like catch on to the heat and then it'll be able to glide through the hair, so just be careful of how much heat you're applying to the lace. You still want to be flat, but you know also remember you got some. You know makeup underneath so right here. What i'm doing is i'm taking a section on the side of the hair, so i'm able to part out where my um half up finish started and because i don't want the tracks to be seen, i don't want the lace to be seen and i'm having extra Hair to recover the tracks of where they stopped it, so you need to take all that into place. So what i'm doing on one side i'm doing to the other. I know i'm going really fast, but all i did was take a while really fast, because i fast forward the video uh, but all i'm doing is taking hair and i'm parting it on this side. So i have hair to go over the ear to go behind the ear. Like you know how you put your hair behind your ear, that's all i did and then i took some more hair to cover the tracks. So you want to be mindful that you is covering the tracks of the sewing, so you need to take hair to cover it and make like a pyramid like a v so that the hair like going up so maybe like a upside down v. I don't have any clips of the back of the head or the side of the head, while i am doing this so if y'all feel like i do need another in depth. When i do have another half of half down y'all. Let me know i make sure to film that, but you want the v to be um going upwards, so not down like a upside down v. That'S how you should be so it should be upside down v so that the hair is falling to be able to cover any tracks that could be. You know the top of the head is going to be the point of the v and it's going to fall down if that makes sense, so i hope that makes sense, but the visual y'all know y'all. Let me know if y'all i understand girl but yeah. So um, the next step that i did was the baby hairs off camera and when you're doing stitch 13 or any color hair, it is recommended to use free spirits of a gel. So the baby ears are able to be seen, don't use the gel because sometimes especially with 6 13 hair, the baby hair just be getting lost in the sauce. So a tip i learned is to just use the spray and the mousse to mold it and then um i kind of deleted. Well, i didn't kind of i deleted all the times. I did this half up half down like the ponytail holder, chad, and did it so much? I don't. Did it one time for this video and it just looked so perfect, like i just put it in a point saying it was good. First, try shall i wish, but um yeah, so you just go. Take your rubber band. I like to take two rubber bands, so i have a whole secure, rubber band and then um take have my client hold the hair and then take the little piece of hair and just wrap it around to cover it. So it gives this illusion. Don'T worry, it look real high, but it is giving waterfall half of half down. Don'T worry! Okay, so now i'm going to go ahead and crimp this whole entire head. I really don't feel like y'all needed it to see me crimp the head girl, because you know crimps take a little minute, so the iron i use will be in the description. It is from bed head the goat, the best crimp iron out ya, because they got four different type of crimp levels like what's up but yeah. So i just literally crimped the whole entire head use my um free spray. First and then i use my crimp iron and baby. We in there like swimwear because whole crimps whole crimps, okay, yeah what happened? Okay, so um. I didn't show this far. Maybe i should have so y'all could know what to afford. But you know like sometimes you don't want to be like okay, you know if you move a certain way, this might show you move a certain way that my show i didn't want any of those errors. So i noticed that one of the hairs was in the ponytail that needed to be down, so i had to take down the whole entire ponytail to redo it, and i just scissor comb the ponytail, because y'all don't want to don't give yourself more headache, but i Literally, just um cut that out and then i'm about to show you how many times it takes me to do the ponytail it fast forward. But i left how many times it took me because should i always be something, but because there was a piece of hair in a ponytail that was messing it up, showing the track. I did have to take it down and then redo it again and then, once i let that hair come over, it was literally perfect, like literally perfect, so i'm gon na continue doing the same steps after i didn't get this ponytail right. However, time many times it takes me and when you are molding, your ponytail too make sure you use your free spray and blow dry in it blow dry. It mold it first before you try to put your ponytail because it will be wet. You will have indentations, it will be this. It will be there so make sure you blow dry, it first and then take the rubber bands, and i like to take two so that it's sturdy and thick and it ain't popping on me. Then i do the ponytail so mold it using the um free spray or you're any talent spray that you like that will hold the hair. Even if it's spray blow dry, it first and then do the ponytail so that you know hairs be liking to do their own thing. Sometimes, so you got to tell them and demand what you wanted to do so they'll go ahead and do that. So i'm just going to do the same steps cover the rubber bands, because we don't want the rubber bands to be seen so you're just taking a piece of the hair from the back of the ponytail taking a thin. You know little piece wrapping it around with a free spray, keep wrapping, keep wrapping tucking, it tucking and literally that's all you got to do didn't want to go ahead and i had to touch up the ponytail crimps because they kind of did mess up a little Bit it kind of lost this little crimp. It was giving more of a wave, it was still crimp, but the perfectionist see me i'ma go ahead and re-go over it, so you want to go ahead and re-go over it, and now i'm taking some of my styling sprays for fantasia and i'm finished spritz that All over i'm also going to take my own, my fantasia heat, protecting thermal spray in this red bottle, i'm going to spread it all over and it really have a good smell and a shine to the hair that it gives love that product. It is a mold free spray, because you know we want these crimps in the style to last so spray it up, even if you want to use sprints spritz that thing up okay period, so yeah that basically sums up this video, i hope y'all enjoyed. If you have any comments, questions or concerns, you already know, did you go ahead and put it down below and i'll check your light in the next one, don't forget to check out the descriptions for all the links, items, products and all the information that you need To know down in the description box and don't forget to subscribe to be a part of the diabetes game, cause diabetes, taking note, okay period, trust so um
Comments
I AM DETERMINED: You are very talented. !!!
Glamourgirldavi Doll: Hello love your videos. Want to know if I could send you my products to promote. It’s a waterproof lace glue and tint
Khaliah Joyner: Hey did u put all the bundles in the back or did u add one to the ponytail
ilovethegame12: New subscriber you sound like you from Dade. Im in Broward looking for a good hair school
BriT- BriT: Notjing is in the description box babe