Watch Me Install This Hd Lace Frontal Wig | 30 Inch | How To Pluck & Bleach Knots| Beginner Friendly
- Posted on 03 October, 2022
- Lace Frontal
- By Anonymous
#wigs #wiginstall #frontal #hdlace
Watch me install this HD Lace Frontal Wig | 30 inch | Plucking & Bleaching Knots | Beginner Friendly
Social Media’s✨
Instagram: official.skyee_
Tiktok: Isabella_skye2
Pinterest: skyedior11
Business Email: [email protected]
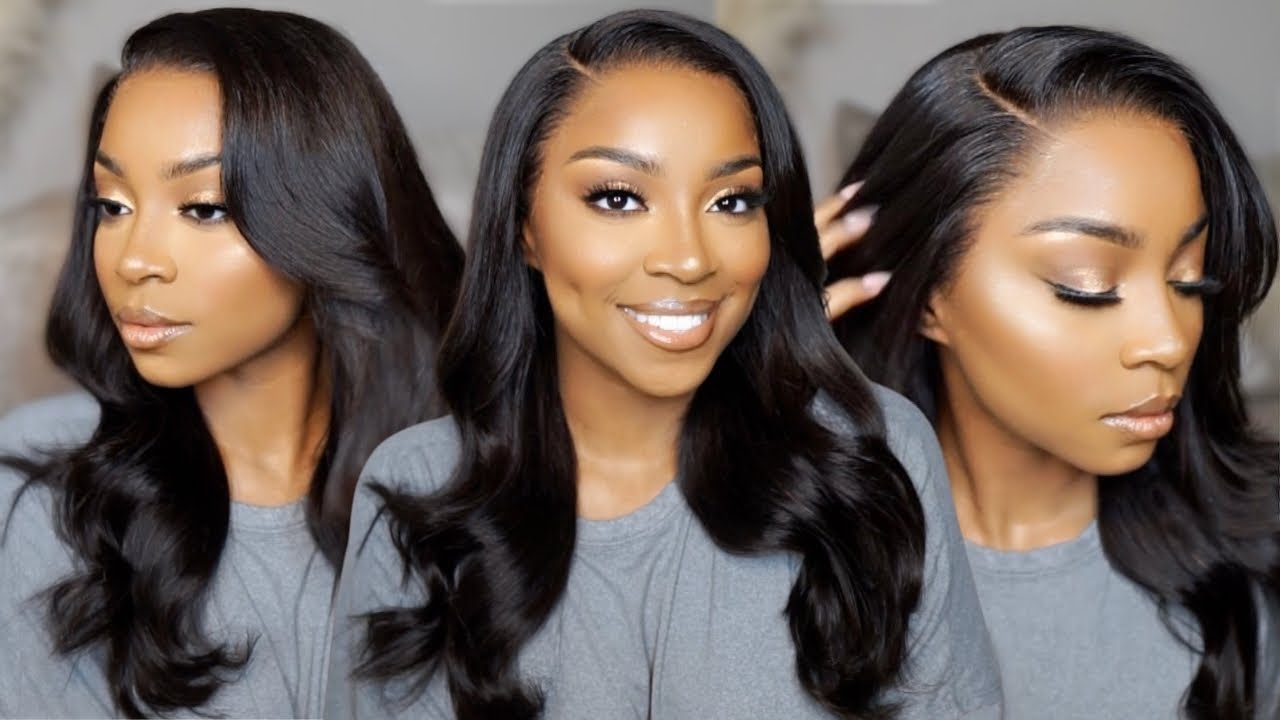
Hey guys welcome back to my channel so for today's video we are going to be installing this wig, I'm going to be showing you guys how I base your knots pluck and style this week. But let's get straight into this install the products that I am using is bw2 and 40 developer, I'm just taking two scoops of that powder. I find that it's perfect for my 13x4. It is the right amount and taking the same scoop and I'm pouring at 40, and I'm doing two scoops of that. This is how it should look when you're done mixing it shouldn't be coming off the stick. It should just hold this place so now I am applying it to the lace, I'm doing it firmly, but not too firm, because you don't want the product to go through the lace and get on the hair. You just want it on the knots. This is how we are looking so far. I let the the mixture stand lasts for about 30 to 40 minutes, but I had to bleach it two times because the 40 - yes, it was too strong. So I use 20 developer and I let the 20s sit on the lace for about 40 minutes and my knots came out perfect foreign, so I am starting in the middle we're going to work in sections. Okay, when you're plugging make sure you're moving around, don't stay in the same spot, because you're staying the same spot, you're gon na over, pluck that spot so move it around to get it even and looking natural foreign. So now you are going to part out at peace, so you can start working behind what you just put. Your main thing is to not over pluck the wig. You rather have a under plucked wig than an over plucked wig, because if you over plucked, then you cannot add that hair back like so just take your time. So I'm doing what I just did in the middle, I'm doing it for the rest of the wig. So so I just got done plucking the sides in the frame. So look at this compared to this side. I didn't pluck this side at all yet but see how it's looking like. I plucked too much right here, but uh it'll be okay. We'Re about to install this this way clean, all the if I had all or any dirt. We want a good, clean and style. I want to make sure the glue sticks. Take our Evans extreme firm, hold spray. I am cutting the I'm cutting near the ear, so the cap can lay flatter. I let the cap dry for about five minutes it. It dries super quick, so I'm just cutting the cap um, I'm doing it right in the middle, because it's a little extra cap, the extra cap right here - you put it back behind the head, so it doesn't roll in the back. It'S Gon na Keep the cap secure down. Now, I'm just applying my Maybelline powder on the cap and I did put some makeup. I put the same makeup on the lace too right now, I'm just see how it looks on my head. I am cutting the ear tabs off, so I have went to the hair store and I have picked up slime. Evens lace, wig extreme firm hole this spin. They said this is really good, so I'm gon na try this and I bought some sprints and um elastic band. We'Re gon na put this glue on foreign. I don't know if I want to do a a middle part or a side part. I'M thinking I'm gon na do a side part, because that part looks super good on me and I'm gon na do my um laying down a wig in sections still kind of new to doing wigs. So I'm just going to go in sections. I'M gon na. Do the middle, then I'm gon na do the sides, or should I just go? Oh, do all at once. I'M gon na just see the inner wash drying I'm going to be cutting off these inner tabs because I don't need them and they're gon na make your wig very bulky and there's no need for them. Yeah I'm cutting off the tabs and the only the only one I'm going to leave on is the back one. That'S it. Okay, we're gon na do one more layer, but wow that is drying. I had went to Sally's and I got the bio silk treatment. This is really good. I'Ve been hearing so much about this, so let me go ahead and buy it. It was about 15 for the small bottle, but I'm like okay here good with you. So let's go ahead and get it. It'S been drying for about five minutes. So I'm just gon na lay the lace down. Let'S see yes, I know the glue is still white, I'm very impatient and I was waiting for about 10 minutes for the glue to become clear, so I'm always taking too long. So I'm just going to go ahead and glue it down plus, I know how to melt a lace, real good, so yeah I already know I need one of my comments saying you passed away you post away. I know how to do it spraying. The Sprints is going to melt it and it's going to melt your lace. Basically, so I'm going to add the elastic band, I am doing a side part he protected on it. You just need a just a just a dime size. You don't need a lot if you put a lot you're gon na weigh the hair down. Oh, it looks like scalp. I do see like a little bit of glue, but that's okay. That'S fine! Though the razor head um cut the hairline very crooked, so I have went in with my scissors to get it back right. It goes right here and my camera had that in the middle of me, cutting so we're just going to go straight into melting. The lake get it melted back, I'm going to spray this sprints again and that's going to get the lace melt. It just put the elastic band back on foreign foreign out the baby hairs hot, coming them out, I'm cutting at a angle so the swoop. So I can swoop into the hair I'm getting my flat iron and I'm curling them up, because when you curl them it blaze, it lays the edges down so much better. I'M taking this um Gorilla Snot and I'm using that to lay down the baby hair. I hope you guys enjoyed the video, don't forget to like subscribe and comment and I'll see you guys. My next video bye


Comments
kutzoffdchain: PHENOMENAL YOU LOOK AMAZING AND TOTALLY GORGEOUS