How To Bleach Knots & Pluck Frontal +Style | Beginner Friendly |Ft. Tinashe Hair|
- Posted on 23 December, 2019
- Lace Frontal
- By Anonymous
Hey y’all thanks for watching hope you guys can take a tip or 2 from this video love you all thanks for all the love and support see you in my next video
For all business contact me at [email protected]
♡ ♡ ♡ ♡ ♡ ♡ ♡ ♡ ♡ ♡ ♡ ♡ ♡ ♡ ♡
KEEP UP WITH ME ON ALL SOCIAL MEDIA
Instagram : https://www.instagram.com/_shaniquaaja...
Snapchat : Nunnaa16
Facebook : https://www.facebook.com/shaniquaa.jah...
Twitter :https://twitter.com/_shaniquaajahyy
●▬▬▬▬▬▬▬▬▬※ Tinashe Hair ※▬▬▬▬▬▬▬▬●
Tinashe Hair Official Website: https://www.tinashehair.com/
Hair details: Body Wave Transparent 13x4 Lace Front Wig 22inch 180%
Same Hair in the video:
https://www.tinashehair.com/product/tr...
New Upgrade Higher Quality Lace Wigs Up To 55% Off
Hot Recommend Lace Wigs:
Human Hair 13x4 Lace Front Wigs:
https://www.tinashehair.com/product-ca...
Short Bob Wigs:
https://www.tinashehair.com/product-ca...
13x6 Deep Parting Lace Front Wigs:
https://www.tinashehair.com/product-ca...
360 Lace Frontal Wigs:
https://www.tinashehair.com/product-ca...
#Tinashehair #13x4lacefrontwig #transparentlacewig
Want To Win Free Hair And Get Our Latest Promotion? Click Here →
Instagram: http://bit.ly/2Isud9X
Facebook: http://bit.ly/34FxUAm
Contact Us: Whatsapp/Tel: +86 17537405381
Email: [email protected]
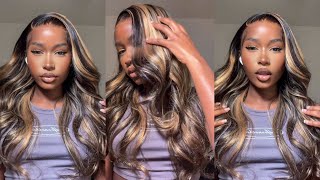
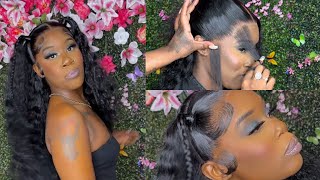
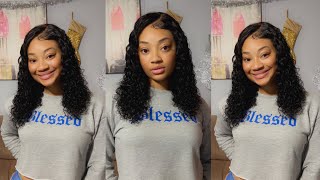
And then the fans so um, if y'all, watching this and you're gon na put this at the end of the video or the beginning like I'm subscribe and follow me. Okay and in this box it comes with the wig, and this wig is actually 22 inches. It also comes with a little bag, and then it also comes with the little directions and their Instagram and Facebook and all their information in this bag. It also comes with adjustable strap and this one is actually the one that's just like a bra, strap kind of which is trending right now. So I guess it's really simpler than a regular one and it also comes with a little mirror in the inside and it comes with a wig cap which comes with almost everyone's weeks, so y'all today, I'm gon na be showing you guys how I bleach in get My week to look really natural, and this is how the hair comes. It comes in a bag and just says, lace, wig and this one is 180 density. So that means it's semi full. So it's um semi for 150 is when it's thin and I love 150. When it comes to curly hair, which I have in my hair right now but anyway, so I'm gon na go ahead and open it up. I'M not trying to make this video super super long, but here we go so it comes with um protection on it and everything on there comes with a little hair net, and this is how the hair looks. Doesn'T it so this is how the hair looks. So this is body wave you guys. I really do not like body wave because body wave never stays body waves, so I might just go in and just curl this hair because I don't really curl on my channel, so I'm gon na go in and curl it, and this is the light brown tint Lace - and this is the inside - you guys - this is Tinashe hair and this is actual hair, so I'm just gon na review the hair just the first glance of it. It comes with a pre plucked hairline. It also comes with baby hairs already on here, and it still it's actually. Actually it's actually giving you a scalp effect already, but I'm gon na go ahead and get rid of those knots. So basically, I'm gon na go in and show you guys what I used to bleach. My knots I'm gon na go in with 30 developer. I believe that this one is more safer than using a 40 or 50, because 30 goes really slow in and process the hair. The way it's supposed to be nice and slow, you don't need to rush or anything like that and then I'm gon na go in with my BW. I haven't tried the blue one. I'M gon na try it one day, but I'm gon na stick to you know what I'm using is always use. So I'm going to go ahead and show y'all how much I use and I'm gon na use my little. Basically, it's two scoops of bleaching powder in here. I'M gon na go ahead and go in with my 30 developer. If I can get it open and with fish, you guys, you don't want it too much in there, so I'm basically gon na show you guys how I do it. I'M gon na go ahead and pour just a little bit. We don't want too much, because we don't want it thick. Okay, we just want enough back to where it is like a paste. You super thick but think enough to not seep through there like this. So basically, this is how it's it's not running or anything. It'S this okay, you guys see I'm putting it on there, but what you don't want to do is press down. So don't press down. You just want to gently put it on there, so you basically don't apply any pressure, just set it on top and just try to move it around without applying any pressure as best as possible, and then this is all we have. So this is how it looks. Y'All, it's already ready to go. I'M gon na leave this on here for 45 minutes and then I'm gon na come back and I'm going to check on it. I don't use any type of foil or anything. I just leave it this way. Okay, you guys. So I went in with the shimmer lights just to tone down the retinas. This takes away at the orange and takes away any like hue to the lace front, and then once I was done with that, I went on my Shea Moisture. I mean I Shea moistures. Might resume, and I just used the conditioner and shampoo to rinse it out. I left the purple shampoo on there for about 35 minutes. You don't have to do that, but I do it just so that I can see through it. I don't want to have any breasts in this on my wig. I don't want it to be like a little reddish, orangish color on my head. So yes y'all, that's! Basically, I did okay y'all, so I'm actually done cleaning it and we'll rinsing it off and now, as you can see, we got a straight scalp going on. I mean I'm trying to do it. Oh yeah, oh you can see now is that it's straight scalp and you can't say that, like nobody scalp - and this is how the hair looks, it did lose its curl pattern, but we're gon na get right into that. Once I her to the doll head just want to show you guys, the accent came along with it so, but this is so gross, but I got to show y'all it is. I don't only nothing now when I did hair reviews so try to be more detailed when it comes to it but y'all. This is the access hair that shaded from the hair not too much. This is so gross y'all got a problem with like wet stuff, and I'm trying to do this for the sake of this video. But this is this Yeti that came with it whoo yeah anyway, so this is the accident should exercise, should I take it down, but this is the excess shedding that came with the hair once I just watched it and bleached it and yeah y'all. So this concludes this part guys. So I'm back and the hair is dry. I just want to show y'all. This is the curl pattern. As you can see the waves the waves have came out and it's so soft y'all, so freakin soft. That'S why it's always better to co wash. It looks so cute still the way stuff came out. I don't know I'm already going to go ahead and curl it when I wear this unit and just want to show y'all the part in spaces and everything in it before we um. This must have been like a party that came with it. Okay, but before we get into it, y'all's hair is so soft. So pretty I don't know what is it Tinashe here? It'S pretty mmm! Okay, that's crazy, like all the hair coming in reached out to me has never been like a mist. It'S always been a heat. You know some hair companies the hit or miss, but anyways y'all, I'm gon na go show you guys how I cook my units um to get in a little room. Cuz! That'S all we want. When we wear wigs. We want it to look real natural, I'm gon na bend this forward, so y'all can see okay, so basically, as you guys can see, you can see a demarcation basically of where the hair stops and what we're gon na do is um, just pull it back and We'Re gon na go ahead and make that disappear, and you don't want to plug in the same spot, because you have a bald spot, so I thought was saying guys: don't plug in the same spot like don't go over the same spot. You just pluck and other places, because if you plug in the same spot, then you guys end up with a boss but a bald spot. But what I'm doing here is just I'm just plucking it lightly first and then, once I'm done plucking it lightly, then I go like more. I get more into plucking it more because now I see where it's going, but for people who don't really know how to pluck you just want to don't start. You don't have to start this way, but you can, or you can start by parting it, which I'm going to show you guys in the next clip. But you guys pluck to your liking, don't pluck to my liking, because I like my way to look really natural and then I pluck a lot. So a lot of hair was coming out and I think I showed you guys in this video, but basically don't pluck in the same spot. That'S all you doing don't pluck in the same spot, make sure you maneuver around and you just eyeball it to get it to what you like. Now, I'm gon na go in and just party, but when I do this, I don't make a straight line. I'Ll just go like this, and let it do this thing. You know I'm saying we want to start one area first and I'm just going to go ahead and just look okay, y'all, so I'm back and basically this is how it came out. So this is the hairline I went in and plus stick to my liking, so you just go in and pluck it to your liking. So basically make sure you don't stay in the same spot too long, don't go over the same spot because then you'll have a bald spot, but this is the hair that came out. Let me show y'all, so this is all the hair that came out of this. So this is all the extra hair that was making it look a little bit too thick, and this is it guys. So, basically, that is how you plug so just to recap, one quick time you go in if you see like well, you can't see it anymore, but you kind of see like a demarcation kind of in this area. So if you see demarcation in your wig, all you do is you go in and you just pull pull pull, pull, pull pull, and this is about the safest way to like not have your frontal bald but it'll. Have it looking really really nice and you don't want to over pluck either so basically, this is how I got it. We have this side, we have this side and then, when I turn it this way, we have this side. Okay, yeah. So I'm just sectioning off the baby hairs. You don't have to do this. Some people like to keep the baby hairs on there and then do it when it's on their head, but just for this year, I'm not going to install it. So I'm not gon na. Do that and then I'm gon na go in with a lot of body. I love this foaming mousse. I don't know what it is, but I've just been using it for a while, and I just love it, and this is what I use to put on the edges, to lay it down just for styling purposes on the mannequin head. I do use it on myself. Sometimes, but I just tell my kalgan's the residue of my forehead, so I stick till I got to be for my own edges by anyway. That'S besides the point y'all, I'm not good at curling hair, but I kind of was getting the hang of the bang. I'M still getting the hang of the bang coming forward. If you know what I mean, you know how you bring the bangs forward and make it look so luxurious and so beautiful so y'all. This is like my first time ever doing a little bang like that. I'M gon na start to try to do it on myself. If I install this hair, I might not, I'm not sure you guys this unit is gon na be for sale by the way. So if anybody wants to purchase it, this is gon na be one of my nan used wigs, so yeah. If you want this week, just contact me but anyways y'all, I'm gon na let this video play out, I'm just basically just styling the edges and you guys already know how that goes short of the edges, the better looking the edges in a more natural it looks And then from there I'm just gon na go ahead and play with it and tool. I, like the bang and basically y'all I like to do better when the curls fell out, so I'm gon na go ahead and just play with this hair and then I'm gon na show you guys some ending pictures. So yes, y'all, if you like, we've seen if you like coming and subscribe, make sure you follow me on instagram @ underscore Shaniqua jay and lay em out so yeah, while I'm doing the baby hairs and there's nothing else for y'all to listen to I'm just lemon Top y'all the thing that I like about this hair. Well, basically, I really did a good job by plucking. I didn't pluck too much hair and I didn't leave. I didn't pluck too much hair, but I left enough to where it looks natural. I love the hairline that I gave to this hair so make sure you take all my steps and you're gon na have a week. That'S gon na look super super natural okay. I want me to lead you guys it all: okay y'all, if y'all still watching this video steel, i'm just want to show you guys. The versatility in this hair i'ma leave everything down description bar this hair is actually from Tinashe hair. I love. I actually love the texture of the hair. It was really soft and when you co wash it that's, when all the texture comes out, it still kept its shine, it's more of a jet-black. So does somebody can get any like brown hair sent to me? It'S more of a jet black. I love the hair. If you do some shedding, as I showed you guys, a few clips back but you're on with everything description bar like what you've seen know to LIKE comment and subscribe, and this video is about to - and I might come back with a install, I'm not sure but Y'All, thanks for all the support, love you peace out, you

Comments
Destini Jerido: Yeaaah I’m gonna go ahead and save your video ! Very detailed . Thank you !
Jessica Auguste: U did good with curling the hair
K P: Thanks for the tutorial. Loved the throwback song "selfish." omg I can't remember her name though!
Marjic Look: Hello. Thanks for video. Why is there need to bleach the knots?
Xx10XPxX 0: What is your ratings on tinashe hair
LifeAsDaijhaa: It says transparent but you said light brown , so it’s light brown instead of transparent?
Queen Gemini: Tinashe hair rating?
Asya Woods: intro song ?
LadyK: *excess