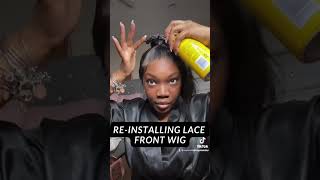
Instaling Lace Frontal With Bald Cap Instagram Method Fail - What Not To Do.
- Posted on 20 December, 2017
- Lace Frontal
- By Anonymous
Hey guys, I wanted to give this method a try. lol I hope you guys can take away from this video what not to do when it come to installing frontals.
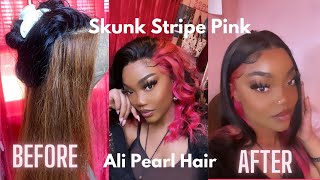
Hair - Mongolian Body Wave 3 bundles and frontal
Social Media
IG - @GlambyMerry
SC - HaveAMerry_Day
Email - [email protected]
Hey guys welcome back to my channel, so today, I'm gon na show you guys how I achieved my custom color and also my install process. I'M gon na be using my clothes bleach and my developer in 50 volume. I'M gon na be mixing this two together to get a very nice liquid consistency that will flow through the bundles, as is considering the fact that I am NOT unraveling the bundles I'm gon na be bleaching them, while it's still bundled up. So I want the consistency of the bleach and the developer to be very, very loose and liquidy. So that way it flows through the bundles are very easy, so very easily can speak english thing, but yeah. I just find my find that I have more control this way. If you want to see how I installed this hair using a stocking cap method - and you don't care for this process - go ahead and hit for a minute in 30 seconds and you'll go right through to that portion of this video, but for right now, I'm gon Na be showing you guys, the customization of the bundles and the front holes and all that good stuff. So, as you can see, the hair is already lifting so I'll, just here lift very, very fast, like super fast and then the lace on the actual front. Oh, I am just gon na be doing the same process except I am gon na be making sure that the consistency of the bleach and developer is much thicker. So that way it doesn't seep through the lace at the front. Oh so yeah, that's! Basically, the only difference just making sure that the mixture is thicker at this time, and it's more it's it's more on the hair versus flowing through the lace, okay, so yeah. What I want to do right now is go ahead and take the lace so that way it matches my skin complexion, I'm gon na be using a door and dark. This is like a dark brown color. So I'm just mixing like a teaspoon into a tub of hot water, and I'm gon na be taking the lace and just dipping it in there for about 30 seconds and your base is going to be snatched so that way, when you put it on the scalp. It'S gon na mimic your skin tone, it's just gon na melt into your hair, especially when we do that stocking cap and yeah. It'S just gon na be so natural. You wouldn't have to doing this. You'Ll have to do like, like the amount of customization you're gon na have to do, is gon na be so minimum for if you do go ahead and do this step and yeah so for the front door, I'm just gon na be leaving out about an inch Worth of hair from the roots - and I would not be putting bleach on that portion because I want the hair to have dark roots because the color I'm going for it's gon na, be so wild, so vibrant. So I kind of want that the roots to remain dark so that way, still kind of looks on an average day so yeah. Basically, this hair is a super fast. I kitchen that, like in about 20 minutes into bleaching, this hair is already gone. Okay, so I'm just gon na take it to the sink and just wash off the bleach and use my neutralizes neutralizing shampoo and also my proper shampoo to wash the blonde hair. So this is what the bundles look like after one hour of sitting in the bleach, I'm just mixing my color, I'm using the door and cherry red. I think I'll check again later and put that in the description so make sure you guys look at my description and this part is like literally the quickest part, I'm just applying that color on to bleached bundles. The hair so looks very healthy, still felt very soft and yeah just taking my brush, I'm just gon na be brushing through the color. So that way it seems. Thank you every single strand, essentially so yeah. This can get very messy, so make sure your tables are covered up, you're wearing gloves and you're good to go, go ahead and use the same method for your front, toe just apply and about an inch off of the roots. Just so you kind of maintain that dark roots. You can go ahead and add it a little bit in the roots, but you know just have a red hue to it. I was opposed to just black, so that's why I kind of went over it a little bit just to kind of blend it a little bit more. So this is what I attempted. This is my failed method of the stocking cap. I was, I thought I was Anthony, cuts, okay, so I went ahead and I had my gasping goose laid this. What the stocking cap on my head glued it down with the guys to be glue and free spray and girl. Let me tell you, don't do this like I have so much glue on my hair right now. I swear I could be bald, but in this video, but we thank God. God was looking at for me. So here's what you should not do do not apply and I've seen like don't apply too much glue on your head. You don't need that much glue for this method. You really don't. I pried it way too close to my eyebrows so necessary. Please do not do this at home, so careful I didn't need to put as much glue. Oh, I didn't even let the first gel to dry and went ahead and add the free spray, the guys to be free spray on top of the already tacky glue, making it freakin impossible to dry. So I have like triple layers of glue on my hair from when I attached it stocking cap on to when I was trying to make my hair tacky enough to lay down my front. Oh girl, don't do this, so I knew I up when it had to use makeup on my stocking cap, because makeup and the glue and all that was just on like my cap - was way too Brown or way too tan, and I was trying to use makeup To blend it to my skin, and I'm over here really struggling putting my frontal next to my eyebrows, where it doesn't need to be girl girl. I don't know why. I keep thinking Instagram, you guys. I literally was like it. I was like I went to my bathroom, took this: damn thing off, went in the shower and watched this whole thing off, and I had to do my hair and all that makeup. That'S it all over again, so this is what I normally would do on a regular day when I am sane when I'm eating and I'm thinking reasonably so just applying a very, very thin layer on my hair just to sleep down my actor here. That'S all! I'M doing first right, so what I then proceeded on to do is take a thin layer again, which I think at this point is a little bit too much, but I'm just gon na adjust my cap first, just to make sure we're good and secured. So I'm just I applied a very, very thin layer at the bottom. Before I put my wig up, I don't know why I didn't capture that on camera, but I did, and I'm just gon na be using my baby hairs to kind of basically secure the wig, because this hair did not stay on for more than two hours, because I only put this hair on for the purpose of this video so anyway, so just taking those baby hairs, writing them down. With your guys to be glue, I took a little thin rag and just like secure them, make sure they are laid for a little bit that I will be leaving them on for, and I just proceeded on to one curling, that's hair. I always want to curl away from my face just to kind of give it that nice sexy bombshell, looking you know, wave going on, and I'm just going to do this for all over the hair and by by the way, all the tools and things I use In this, video will be listed in the description, so make sure you guys check them out and yeah before you asked any questions. Look in the description please! So when I was done, I just took a vent brush and just brushed my hair just to kind of loosen up those ways, because I don't like my curls being so defined. I find them very irritating when they are all like aligned. So I just kind of use my fingers to kind of further brush them out and loosen them up, making sure that they are more on the way. The end, then, I just did a little bit of back combing to make sure like I get that little umph and bump at the top, and then I used some spritz, not some spray, some hairspray just to spray them down and use some clips to hold them. So that way, they're still very nice and still bumped up by the time I take them out and ready to you know, step out the door and slay this hair. You guys I'll okay feel like I did on baby hair. Like I don't know, I really don't know today when I did this video I was so off. I swear I was so. I should have stayed back in bed for like two more hours and had like breakfast or something because baby girl, but anyways you guys get the gist. Okay. Thank you guys so much for watching. I appreciate it make sure you like comment, share subscribe and I catch you guys in my next. Video have a merry day and God bless just a slant.


Comments
Joley Anne Vennes: you pay so much attention to detail and the result is ALWAYS amazing ✨
Mrs.RED'VON 77: The end resort end up being just beautiful girl we all know when it comes to hair you have to have patience and mistakes will be made thanks for #Keepssupportingsmallchannel like mind God bless peeps #checkoutmychannel
Ikkey73: Cute! Love the color
imperatrice_VI le chat le plus cool enville: you did a good job
What's Coming Out of Your Mouth Podcast: I love the commentary
GlamDiva_J: ❤️
Pure Estrogen: Pretty.
DivaNy hair: This color is to much , cute
Hernande Felix: First comment yayyyyy
annica jackson: First gang