Crochet Floral Hair Accessories - Step By Step Tutorial
- Posted on 13 May, 2021
- Hair Accessories
- By Anonymous
This video will take you through on how to crochet a flower piece for hair accessories. It is very easy and simple to make. I hope you enjoy the video. ❤️
FREE PATTERN: https://lushandicrafts.com/how-to-croc...
Suggested Yarns, Hooks & Clip Materials (include affiliate links)
- Soft Baby Pink Vardhman Acrylic 8 pc - https://amzn.to/3fSV1iR
- Maroon, M.G Enterprise Soft 4 ply - https://amzn.to/3x489aN
- Vardhman Knitting Yarn Soft Wool Ball(Mix Colours) - 20 Pieces - https://amzn.to/3cjxOUC
- Hooks (combo box, 51 pieces) - https://amzn.to/34TqF9q
- Metal Plain Hair Clips (50 pieces) - https://amzn.to/3cjtXqZ
Find other similar videos here:
1)How to crochet puff flower https://youtu.be/AmnIDbbYT28
2)How to make flower Using Yarn and Disc https://youtu.be/6z31te_JRKM
3)DIY wedding brooch https://youtu.be/Juen1j9lY8s
4)DIY flower with pencil https://youtu.be/WAhhHiQLKTU
If you're new, please subscribe to my channel. And let me know what you think in the comment below. I'll be forever grateful for your support. This channel exists only because of you guys. Thank you so much. Stay blessed!
Also find me on
Instagram:
https://www.instagram.com/lus_handicra...
Facebook:
https://www.facebook.com/Lushandicraft...
https://in.pinterest.com/lus_handicraf...
#LusHandicrafts #Crochetflower #CrochetHairAccessories
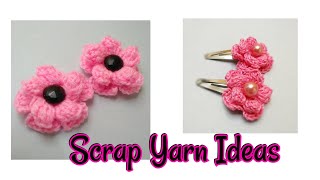
Hi everyone welcome back to lou's handicrafts. Today, i'm going to show you how to make this beautiful flower with bead in the center. It is quite easy and simple to make, so i hope we will have a lot of fun together, alright, so to begin, we will require a three millimeter crochet hook, the smaller the better. Also, we will take the yarn of our choice for now. I'M using this turquoise color and then make a slip, knot and chain it in the multiple of four the longer the chain. The bigger will be the flower, so i'm gon na chain up to 60 plus three chain at the end. So this is 61 chain 62 and 63, and now we will leave the first chain second chain and into the third chain. We will make one single crochet, so one single, crochet and then chain up four one, two three four. Then we are going to leave one two three stitch and into the fourth make one single crochet chain up four one, two three four leave three stitch, one two three and into the fourth, make one single crochet chain up four one, two, three four lift three stitch: One two three and into the fourth one single crochet. We will repeat this throughout so chain up four one, two three and into the fourth chain. We will make one single crochet, so we will do this all across at the end of the round. You will see that we are left with five chain, so, as usual, we will chain up four and one single crochet into the fourth chain, and then we will just put one single crochet into the last chain to smoothen it out one single crochet chain, one and Turn the work and so far this is how long we have made our chain. Now we will put one single crochet into the chain: four space, one single crochet and then one double crochet, two, three, four, five, six, seven and eight double crochet. Then we are going to put one more single crochet into the chain, four space, so one single crochet and that completes one petal now into the next. We will repeat the same one single crochet, then eight double crochet, one, two, three, four: five, six, seven and eight double crochet and one more single crochet that completes the second petal just so the petals are separated and distinct i'll. Just push the whole cluster into the chain, four, so that they don't overlap, and now i'm ready to begin my next petal. So we will do this repeat: one single crochet, eight double crochet and one single crochet and the same goes for the next petal and so on till the row is completed. So do this and i will meet you at the end of the row. I am at the end of the round, and this is how it looks it is curling up now i'm left with the last two stitches, so i will put my last double crochet and one single crochet. Now that completes the last petal, and here we are going to put one single crochet into the next chain available, one single crochet, and now we can cut off the yarn, leave a long tail to sew in so now that's done and now comes the fun part Where we will turn this long strip into a flower okay, so we will start with the first petal and the petal is facing towards you and the base is facing outwards from you. Now we will turn this petal and fold it into half. Make sure that the tail is pointing downwards, then we bring the second petal hold it with our fingers, and we will wrap around this in anticlockwise direction. We don't want to wrap it too, tight or too loose. So just keep wrapping like this. The longer your chains are, the bigger the flower will become so depending on how big you want to make it. You can make your chains and there it is just like that, so we will need to attach this and fasten it with the body so that it doesn't fall off here. I have threading the yarn into the needle and now i'm ready to sew and attach it to the body, but right before that, you might want to cross check it and see if your flower is according to what you need. If it's too, loose or too tight, rearrange it, and once you are happy with how it is, we can then finally attach it to the body. So for this right from where our project ended, i'm gon na insert the needle and pass through all the petals come out in the front and then take a small stitch pass through all the other petals again and come out to the base or the back. So that secures the first petal now we will secure the rest of the other base chain. So we will pass through it and come out through all the other petals like before. Take a small stitch, go back in and take a stitch from the base and just pull the yarn through now. We will also take the base chain from the inner circles, so we will take this base and that base pass the needle through take a small stitch. Pass it back going through one of the base chain and we will secure it that way. Do this all around now, once this is done, you can see that the petals are quite secure and it won't fall off now. The working yarn is out in front and i'll change, the needle into a smaller one, so we can put the beads in now i'll just pass the bead into the needle and bring it into the center. Then i'm gon na secure it by passing it through the center and out into the base. Now once this is done, i will secure it by tying the two ends together now, once this is done, i will secure it once again by knotting it off. You can knot off as many time as you want i'll just knot. It off twice pass it through bring the yarn out the needle into the loop and just pull, and that's it and now you can leave it like that or you can hide the tail. You can pass the yarn through the whole base and hide the tail. So if you want to make it more secure, you can pass it back once again, and that is it. You can cut off the yarn here and that's how we make this beautiful flower by simple technique of crochet, and i really love it just pour the glue to the base of the flower and then you attach it to the hair clip just like that. Oh, it's kind of hot in here; okay, so just attach it, and that is it a very pretty hair clip that you can gift it to your friends as a handmade gift too oops. So that's it for this simple adorable and cute hair clip. Let me know what you think about this: also, they are great for accessories like hair bands, socks or bags. You can use the yarn or the tail, that's left to attach it with the project or you can just glue it to the projects and they will look perfect and that's it guys. Let me know in the comment section: what kind of project would you use this flower, for? I hope you liked this video and if you do, please give it a big thumbs up and if you haven't already, please do subscribe to my channel. I appreciate each and every one of you for watching bye for now.
Comments
Liliana Escalante: This is so helpful !!! My mom loved her new hair clip
Zina Ramos: Thank you. Now I can make hair clip for my granddaughter.