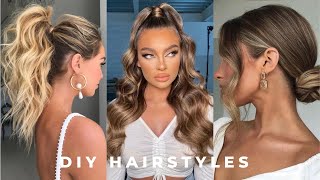
3 Diy Trendy Hair Accessories Using An Old Scarf I Easy No Sew Hair Accessories For Cheap I Recycle
- Posted on 10 June, 2020
- Hair Accessories
- By Anonymous
Hello everyone, i am exited to share with you my new video! I am going to show you how to make trendy summer hair accessories using and old stuff and for cheap. This diy is a great way to recycle old clothes and fabrics and make cute hair accessories for the summer. The best part is that they are super fast and easy to make :)
Measurments:
Bunny ears hair band - 80cm x 12cm (30 inch x 4.7 inch.)
Headband with a knot - 55cm x 16cm (21 inch. x 6 inch.)
Scrunchie with a tail - 55cm x 6cm (21 inch. x 2.3 inch.)
Follow me on :
Instagram: https://www.instagram.com/bori.theflo...
Facebook: https://www.facebook.com/The-flower-a...
Hello, everyone and welcome back to my channel for those of you who are new here. My name is bori and I'm super excited to have you so today's video it's again summer, inspired like my last one, but I was thinking if it's somewhere, we have to create cute stuff for the summer, and one day I was looking around the city for materials For my upcoming video and I passed by a trip store - and I saw this beautiful beautiful scarf - it has these beautiful flowers and summery colors. I saw this beautiful scarf and I knew I'm not gon na wear it because I'm not very big on wearing scarf. But I thought what, if I use this scarf to make three cute hair summer accessories. That was long and that's what I did so if you are really curious to see what I came up with keep on watching until the rest of the video. So let's get started first you're going to need an old scarf. I bought mine from the thrift store for 1 euro. If you don't have one - and here I'm laying my scarf and deciding which part I should cut for each hair accessory and for the first one, I'm gon na cut this part, and here I'm measuring how wide I want it to be. Mine is gon na, be around 5 inches wide, but I'm definitely gon na leave you the measurements in a second and also in the description below you can definitely cut it. Wider or less depends on your taste, and here are the measurements. Then I'm folding my piece in half and after this I'm gon na cut a triangular shape on the cut it ends and after this I'm gon na fold it again. So when I cut, I make sure that it it's even on the both sides. After I make sure that I cut it, everything nicely I'm taking my fabric and I'm gon na unfold it, and after this we have to glue for this step, you can use glue gun. In my case, I use glue, gun hot glue, but definitely this is optional. You can use fabric glue or you can sew it, but for this step I decided to use hot glue, because I wanted this DIY to be fast and easy in here, as you can see, I'm starting blowing from the middle and I'm moving towards the end, and I'M gon na tell you why I do this in a second instead of blowing from beginning to end and when I finish gluing on one of the sides, I'm going back to the middle and as you can see, I'm going to leave a little bit of space And continue gluing onto the other side, and I left this space in the middle because after this, when I finish gluing, I need to turn it inside out and here I'm gon na use scissors to push it out. Definitely it helps for these pointy edges, but I recommend not to use scissors because by accident you can cut it. That'S what I was afraid of, but fortunately it didn't happen. So when I turned it inside out, I'm going back again so the middle part, because I need to close it up and for this again, I'm using glue gun - and here I'm gon na - lay it nice and flat and use a few dips of glue to close It up and that's it that was the last step and we officially have our first hair accessory ready. As you can see, it was super fast and easy, and after this you just have to put it on your hair and make a knot to make those bunny ears. And I think it looks so so cute and it's perfect for the summer and now on to the second hair accessory for this one. I'M gon na use this flowery part because I think it's gon na be perfect for the headband, and here I'm gon na cut it and, as you can see, my edges are pointy, but I definitely recommend to be a square. But I couldn't cut a square because I wanted to use most of the flower part and here I'm taking my headband and make sure that I'm gon na have enough fabric to cover it. And here I'm taking my glue gun again and I'm gon na go from one end to the other and, as you can see in this tutorial, I'm gon na use the blowgun a lot. I think it's the best invention ever, especially for deer wires. Like me, who wants to make cute stuff fast and easy after this, when we are done gluing we're just going to take our fabric and turn it inside out and after this we're just going to lay it flat and make sure that the glued part it's in The middle, because when we attach it to the headband, we wanted this part to remain hidden after this I'm taking my headband, and I make sure that the both sides of the fabric are even when we fold it in half and after this we're just going to Make a knot on the top of the headband, and I make sure that I, like the shape of the knot before attach it to the headband. And here I'm just going to take the glue gun and put a little bit of glue. And I'm just gon na. Take one of the sides and press it to the headband after this, I'm just gon na cut the rest of the fabric that I don't need, but living a little bit in the end, because we want to attach this to the headband to have a nice finish. After this, I'm just gon na put more glue and I'm gon na attach the both sides of the fabric. So it has a nice finish in the end. After this, you just need to repeat the same step on the other side of the headband and, as you can see, it was super fast and easy. I think it took me around 10 minutes in total to do it and definitely you can use old clothes or old fabrics that you don't use anymore to make them, and I think they're, the perfect hair accessory for the summer and actually they're super trendy this year And the best part is that you can make them by yourself, and now we got to our dirt hair accessory for this one. I'M gon na cut this long strip because I'm gon na make a scrunchie with the tail and these ones as well. Our super super trend is here, so I thought it's gon na be great idea to make one for me as well, and here I'm just cutting with the measurements that I need and I'm gon na leave them here and in the description below after this we're just Going to take our glue, gun and glue from one end to the other. After this, we have to turn it inside out, and here I'm using a safety pin to make the process easier. I'M just gon na attach it in one of the ends and push it through the tunnel of the strip until I see it on the other end and then I'm just gon na pull it until. I turn it inside out completely after this, I'm just taking a piece of elastic and I'm gon na attach a safety pin to it to make it easier to pull it through the fabric and by the way I made two other videos for making scrunchies. If you want to check them out, and I will leave a link on the top of the screen, if you would like to check them out and after this one, we have our elastic through the fabric, we're just going to make a knot. After this I'm just gon na tack, one of the ends into the other and fold it a little bit to have a nice finish, and then I'm just going to use a few dabs of glue to close it up, and I know I'm repeating myself few times Now in this video, but I definitely think that this hair accessories are super fast and easy to make, and I definitely believe that everybody can make them and they're the perfect project for when you feel bored or you just want to pass the time. And for the last step to finish the scrunchie, I'm just taking the rest of the fabric that I have left and I will try to make the best of it. So I have left something looking like a triangle and then I'm just gon na cut it to make it nice and even and after this I'm just going to take my fabric and fold it and here, as you can see, I'm just gon na roll it. A few times - and here I want to say that you can definitely use this as a scarf as well, because this part is detachable, you can attach it or dis, attach it from the scrunchie here, I'm taking my scrunchie, and I'm choosing this part that we glued To hight, when we make a knot - and here we just want to make sure that the both ends are even and we're just gon na tie a knot, and I think that this idea is super cool because you actually can use the both parts separately. If you want to wear the scrunchie only without the tail, and now I got to the end of this video, thank you so much for watching, and I really hope this will inspire you to make cute hair accessories for yourself as well. For this summer, please like and subscribe, if you like this video, and you want to see more, thank you again and see you next time. Bye,


Comments
Neiva Souza Silva Rocha: Que bacana amei
Verónica Arriaga Alcaide: ¡Qué buenas ideas!
Tiy's Ties: Love your content
Suganya Sugu: Which type of glue used for fabric
Mara Stanga: So cute ♥️
The Flower Art: Hello everyone, i am exited to share with you my new diy. I am going to show you how to make cute and trendy hair accessoires for the summer using and old scarf or clothes. I hope this video inspires you to make for yourself these cute accessoires as well. Enjoy :) My last video: https://www.youtube.com/watch?v=a0lJz0PO2g4&t=40s
Art for Life: nice one❤❤
swarna pari 7C Roll no38 pari: Can I use stitching rather than using glue.please reply
MarPlaysRoblox: deffinitely making one and selling these teehee
Effie Smith: Cool