Super Long Butterfly Locs | Diy Crochet Butterfly Locs Wig | Niseyo Hair Amazon | Missuniquebeautii
- Posted on 09 January, 2021
- Hair Accessories
- By Anonymous
#butterflylocsstyles #crochetbutterflylocs #butterflylocshair
Super Long Butterfly Locs | DIY Crochet Butterfly Locs Wig | Niseyo Hair Amazon | MissUniqueBeautii
In this video, I was able to show you guys exactly how I create a half wig, install long butterfly locs, and style them as well. This hair is from a company called Niseyo Hair on Amazon. Like this video, share it with your friends and family, and don't forget to subscribe to my channel to be notified of my future uploads.
Follow Me On Instagram@: https://www.instagram.com/missuniquebe...
Follow My Business Instagram@: https://www.instagram.com/missuniquebe...
Shop My Website https://pressedbymissuniquebeautii.com...
Discount Code: YouTube25 for 25% off the Entire Website!
Shop for your favorite beauty essentials! Press-on Nails, Lip Gloss, Mink Eyelashes & MORE!
I also make and sell Headband Wigs, Half Wigs (without the headband) Lace Closure Wigs, Frontal Wigs, & Drawstring Ponytails. If you are interested in having me make a wig or drawstring ponytail for you, please send me an email at [email protected]. SERIOUS INQUIRIES ONLY!
Products Used:
Niseyo 24 inch Butterfly Locs (Direct Link)
https://www.amazon.com/gp/product/B08P...
Niseyo Facebook: https://www.facebook.com/Niseyobriads
Niseyo Instagram: Niseyo_hair
Crochet Needle https://www.amazon.com/gp/product/B075...=
Mali Pah Hair Accessories
https://www.malipah.com/hair-accessori...
https://www.youtube.com/watch?v=FvcISe...
Crochet Bob Butterfly Locs | NO WRAPPING | Quick & Easy Style | WeaveMaster Hair | MissUniqueBeautii
Cute Headbands That I Purchased:
https://www.amazon.com/gp/product/B08H...
https://www.amazon.com/gp/product/B01F...
https://www.amazon.com/gp/product/B07S...
https://www.amazon.com/gp/product/B07Q...
https://www.amazon.com/gp/product/B07W...
https://www.amazon.com/gp/product/B081...
Equipment Used:
Cannon SL2 https://www.amazon.com/gp/product/B071...
Neewer Back Drop Kit https://www.amazon.com/gp/product/B07P...
Ring Light https://www.amazon.com/gp/product/B08D...
Rose Gold Backdrop https://www.amazon.com/gp/product/B01C...
Instagram: @MissUniqueBeautiiLLC, @MissUniqueBeautii
Facebook: @pressedbymissuniquebeautii
Website: pressedbymissuniquebeautii.com
E-mail: [email protected]
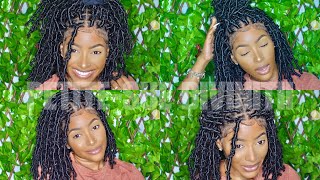
Oh hey my beauties, it's miss unique beauty and i'm building and i'm back with another video. If you are new to my channel tap that subscribe button so that you won't miss out on any of my new uploads and if you have already subscribed, what's good. What'S poppin welcome back to my channel the items that you're going to need today is a crochet wig cap, your crochet needle and, of course, the hair of your choice. Now the hair that i am using today was sent to me by a company called nascio hair, and this is 24 inch butterfly locks, yes, 24 inch, crochet, butterfly locks, and when you receive your package, you will receive six bundles of hair within one package and right Now, i'm just showing you guys exactly how the hair would come when you get it, you will also receive two crochet needles that you can use to install the hair and a thank you card now, let's get into the installation. So the first thing that i'm going to do is apply my crochet wig cap to my mannequin head and i'm going to position the crochet wig cap, exactly where i wanted to be on the mannequin head now. This is not going to be a headband wig. This is just going to be a half wig, so i will not have to sew any kind of additional things to this cap to complete this style and right here, i'm just getting my t-pins just so that i can use them to secure the cap and make Sure that the cap won't move, as i am installing these crochet locks to the cat. This is what the loop is. Looking like on this crochet lock now, i am loving the loops on these locks because they were so easy to open up and install and pass the lock through the loops so so easy i didn't have to struggle or anything like that. There was enough space to get the entire lock through the loop. Now these locks are 100 percent handmade, so each lock is not going to look exactly the same when you take them out of the packaging, but they will look very similar to each other and being that they are handmade. You know the more natural they look when they are not so uniform. So i like that now i did only receive six packs of this hair so to make sure that i had enough hair to complete this entire wig. I spaced the locks out in the back section about an inch and a half apart from each other and then, as i continue to work my way up the cap, i will be doing the brick layer method where i will be installing the locks in between each Other as i go up in each row - and i will show you that right now, so, as you guys can see, i'm placing my second row lock the first lock in the second row in between the two locks that i created in the first row, and i Will continue to do this all the way up through this cap and if, in the end i do have hair left over, i will go back in and fill in hair in this back section. If i do have hair left over, as you guys are watching me installing these locks to this cap, i do want to talk to you guys about the 2k giveaway that i am having on my channel, and i do want to let you guys know that i Will be giving away a headband wig, yes, and i will show you guys exactly what week it will be in my next video so stay tuned for that and in order to enter the giveaway, all you guys have to do is be subscribed to my channel. Follow me on instagram at miss unique beauty and comment down below my giveaway post on my instagram. What are your goals for 2021? That'S! It just comment your goals for 2021. You must be subscribed to my channel and you must add me on my instagram page at miss unique beauty. Thank you guys so much for supporting me on my channel and i have so much more great content coming for you guys this year. Now i'm installing the locks on the side section of this wig and it's basically the same process that i use in the back. So what i'm going to go ahead and do? Is i'm going to go ahead and finish up this entire wig and i'm going to come back and show you guys exactly what the wig looks like after i've completely installed all the locks on it and i'm gon na come back and show you guys exactly how I installed this wig on my head to make it look very natural, like i just left the hair salon. This is what the completed wig is looking like after i went ahead and installed five complete packs of this hair onto this wig, the six pack i'm going to use for something else, and you guys will see that coming up next. But this is what the wig is looking like, it is very full. The texture of this hair is amazing, and i just love the length of these locs. Now, let's get into applying this wig onto my head, as you guys can see, i did go ahead and install the sixth pack as individuals in the front section of my hair. Now doing this allows your wig your hairstyle, to look as natural as possible when you apply this wig now, if you guys are interested in seeing exactly how i go about doing these individuals in the front section of my hair, i will leave the link to the Video that i created showing you guys how i do that process in the description box below now the cap that i use to construct this wig already has combs in it. So all i'm doing here is i'm placing the combs exactly where i want them to sit in my braids in the back section of my head. Now, as i position the wig exactly where i want it, i am pulling the back section of the wig down to make sure that the entire wig is laying nice and flat in the back section of my head now, because this wig cap does not have combs And the top section of this wig, i am going to go in with some bobby pins and use the bobby pins to secure just the top section of this wig down now. This will help prevent your wig from slipping and moving out of place during the wear. Now, i'm going to show you what the back of this wig is looking like and, as you guys can see, the wig is nice and full very concealed, very natural. Looking in the back section of my head - and this is what the length is looking like now - i'm going to go ahead and show you guys how i style this hair on my head and i am going to do a half up half down style on this Hair today in this video, i was able to show you guys how you guys can go ahead and create a 24 inch, butterfly locked half wig with individuals in the front section of your hair. Now this hair is from a company called nasal hair on amazon, and i will go ahead and leave the link to this hair in the description box below so that you guys can go ahead and check it out. Even though these locks are 24 inches long, they do not feel heavy. They are extremely lightweight on your head. Now, if you guys are interested in getting this hair, it does come in a few different colors. If you guys do not want to try the black color, that is fine. I really hope that you guys enjoyed this video comment down below any questions that you may have like this video and don't forget to subscribe bye. My beauties, oh
Comments
BelieveInYour Crown: You did that Queen
Blue Lotus Queen: Giiiirrrrllll this came out so cute. Have a great weekend.
Destiny: Anything you do I am here for it.
Mb22: Where did you get your hair feather accessories from
Afro Sophisticated Beauty: Where can I get the cap, do you know the cap name?
Sonya Johnson: Nice job