Ayuverda 6 Months Hair Care Challenge On 4C Hair | Month 1
- Posted on 04 February, 2023
- Hair Care
- By Anonymous
Join me as I experiment using Ayurveda products on afro hair.
—--------—----------------------—----—---------
Products Used:
Unrefined yellow shea butter:
https://nubianroc.co.za/?page_id=611&v...
African black soap:
https://nubianroc.co.za/?product=afric...
Ayuverda powders:
https://lovemyhair.co.za/product/aloe-...
https://lovemyhair.co.za/product/hibis...
https://lovemyhair.co.za/product/henna...
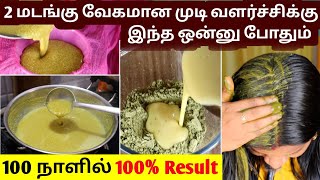
Hi, everyone welcome to my YouTube channel. I decided to document the six months, hair challenge using ayurveda products and for this challenge I'll be using henna powder aloe vera powder, as well as hibiscus powder. On the day that I recorded this video, I use a hibiscus powder as well as aloe vera powder, and I have a plastic bowl and a plastic spoon to mix the two powders with some lukewarm water um. Usually, I use one powder when I do this mixture, but on this day I decided to choose both the powders for different reasons and yeah. So usually, I use about three to four spoons from each powder and there is no rule in terms of how much powder is required, so this is dependent on the amount of hair that you have on your head, as well as how thick you want. The consistency of the mixture to be so, in my case, I wanted the mixture to be thick and since I don't have a lot of hair on my head, I don't need a lot of powder. Hence I use three spoons from each. So then, after mixing the two powders I yeah I pour in the water and then mix the the two. So on this day I used a lot of water which made them the paste to be very watery and yeah, so just a fun fact about hibiscus powder. When I was doing my research, I read that it does prevent premature praying, and this is something that I've seen on my hair I've since I've seen one or two strands on my hair, which are gray. So I hope that it helps with that, and you know just makes it um not so visible, but we'll see how it goes anyway, so because I've mixed a lot of water on the mixture, I used a conditioner just to make it a bit more thick and You can use any conditioner that you have, which is what I did. I just used the air conditioner that I had lying around in my apartment and yeah. So this is what I used and I just pour in the conditioner and the mix away so yeah once I've mixed the the powders, the water and the conditioner. I just stay away to make sure that um everything gets mixed up well, and I usually do this. The previous night and then leave the mixture overnight and use it the next day, but on this day, because I did the mixture on the day that I wanted to put it in on my hair. I so I then left it out for about two hours so yeah. So when I leave out the mixture I use foil or cling wrap so which, whichever one I have just to cover it up to make sure that the powders get activated and then I'll get the the benefits from the powders. And this is me, I'm doing the rest of my hair. I had mini twists very, very tiny twists, and these are the last two that I left in my head. So I'm just undoing them. So I'm doing the twist I just unravel The Twist from the top and when I'm unraveling The Twist. I just twisted that I twist the twist in the opposite direction, which in which I twisted, which will make it a bit looser. And then I just unravel from the tip of the hair to the root and when I get to the root there's a part where I have New Growth as well as with the twist stacked. So I just make sure when I get to that part, I detangle the hair just to make sure that I don't get any knots on my hair. So this is what I do to unravel The Twist. It'S usually very fast, but um, because I had the twist for about a month and a half, and during this period I did wash my hair so yeah it shrunk and it got matted. So that's why it took me a bit longer to you know, undo the twist so yeah, so I undid the twist um yeah, I think the day before. So that's why I have these chunky braids in so what I'll do is, after I'm doing the last twist. I will then undo the braids that I have and yeah we'll just first watch over that part where I'm undoing those braids that I have foreign foreign. So after I'm doing all the braids that I have as you can see, my hair is very very dry and it's stretched because yeah I had the braids on and yeah. So I'm just happy that the hair is now free and yeah, as you can see, I'm so detangling just to make sure that I don't have any Tangles on the hair, and this is me just playing with the hair. Don'T mind this and yeah so we're off to washing. Now now, when I wash my hair, I use uh African black African soap, which is what you see here and yeah. Let'S go to the washing and then this is me after washing the hair um, as you can see, I'm just trying the hair at this point uh just to make sure that it's dry, but not so so dry and yeah um yeah. So what I do here is just to Pat the hair in half so that I work in sections and yeah. So the part does not really have to be straight uh because yeah you just putting the mixture on the hair, so yeah so um. So I just put the hair and then for each page that is parted, I divide it into sections and for each of those sections I pour the mixture from the tip of the hair to to the roots. So, as you can see, this is me applying the mixture on my hair, um yeah. So when I apply the mixture I just I try to make sure that covers all the strains of my hair and yeah yeah yeah. So then, while I am applying it, I yes, as I said, apply it from the tip to the root and then from the root to the to the tip. Once I've covered all most of the hair - and I just rub it in to make sure that everything is in each of the Strand and once I've done that, I then twist that section and yeah move on to the next section so and yeah. So this is just me making sure that also the The Roots have some. You know, mixture on them and yeah, so we'll first slide over that part right. So now that my hair is saturated with the mixture, I will then put it away in a plastic cap, but in this case I'm just using a shower cap and so I'll cover it with the shower cap for about an hour. But on this day I left it for six hours. Oh no, it was not six, it was more or less uh yeah six hours because I was just cleaning the apartment. So this is after the six hours as you can see, the hair is um dry, but it's not so dry. It still has some moisture in it and yeah. As you can see, the back has unraveled a bit um yeah I'll, wash the hair now and come back. So after I've washed the hair, you can see that it is very clean, um, it's very shiny. It'S ready to find and the scalp is um nicely moisturized. Um yeah, so what I'll do here is uh moisturize the hay with some shea butter and oil. On this day, I decided to leave the hay in its shrunken state, so I'll proceed to just applying the shea butter and the oil on the hay and I'll be using the black, castor oil um yeah in this video I'm using the MPL one as well as Some yellow rose shea butter, which is what you see here on the video um yeah. So I just put the shea butter on my hand and then rub it in on my hands to make it a bit loose and then apply it on my hair from the tips of my hair up to the roots. So because the tips of my hair are very vulnerable, so I make sure that I do apply some shea butter on those tips and all the edges of my hand. Um yeah, you can apply as much shea butter as you require, based on the need of your hair and, as you can see, I applied from the on the front of my hair, as well as on the back of my hair and yeah, and then I'll put Using the shea butter I'll then use the oil on my hair and yeah so with the oil as well. I first applied on the tips of my hair down to the root of my hair and for our pain is just make sure that yeah. I just rub it in on the hair gently without breaking my hair and yeah. So this is what I do and then I just pluck the hair out to be in the shape that I want it to be in in this case, I'm just stretching it out and it's shrinks back to the height that it wants, and then I will do Puff it out with my hands and I'll be done at this point, I'm still laughing it out. So this is exactly what you need to do. You just need to fluff out the hair until it's in the shape that you want it to be in and that's what I did um yeah. So thank you so much for watching the video. If you've reached this part of the video, it means that you push the end of the video and if it is the kind of content that you would like, please do like the video and do subscribe to my YouTube channel for more videos and I'll. Be posting. More videos on here, as well as how this challenge has changed. My hair and I'll, see you on the next video. You can see how happy I am with the hair um yeah. So this is how my hair turned out. I really liked it. Um yeah I'll see you on the next video bye, bye,

Comments
Samm: I also like the “Love My Hair” products! I need to go back to consistently using them