How To Make Fabric Hair Bows! #Ellieandmac
- Posted on 10 February, 2022
- 6D Hair Extensions
- By Anonymous
Easy Bows for everyone! Minimal sewing, minimal time!
#Ellieandmac #ilovetosew #sewinginspiration
Please like, subscribe, and comment for more great sewing tutorials.
FREE patterns here - http://bit.ly/freesewingpdf
Join our FB sewing community here - http://bit.ly/eamgroup
Follow us on Instagram @ellieandmac_patterns
find patterns here (AF link): https://ellieandmac.com?aff=683
Here are more fun videos for you:
Cordless iron &wool mat review: https://youtu.be/j-rIa-BQzzk
How to clean your self healing mat: https://youtu.be/WYteu15L73I
Fun Holiday Treat boxes (ornaments): https://youtu.be/z2b0uAAqZN8
The Following are amazing affiliate links for items I use regularly:
Maxi-Stretch:
Janome 3160QDC Computerized Sewing Machine:
SINGER 00564 ProSeries Thread Snips, 5-Inch,Teal:
Breman Precision Cutting mat Black/Green:
The Coats & Clark Dual Duty Thread:
Panasonic cordless Iron:
Maxilock thread:
Ghinger Dress Maker Shears:
Sewing Needles Universal multi-pack:
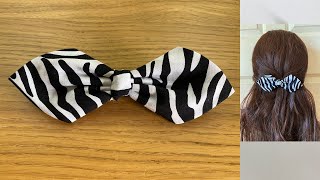
Hi friends welcome back, i'm so glad you came back to see my video this week. I know it may be a little bit confusing because i'm making videos on fridays now instead of every tuesday and now i'm also doing videos once or twice a month, and so it may be difficult to know. Hey is not posting this week. Well, guess what all you have to do is hit that notification bell and make sure that you subscribe to the ellie and mac patterns channel that way, y'all don't ever miss me when i'm over here having fun and likely cutting up, because you know that's how i Live over here, that's how i do this week, i'm gon na go ahead and show you a very, very easy way to make a hair bow there. We go for your favorite person or you're, not favorite person, or one of your customers or clients. You could make a hair bow. What am i doing anyway? I'M going to teach you how to make a very, very simple hair bow with just a little bit of fabric, and if you got about 10 minutes, i got you, but you got to stick around okay. I'M nye with ellie and mack come along friends, okay, friends, thanks for coming back, let me show you what you need to make these bows you're going to need a piece of fabric that is 6 by 18 inches. If you want to do the bow that i have here or if you want to do a larger bow, you may cut a piece of knit fabric that is 8 by 24 inches you're, going to need a strip of fabric that is two inches in width. It can be any random length you're just going to use it to bind your bow to your barrette next you're going to need some barrettes. These are very easy to find online. You can actually find them in your neighborhood like beauty, supply stores, um they're, relatively cheap. You can probably get them for like a pack of 50 to a pack of 100 and they come in different sizes, which is super great. So if you have like really thick hair, you can get a larger barrette and if you have like little tiny hairs, you can get little tiny ones. Okay, you're also going to need some rubber bands. Now i get these from the beauty supply store and honestly i get all kinds of trauma when i see these, because i remember my mom used to use these to put my hair up when i was a kid and there was a lot of crying and a Lot of getting hit in the head with a brush because i would not sit still but uh yeah you're going to need some of these, too, don't be afraid, nobody's going to be doing your hair um and here is a safety pin you're going to need this Because when you sew your strip to go around you're going to need to face it right sides out some scissors, so you can cut your fabric or rotary cutter you're, going to need a glue gun and be very careful because we all know i may or may Not have burned myself whilst making this video, you know i burned myself. This is just how i roll you can use your sewing machine or you can use your serger in order to sew the seams. If you like, whichever one of those you have available, is perfectly fine now you don't have to worry about doing a stretch stitch, but if you feel more comfortable on your sewing machine, doing a stretch, stitch go ahead and do a stretch stitch now. The reason why i say that is because you can probably get away with a long stitch, because no one is going to wear this bow or squeeze anything into this bow. So it's not gon na get stretched right. Okay, so and it's not likely anybody's gon na. Actually, throw these barrettes in the washing machine just make new ones, because now you know how okay, so in order to get started, you will take your fabric now, i'm going to take the actual large piece, because you've already seen this. Oh goodness, you've already seen the small bow, but you haven't seen the larger one, so i'm going to make the larger one this time. Generally speaking, you want to have a larger barrette if you're going to make the larger bow, but these are all the ones i have and i'm cheap and i'm not buying new ones. Okay, i'm cheap, and i have a ton of them here in this ziploc ziploc bag, which we're going to from now on refer to as a um, oh, which we will now refer to as my designer burette bag. You don't see the designer name on it. It says right here: great value. Great value is a designer brand walmart, but let me stop playing okay, so we're gon na go ahead and get to sewing you're going to fold your fabric lengthwise, just like this bloop and then you're, going to sew across yeah. That wasn't magic. I just did some camera stuff, but look it's already done so now. What i'm going to do is fold the corner. You keep the thread facing away from you and fold the upper left corner down until it meets and is parallel with the bottom, and you do the same thing on the other side. Now what you're gon na do is memory crease it. So you just basically memory crease just means you just push down on the fabric, okay, and i actually have one of those little rollers that you would roll over the fabric and create a memory crease, but i can't find it right now, so you do that and Then you cut on that line. It doesn't have to be perfect right if you plan, if you plan to use your serger, you can actually just mark that memory crease and then go ahead and serge it right on down, because guess what y'all a serger has a knife on it? No, i made it way too much like halloween in here so now, you're going to sew right down to the corners bam. I know right, i'm a bad girl with a camera. All right look out, okay! So now what you're gon na do is gon na go to the center and you're gon na snip those little threads, because what you're gon na need to do is open it up so snip the threads in the center. I mean you're, basically just re, removing the surge. If you wanted to you, could just surge and then skip about an inch and surge or so so you don't have to cut the threads. But for me it's a little bit faster. If i just do this and then open it up right here in the middle to flip it inside out, okay, now i have it open. I can go ahead and flip this right sides out y'all. This is so fast. I i promise you you're gon na be like so you flip it out. Okay, so now i have it all flipped out - and you have this tiny little opening here this little opening here is not really a threat. Okay, because it's gon na be bunched up in your bow, but if it makes you feel any better, you can just stick a little dot of glue on there right and pinch. It closed winding. Okay! So now you have your bow! Oh, my goodness! Okay, now you have your bow with your short sides facing away and long sides facing down towards you. You want to take the bow and fold until you're, curved edge is meeting the bottom of your strip, so you do that again. On the other side, and now you have two sides where your curved edge is just about at the bottom of your bow, just like that, and then you can smush it. You want to see how i did that real, quick whip, smoosh, okay and then, when you smush it all up, it kind of looks like a bow right. That'S when you get your torture device, i mean ponytailers and you wrap them around now. The reason why i use these is because you can take them off and put them back on. I have once tried to use thread, but then i have to hold it down and try and tie it, and it makes me miserable so these ponytails are super awesome and super fast. So now all you need to do is adjust your bow. The way you want it to fall, okay, so now i have my bow all bunched up just the way i like just like this, and now you get that two inch strip of fabric and you sew it down lengthwise and then put that in front of you With the seam up, you have your bow here and you grab your barrette when you get your barrette you're going to want to take the innards out this little piece, you'll put it back in later, okay, so first things: first, you need to glue it to your Bow you don't have to put a ton of glue, just a tiny little dot right in the middle, but don't put it on your elastic because those elastics will break because they're not made for this kind of heat, so you're just putting it in the middle. So that you can have a barrette, that's not actually like squealing around and moving all right, so put a little dot in there yay. Now you want to separate your little bow: okay, get your strip of fabric and cut the end off, because you want it nice and clean. So the first thing you do is you put a tiny strip inside your barrette of glue just a little bit and press your little tube down right on top of it? Once you have that glued onto the inside of your barrette, you can then take the whole thing hold it together with your little thumb and forefinger and flip it over when you flip it over. You will see how the center will look super cute with your band on it right. Okay, so then you flip it over again to get it to come around the back side of your bow again. So now that you're looking at it, the plan is to have enough of this strip that you can fold it under that way. You don't have like a raw edge hanging out on the inside of your bow. Okay, so give yourself a little bit of leeway. I like to go just a little bit past, where the original one is where the original strip was glued. Like that, and then i put a couple dabs of glue on there again just a couple now with this um. Sometimes it helps to let it set just a couple of seconds before you press down on it. So then i roll this strip inward and then i place it on top of the other, just like this and hold it until it cools off. If you try to let go before it's cool, what's going to happen, is it's likely to pull off and then you'll have to do it again? And then you have to deal with the mess of the glue, because there is nothing worse than making a craft and having like glue everywhere. It looks like spider webs all over your stuff and nobody wants spiderwebs in their hair unless they're celebrating a spooky holiday. Okay, so do you see how clean that is? Yes, i did it. Okay, then you take your beret innards and you slip them back inside yay and now you have your hair bow. Is that not the coolest thing ever very minimal sewing just a teensy bit of glue a little bit of ingenuity and a couple of torture devices, and you have a cute little bow. I hope you like what we have done here this week. I hope you go on and make a whole bunch of bows, because these can be worn for all kinds of things and my little biscuit just loves them. So i hope you have a fabulous week. Go ahead and check out some of the videos that i have. After this and i'm going to go ahead and post some links to some videos that you might actually like that, i've done before make sure that you click that notification bell. So you don't miss any of the fun that we're having over here me and nancy, and no not nancy, have a good time, and so the things yeah bye, bye, friends, you


Comments
Rebecca Lewis: LOL!! I am fairly new to the Ellie and Mac channel, and this is the first time I've seen one of your videos. OMG you are hilarious! I will definitely be watching out for more of you tutorials because YOU ARE FUN! and your tutorial was great! That has got to be the easiest bow to make that I have ever seen. I used to make tons of bows and barrettes for my daughter when she was young (she's 24 now). Her hair was so fine that barrettes did not want to stay in hair. I figured out that putting hot glue on both sides of the inside of the clasp makes it non-slip and the bows stayed in her hair. Much like the glue dots on the bottom of slipper socks. I can't wait to see more from you. Thanks for sharing.
MANDIE EXPRESS: Love the bow. Super cute and yes I remember all too well those little hair rubber bands and getting hit with the brush
Roo B: Oh Ny, your videos always make me smile but I could have done without the reminder about my mother hitting me on the head with the hairbrush when i squirmed whilst she was brushing my hair Great bows
Terah Stearns: Love ur blouse. Could u do a video on making it?
little feather: Thank you the bow is beautiful
KatheD: My younger sister always had really long hair, but mine was cut short every third year, because mom and I could only take so much of the hair brushing tears...
MsMonet: Hi NY. My question has nothing to do with this particular video, but I need help figuring out how to store and display knit fabrics. Cotton fabric fold up so pretty to stash. But knits just flops and morphs into a pile on my shelves. I have a wall of elfa wire shelves. All suggestions welcome. Thank you, Betty in Texas.
Therese Keller: Love the bow. Have a great week
Sparkelez sparkelez: Does it have to be knit fabric? Could we use woven as well?
Wendy Diaz Pesante: Girl I really love your videos