#Slrawvirginhair Diy Clip-In Hair Extensions For All Hair Types | Easy Step By Step
- Posted on 21 March, 2021
- Clip-in Hair Extensions
- By Anonymous
Making your own clip-in hair extensions gives you the flexibility and freedom to choose what type of hair you use, the quality, length, and styles. The beauty of this process is simple and quickly easy to do. Here’s my step-by-step process on how to make your own clip-in hair extensions at home.
Tools/Hair used in this video
- SL Raw Virgin Hair 1bundle in 16'' SL Raw Kinky Curly https://www.slrawvirginhair.com/produc...
- Thread
- Hair clips/clamps
- needle
- mesh net
- push pins
- Wig block
Watch More Makeover Videos
Season 1 Makeovers: https://bit.ly/2MctydQ
Season 2 Makeovers: https://bit.ly/2niSJxp
Thank You to my Music Producer :
Young Head Beats Production
https://www.youngheadbeats.com
Instagram: @YoungHeadBeats
Stylist Lee Apparel: https://bit.ly/2Nmdgwc
Need Raw Virgin Hair?
https://www.slrawvirginhair.com
Available Hair Types: Straight, Wavy, Curly & Kinky Blowout
Lengths Available 12 inch - 32 inch
Lace Closure & Frontal
Connect with Stylist Lee
- Instagram https://www.instagram.com/stylistlee
- Twitter https://www.twitter.com/stylist_lee
- Facebook https://www.facebook.com/StylistLee/
#clipinhair #hairhacks #DIYClipins #SLRawkinkycurly #kinkycurlyhair #slrawvirginhair #howtoclip #hairextensions #stepbystephairvid #curlyhair #naturalhair #professionalhairstylist #tutorialhairvideo #youngheadbeats #educationalvideo
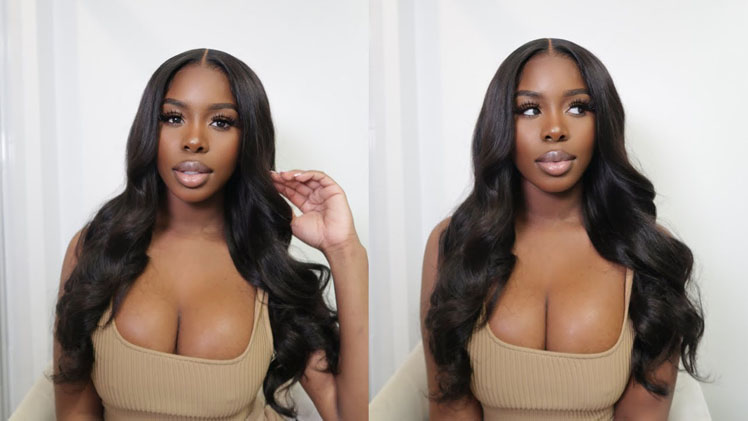
Welcome back to my channel, i'm stylist lee and, if you're new be sure to subscribe below today we're doing something very exciting. Today, i'm going to be showing you how to make homemade clip ins, i'm going to be using hair from sl raw virgin hair, and this is going to be their kinky curly collection when being a celebrity hair stylist. Sometimes you get put in situations where you have to be creative. I recently did a campaign for adidas and re linux and guess what i didn't have time to buy clip-ins. So it resulted into me making clip-ins from home and it came out great. So you know our linux is natural, so we went ahead and chose hair from sl raw virgin, hair kinky curly collection, so i knew it would match perfectly. All i used was a mesh net, push pins needle and thread and clips keep watching. So you can see the process. You first want to begin by placing your mesh net smoothly on a wig block by placing them and ensuring them in place. Using your push pins and what you'll see here is i'm going around in a square motion creating my guideline. So i can ensure that when i'm sewing my wefts down that i will not go past my guideline now that your mesh net is smoothly down and it's pinned in place, you now can begin your sewing process. You want to start off with an anchor because you want to make sure that the wefts do not flip up when you sew these down. Once you create your anchor, you want to go ahead and then begin sewing your wefts in place. So, although i am using kinky curly hair, this technique can be done with straight hair or wavy hair or any hair of your choice. For that matter, you want to make sure that you choose hair that you know is going to blend in well with your hair. So we went ahead and chose the kinky curly hair, since this is the hair that i actually use for iri linux, and i thought it would be great to use this demonstration to kind of show you guys how i achieved that. Look now that we have completed our first row, we're going to go ahead and repeat the process and do the exact same thing, not even an inch like two centimeters above the first weft that we just did now with this. I'M only going to be doing two rows. This is not necessarily what you need to do. If you want it to be fuller, you can do three rows even up to four rows. Depending on how thick you want your clips to be since i'm going to be creating multiple clips, i'm only going to be doing two rows, because i want them to be very lightweight and i want to be able to place them discreetly throughout the hair. So keep watching once you complete your first set. You want to go ahead and begin by removing the extra excess of the mesh away from the wefts that you're going to be using to create your clippings. And you want to make sure that it's nice and neat, because you don't want to leave any extra mesh behind, because it will have your hair flipping up now that we've completed with our first piece. You want to make sure that you place your piece flat on a wig block by using push pins and securing it in place. Now we can begin sewing down our clips for the purpose of this video. I will be using lime green thread, so you guys can see exactly what i'm doing, keep in mind that the holes in the clamps are very small. So you want to make sure that you're very careful when pushing that needle through for each hole. I can suggest that you do at least two loops per hole, just to make sure that it is in place, and these are very secure. So when you're installing them, you won't have any issues. Now that we've completed our full set of clips, we can begin by placing them in the order that we want. Typically, i would suggest, starting from the bottom and working your way up, but the luxury for clippings is. You can place them wherever they're needed today, i'm going to be placing them on one side, so you guys can get a good look in comparing contrast to how one side looks with clips and how the other, doesn't you

Comments
Milon: Best technique I’ve seen yet
Michelle Robinson: Wow awesome thanks keep sharing my kinda stuff ❤❤❤❤❤