How To Make Diy Clip In Hair Extensions | Easy Step By Step Tutorial | Feat Ali Julia Hair
- Posted on 29 April, 2018
- Clip-in Hair Extensions
- By Anonymous
HOW TO MAKE DIY CLIP IN HAIR EXTENSIONS | EASY STEP BY STEP TUTORIAL | feat Ali Julia Hair
hair information: Brazilian Curly 20, 22, 24, 26
link to the hair: https://goo.gl/cj1SjJ
Ali julia hair hot selling:
Brazilian body wave: https://goo.gl/Drmh9T
Brazilian straight : https://goo.gl/1MCygV
Brazilian natural wave: https://goo.gl/qr89ya
julia hair youtube: https://goo.gl/6z9tvz
ali_julia_hair instagram: https://goo.gl/yVTv59
In this video I will be showing you how I make clip-in hair extensions.
Products Used
Wig Clips
Black Weaving Thread & Needle Set
Disclaimer
-------------------------------
I have affiliate links in this description box, which means if you click the link and purchase something from the linked websites, I will get a small commission from it.
FTC: This video is sponsored by Ali Julia Hair. All opinions are honest and authentic. I only share products that I like.
---------------------------------------------------------------------------------------------------
Let’s be social!
Instagram:
https://instagram.com/feliciamesadieu/...
Facebook:
https://www.facebook.com/Felicia-Mesa...
tags
natural hair, 4b hair, 4c hair, thick hair, flat twist out, twist out, wet hair, tutorial, overnight, bantu knot, bantu knot out, routine, heatless curl, curl, curls, heat less, heat less curls, natural, hair, beauty, easy, quick, everyday, volume, thick, full, kinky, blow out, blow dry, smooth, frizz free curls, products, moroccan oil, haircut, short hair, short, medium, medium hair, shoulder length, armpit, arm pit length, medium length hair, medium length, school, style, college, work, casual, glam, Just Natural, Jaleesa Moses, Jaleesa Moses hair, dark skin, pretty black girl,
,Natural,Perfect, strand twistout,three strand twist out,natural journey,Naptural85,Alyssa forever,how to three strand twists,4a,4b,4c,3c,two strand twists,three strand twistout,Protective Style,healthy,hair,long,low manipulation,kinky hair,coily hair,black hair,hair growth,mini twists,natural hair care,grow long 4c hair, alopecia, castor oil, black castor oil, black jamaican castor oil, , edges,emu oil for bald spot, grow edges back fast, vicks vapor rub, vicks vapor rub to grow back edges, Felicia Mesadieu, shaving off edges, shaved edges, no edges, bald, bald edges, grow edges, grow, grow hair, castor oil, black jamaican castor oil, long hair, No hair, No edges, traction alopecia, alopecia, alopecia areta, grow back bald spots, grow back edges, grow back hairline, thick hair, black girl with real long hair, dark skin, bald spot, how to massage your edges, 4c hair, natural hair, alopeciafreewithjass, thin edges, fast, update, Empties, peakmill, how to make a wig, how to make a wig for beginners, how to make your lace frontal look natural, how to apply a wig, how to grow long hair fast, how to get silky straight hair, how to look beautiful, how to look better, how to style short hair, how to style curly hair, how to layer curly hair, how to maintain curly hair, how to install weave, cheap virgin hair, diy, fashion, style, beauty, how to color your hair, watch me slay this wig from start to finish, Maria Antoinette TV, The Maria Antoinette, Licensed Cosmetologist, afro hair, natural hair, big chop hair extension, textered clip-ins, clip-ons, how to blend clip-ins, easy natural hairstyle, How to, best clip-ins for thin hair, Maria Antoinette Tv, the Maria Antoinette, twist out, big chop hair extensions, review, natural texture clip-ins, natural weave, natural textured weave, weave, natural hair, natural hairsyle, clip-ins, curly clip-ins, kinky hair, Brazailian Curly Hair,natural hair,Felicia Mesadieu,Shaved Edges,Peakmill,Ashley Devonna,Curly Hair,Ali Julia Hair,Ali Express Hair,curly hair clip ins,natural hair clip ins,how to grow long hair fast,how to install weave,how to install clip-ins,cheap virgin hair,diy,shaved my edges,how to blend in clip-ins,textured clip-ins,Maria Antoinette TV,the perfect twistout,kinky hair,how to blend natural hair with curly weave,start to finish,review,4C HAIR, prom hair, homecoming hair, winter formal hair, military ball hair, glamorous hair, glamorous curls,
natural hair,4c natural hair,chizi duru,naija vlog,natural neiicy,long natural hair,curly hair,short natural hair,natural hair extensions,hergivenhair,logan,paul,shane,dawson,twistout,4b natural hair,ponytail,sleek ponytail,ponytail on natural hair,curly, wire wrapped ponytail 2018 hair trend, wig,kinky hair,kinky hair extensions,afro hair,
mayvenn hair company,mayvenn hair inc,mayvenn hair extensions,mayvenm hair,virgin hair,sell mayvenn hair,how to make clip-in hair extensions,clip in extensions,clip-in extensions,mayvenn clip in,clip-ins,clip ins,artificial hair integrations,beauty tips,tutorial,mayvenn,weave,hair extensions,clip hair extensions,clip in hair,how to clip in hair extensions
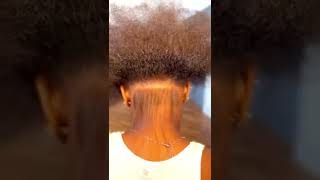
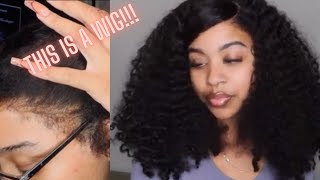
Hello, everyone welcome to my channel. My name is Felicia Meza. Do your guide to help you design the best version of you by looking and feeling your best today, I'm gon na be sharing with you how to make clip-ins. This is a video that I have been promising for a very long time now and I'm just now getting around to it. I will be using oli, Julia's hair. If you, ladies watch me frequently, then you would know that I consistently wear Ollie julia hair and I have some clippings here that I have made myself. This is what it looks like, and what I'm going to do at the end of the video is just show you how to apply one of these in your hair. But then I have a separate video where I'm going to be showing you how I apply a full head of hair with clip-ins. Now, if you watch me frequently, then you see me: do it all the time, but this time I'm really excited, because I have longer lengths of hair and I really wanted to have like a super long dramatic, full head of hair, like I wanted really long long, Hair, so this here is 24 inches of hair, but I also have 26 inches that I'm going to be installing, so this is going to be a two-part video, so in this video I'm going to be showing you how I make my clip-ins just like this. It'S very simple: to do I've seen people. Do it several ways, I kind of do it my own way, this works. For me, it's simple. It'S not professional, it's really just a DIY, so I make it work and my hair is healthy. Still, as you can see, but yeah, I'm gon na show you how I actually attach one at the end of the video and then I'm going to show you the thread that I use. I'M going to show you clips that I use and the needle that I use. Let'S go ahead and jump into the tutorial. I'M gon na start by showing you everything I'll be using to create my DIY clip ins I'll, be using this Ollie julia Brazilian curly hair I'll, be using these large wig clips next I'll, be using a needle and then I'll also be using thread. These were purchased at Sally's Beauty, Supply Store I'll, also be using a pair of scissors taking the hair. I will be laying it out flat to measure how much I want to cut off for my custom, DIY clippings. I like to do this two ways. The first way is to take the hair, lay it flat I like to I, the hair I'll just take the hair I'll measure it against my scalp, then I'll lay it down flat and I'll cut off the necessary amount of hair that I need in order to Make my custom with clipping extension. The second way that I like to do. It is by taking a custom clipping extension that I've already made, and then I will lay that flat then place the new hair. The version here that I'm going to use to make a new clipping extension and I will lay the new virgin hair on top of the clip in extensions that I've already made and I'll measure it out. The amount that I need to make a custom extension. And then I will cut off the necessary amount needed next I'll, be taking the thread and needle and I will place the thread in the eye of the needle. This part can be a little tedious, though I try to be very focused and patient. When I'm doing this, it's also easier, if I dampen the end of the thread first, before placing it through the eye of the needle. Once I see the thread peeking through the eye of the needle, I will pull the thread through the eye about four or five inches. This is the end of the thread that will remain unknotted and then I'll just begin to cut the thread from the thread spool and next I'll double knot. The thread around the needle and this helps to secure the thread around the needle as you're stitching the clip-ins. On the wet of the extensions next, I will begin to sew on the wig clip to the extension. I find that the best wig clips are the larger ones. These clippings feel more secure once you click them into your hair and they're. Also very sturdy, and I also find that it's easier to clip on your hair and to clip it off it's just way more easier than using the smaller wig clips next I'll be sewing the clip ins along the edge of the lining on the weft of the Extension, placing the clip so the comb teeth are facing up and the rubber strip is against the lining, making sure the long edge of the clip lines up with the edge of the lining of the West. I can't stress enough how important it is to make sure that the wig clip is stitched facing up with the teeth facing up, because if you stitch the clip on backwards, it's really annoying to unstick everything and to take all the threads out and have to start Over and then also if you stitch it on backwards, you're not going to be able to clip on the extensions to your hair. So it's very important that you make sure you're stitching on the clip ends the the correct way. I will be stitching through the lining. Inserting the thread in the needles through each hole in the clip there are several holes on this clip, but I try to focus on stitching the threads through the holes that are on the top. So I just focus on the top holes and I find that this works to secure the clip to secure the threads in the clip. I just thread each of the top holes about three to four times to make sure the clips are secure. This is also a very tedious process, so I try my best to be very patient during this part, and usually I like to have something playing in the background like music or I'm watching YouTube in the background, but then also just making sure I'm focused on what I'M doing so that I don't poke my fingers or anything with the needle, I'm also very gentle when I'm pulling the needles through the holes, because sometimes the needle can get stuck through the threads in the halls. And I just want to be very. I like to be very gentle that way, I don't break the needle, because that has happened to me before and also there's gon na be a lot of hair like stringy hair that gets in the way of the while you're sewing. You just have to kind of brush that hair out of the way move that hair out of the way, so it doesn't get stuck while you're trying to stitch the thread in the needle. So, every time that hair gets in the way just move it out of the way, so it's not a distraction, and so it doesn't mess up your stitch work once I'm finished threading each hole. I will begin to secure the thread by stitching it through the weft of the extension and then I will cut off the remaining thread and any random threads just hanging from the weft of the extension, and I just repeat that process about two to three times. I like to so at least two to three clips on my extension and I like to make sure I have a wick clip on each end of the extension and I'll put one in the middle, depending on how long the extension is. If I feel like, I need one in the middle and then also depending on, if I have enough wig clips to do it, and this is what my extension looks like once I have completed it now. I'M just gon na give you a little quick mini tutorial of how I attach the clip ins to my hair. I just start by parting, the hair. It doesn't have to be perfect and then I clip the extension on to the hair a few centimeters away from the scalp. I just make sure that it's secure and voila. It is done, easy-peasy simple as pie and there you have it DIY custom, clip-in extensions. Alright, I will have a follow-up video showing you how I do a full head of extensions. So thank you so much for watching if you're not a subscriber, please subscribe, so you can see more videos like this. Don'T forget to comment like and share and I'll see you all in the next video bye

Comments
Prisla Em: Patience is a virtue! You did an excellent job, and your explanation was easy to understand! Thanks for sharing love!
Latrice Byrd: Thank you for making this, I was thinking about doing this, but was sure where to start. Thank you
The Garcia’s Journey: great video !
blu xpretion: What song did you use in the intro?
Chalsey Wilder: Cheaper to make your own too.