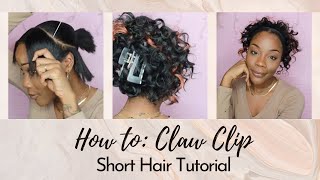
How To Blend Short Natural Hair With Clip Ins | Ft. Curls Queen Clip Ins
- Posted on 01 November, 2020
- Clip-in Hair Extensions
- By Anonymous
Hey y’all, welcome back/to my channel! In today’s video, I will be showing you all how to install clip ins and how to blend short natural hair with the extensions! CurlsQueen sent me one bundle of their 4b/4c clip ins (more details below) to try out and I am in love! Having these clip ins make my hair look the way it did before I did my 2nd big chop! I hope you all enjoy the video and find it helpful. Please SUBSCRIBE, COMMENT, give the video a THUMBS UP, and SHARE with a friend!
♥♥♥♥♥♥ CURLSQUEEN HAIR INFORMATION ♥♥♥♥♥♥
Use Promo Code: Jharnell (to save 10% off)
Hair I am wearing in this video is from https://www.curlsqueen.com/
Direct Item Link: https://www.curlsqueen.com/136-14-20-i... Hair Code :CQ001
Hair Color: NATURAL BLACK
Hair Type: 100% Indian Virgin Hair Hair
Texture: Coarse Kinky Fro
Hair Length: 20inches
The textured clip in extensions are all double wefted ones. So only ONE SET is sufficient for a full head rather than paying more to buy 2 or 3 bundles of what other companies are selling. Hair can be washed, conditioned, cut, twisted out, bantu knotted, straightened and more. Hair can be dyed or bleached to achieve hair color as it hasn't been dyed using permanent dyes.
Follow CURLSQUEEN INSTAGRAM For GIVEAWAYS AND DISCOUNTS : www.instagram.com/curlsqueenofficial/ Feel free to contact them if you have any questions.
Email: [email protected]/[email protected]
♥♥♥♥♥♥ CURLSQUEEN HAIR INFORMATION ♥♥♥♥♥♥
MUSIC:
Music by MDMN - Mimosas - https://thmatc.co/?l=FE15B10F
Music by Mayila - Energy - https://thmatc.co/?l=1B78D82F
Music by Cassette Tapes - Sugar Rush - https://thmatc.co/?l=61D4FEB9
Music by KoVu & Michaella - Love Me Anyway - https://thmatc.co/?l=43F44D64
POPULAR UPLOADS:
2020 APARTMENT TOUR | Modern Farmhouse and Bohemian Inspired | Starring Lia
https://www.youtube.com/watch?v=DJuImM...
How To: Straighten Short Natural Hail | 4C Silk Press | Fixing Bad Trim | Styling Short Natural Hair
https://www.youtube.com/watch?v=N4qf0V...
Mini Twists on Short Natural Hair | Quarantine Protective Styling
https://www.youtube.com/watch?v=D6idIh...
COLLEGE APARTMENT TOUR (Minimalist) 2018 | Junior Year | ECU | STARRING LIA
https://www.youtube.com/watch?v=ah3pqB...
3 WEEK OLD Cornrows + How to Detangle | Hair Matting? | STARRING LIA
https://www.youtube.com/watch?v=iO7r0Y...
Wash n Go on Short 4C Natural Hair + Nighttime Routine | Thick, Low Porosity Hair | DEFINED CURLS!
https://www.youtube.com/watch?v=dJ2mCp...
New Apartment Essentials Haul Part 1| I'M MOVING!
https://www.youtube.com/watch?v=sfjdyM...
DISCLAIMER: I received these clip ins from CurlsQueen and I was paid to do this video. All ideas and thoughts are my own. Links included in this description may be affiliate links. If you purchase a product or service with the links that I provide, I may receive a small commission. There is no additional charge to you! Thank you for supporting the Starring Lia brand.
Editing Software: iMovie
Follow me on Instagram: starring_lia
Email: [email protected]
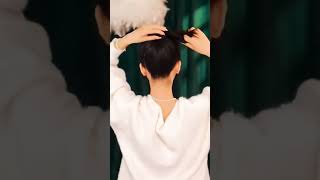
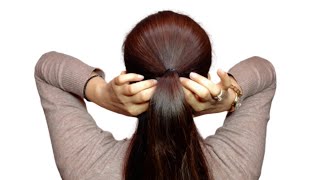
Hey guys welcome back to my channel in today's video. I will be showing you all how i installed these clip-ins i was sent from curls queen. I was super excited to get textured clip-ins, because you guys, i wanted a little bit of extra length in its natural state and i wanted the hair to look like it was mine. So this is how the clippings came packaged. It was packaged really really nicely, and i was so surprised at how thick the bundles were. They are double wefted, which is a plus, and one bundle will do your whole head at first. I was a little skeptical. One bundle am i gon na have enough, but you all, as you can see in the thumbnail, i had more than enough hair and it was super full and this texture is for b4c. It is coarse, kinky fro and it is 100 indian virgin hair and at the bottom of the bag. I found some extra clips and some thread just in case some clips needed to be reinforced or reinstalled, and i love this bag that the hair came in, because i have the tendency to put hair in ziploc bags when i'm not using it. So i definitely needed that for when i decided to take the clip-ins out and now i'm just showing you what the wefts look like. This bundle is much thicker and fuller than what i have seen for most brands in the past, and i did go ahead and wash and condition this bundle and it did pretty well. The curls were still there. I didn't lose any curl definition and also i had minimum shedding, which was a plus. Now i did go ahead and section a leave out just because i kind of wanted some of my hair out to make it look natural. And if you are doing a leave out, you do want to make sure that you have enough hair to cover the wefts. Because nobody wants their trash, showing now, let's go ahead and get into this braid down the way you break your hair. If you decide to do, cornrows is very important on the side. I am going to do one straight back because i didn't want to do braids going from the middle of my head to the other side, because i felt like it was a lot of tension. So i'm doing a couple on this side and, as you all can see, i do lift the braid up and connect it to the other one just so that i can only have one braid at the end that i need to tuck up under the other ones. Now we are going to do somewhat of a curved braid, and i am doing this braid like this, because i want some of the hair to hang in my face, and i want the clip clip in to be able to clip onto a braid. That is sturdy and that is going to allow the hair to go in the direction that i want it to go now, once you have those braids on that side, you want to go ahead and move to the other side, because you want to be able to Connect the braids in the middle at the end, so that it is not as bulky and here i'm just using a crochet needle to tuck the end of that braid. Now, let's go ahead and start clipping. The hair in this is the fun part because it is the quickest and you're about done. I am going ahead and start above the braids that i connected in the back, because nobody wants that tension back there, and this whiff actually has three clip-ins on it. I'M going to say one with four for the top, and you want to make sure that you space these out decently, because this hair will get bigger as you get ready to style it. I noticed that you all couldn't see how the hair was looking on. My black sweatshirt, so i did go and switch shirts so that you all could see a little bit better. Now, i'm using the weft that has four clip-ins on it and i am going ahead and start to the front of my hair. You want to make sure that you lay these webs kind of at angles so that the wefts, the end of the wefts are not sitting on your edges if they make sense, because i feel like it's more noticeable that way these days, i don't really care for That empty conversation these days now i do want to let you all know that it is okay to cut some of your wefts. A lot of us probably will have to cut our wheels because our heads are different, shapes and sizes, but it's okay just cut it and you can still use it, and that is why i had that braid in the front, because i wanted the hair to lay Directly in my face - and that is exactly what you all want to do with these clip-ins - you want to clip the hair in in the direction that you want the hair to lay, as i am doing right here and now it is time to get into this Falling part, i am going to be putting some jumbo twists in, but i am going to make sure that i detangle the hair and moisturize it just as if i would, if it was my own natural hair, because you guys at the end you all will see That this hair will definitely look like real natural hair. I did give the ends a little bit of a trim, because i wanted them to look even and uniform now when you get to the top go ahead and release that leave out and slick it down with your favorite gel jam or edge control, because you want This part to look very sleek as if it would be a wash and go or twist out. However, you would normally style your hair, and this is how i normally style my part, so i'm just going to make sure it's moisturized, i'm going to bring the product to the ends, and i am going to detangle my hair with the extension so that i can Get it as smooth as possible before putting a twist in, and once you get your twist in, you do, want to go back and make sure that you have your leave out nice and smooth, because we are going to tie it down and ensure that it is Dry before we do the tape, what they all down - okay y'all, so i had set up under the dryer, which is why i'm a little bit oily, but i was so surprised at how fast my leave out it got dry. So now we're just going ahead and do the take down. So this clip is fed up a little bit, but you all want to make sure that when you're taking these apart to be gentle and to separate the curls, where they naturally separate eyes on me, i don't know what to do so. I smile and i wait everyone's looking like they know what they do. Everyone you guys, this hair was so super soft and so defined. I just couldn't keep my hands out of it because it just felt so so so good. Now, if you have shorter hair like me and you're, having a little bit of trouble blending, this is a trick for you, so gather a piece of the extensions in your hair and put a little bit of gel on it and squeeze it. This helps the end of your hair blend, with the extensions a little bit better so that it looks natural, as you all will see in the end, you can also give it a little coil like this, just to make sure that it is stuck in place. So after flipping, i decided that i wanted more of a blunt fro, so i am going to go ahead and even my hair out all around and if you need assistance with this, don't be afraid to ask. I just wasn't gon na ask stefan to cut my hair, because no we're not doing it and my sister wasn't here this day, so i'm just going ahead and giving myself a little bit of a trim y'all. I am still amazed that one bundle got this style and i actually had all of these clips left over and i just started feeling myself and then realized that okay, i need to change my earrings and come back because i just needed like a boom effect. Then i started feeling myself a little too much like honey like who could tell me that this is not my hair, and that is not growing out of my scalp, even though i know it's not, but you guys. This looks good and it looks like my natural hair before i cut. It really really hope you all enjoyed this video, and i will see you all in my next one.
Comments
Dime a Dozen: It’s the best natural hair extensions video on YouTube!!!! I’m sold! Thank you so much sis!!!
Meisha Moon: Gorgeous!! Glad I found your page ❤️ thank you
ellipsesbolt: Hi, I really loved the video :) I ordered these clip ins and I’m wearing them currently! I have one question though, did the natural black colour match your own hair? I had to buy some semi permanent dye black dye for it because it was way too brown for my hair that’s completely jet black
Itsjustsp: Beautiful Loving your content amazing.
CoconutSatinPeePee: It’s been around 8 months. Do you still wear the hair? How well does it hold up?
zoelynn69: Your hair turned out gorgeous. I have a question was yours the 5clip set or the 10clip set?
Savannah Jocelyne: Hi! I love the way your hair came out. What gel did you use?
Breyanna L: I love this! How long was the delivery?
jasmine peele: i love this look. you better show out at the end
Queen Lady: Thanks for changing your shirt out and doing this video with great detail
charmaine gray: Very nice, cute hairstyle
Tabby Lynn: Thanks for the video. Cute on you!! ❤❤ Did you sleep with the clip ins in or is this more of a one-day style?
Purple Glitter: It doesn't look like 4c. It's look just like 4b. I want to try it but don't want it to just basically be 4b hair.
Pink Magic: Yessss finally
Just Queen:
Queen Moe Better: New subscriber 6-11-21
GG love Love: Pls is this 14inch or 16