How To: *Detailed* Microlinks Installation Ft. Niawigs Beginner Friendly
- Posted on 04 August, 2022
- Microlink Hair Extensions
- By Anonymous
ROAD TO 1K! MAKE SURE YOU SUBSCRIBE
Hey homegirlz! I was very impressed with this hair. It looked so much like my natural hair and not having to put glue or anything in my hair was a plus. Took a while to install but so worth it! Let me know what yall think down below. I will be doing an update soon!
Huge Thank you to @NiaWigs for sponsoring this video!
Microlink Hair Extensions in the video: https://cutt.ly/vZZGPci
Hair Length: 20", 22", 22"
-----------Get 20% off---------------
Use Coupon Code: Nakia20
More products on https://niawigs.com
Tape-In Hair Extensions https://cut.ly/nL71wiV
Microlink Hair Extensions https://cut.ly/hL8qQyH
I Tip Hair Extensions https://cut.ly/aL8qU7k
Bulk Hair for Braiding https://cut.ly/aL8qGH9
Contact: [email protected]
00:00 Intro
00:44 Unboxing
01:46 Parting
3:40 Installing Microlinks
10:42 One Full Bundle Installed
14:01 Fully Installed
14:35 Curling
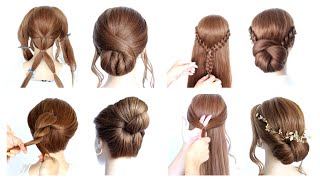
16:35 Diffrent Hairstyles
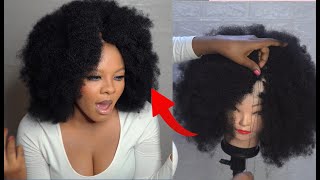
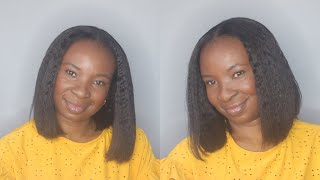
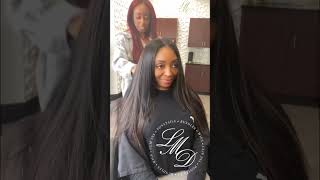
Making trips what's up y'all welcome back to my channel if you're new here my name is nakia. Welcome, make sure you go ahead and subscribe. Today'S video, i'm going to be showing you how i go from my natural hair flat iron to this voluminous very much body. Yada yada natural, looking install using micro loop extensions, so if you are interested in seeing how i achieve this look make sure you keep on watching. So the hair comes packaged really nicely in this purple packaging. Once you slide the initial cardboard off, there's a drawer for you to pull out and there's a purple satin bag here, where you can store any remaining hair or any eye tips that you want to reuse. It says neowigs.com and then there is my three bundles. So i have two 22 inches and 120 inch, so the texture is really curly very textured hair. It also comes with two hair clips and also two velcro hair patches and a set of flexi rods. There'S also a pamphlet in here with instructions on how to do the eye tips and i'm loving the representation they have here, she's really cute. I love that and there's also some more information in here about neil wiggs. This is what the hair looks like after i had dyed the hair jet black and let it air dry texture looks pretty much the same, and then we went into party so for pardon. I pretty much left out the same amount of hair that i would leave out. Um like in my quick weave video. I just left out the perimeter and a little area here for me to do a middle part and i pretty much just braided the perimeter of the hair just to get it out of the way. If you plan on installing these on your own, like i was you want to make sure you have at least two mirrors, so you can see in the front and in the back of your head, because this isn't the easiest process to part and separate to do On your own, however, the actual micro links themselves are very easy to install and, of course, my parts were not perfect, but as long as i had enough hair around the perimeter to cover the beads, when i put it up in a ponytail or in a bun, That'S all that really mattered to me, so i just went ahead and braided one braid all the way around my head and connected it to my leave out in the front where my middle part is - and this is what it looks like when i got finished with My braid so now we're going to start with our first row of the micro loops, so you want to part very thin, thin layers of hair, because if you have too much hair, you won't be able to pull it through the microwave extension. So just make sure you do very thin layers, you want to make sure you don't have too much hair, but then you also need you don't want to have too much, but you don't want to have too little if that makes sense, because if you have too Little it'll slide out and if you don't have enough hair, you won't be able to pull it through. So just make sure that you do a nice layer of hair, and so, as you can see, there's a lot of little flyaways. So those little velcro pads that neo wigs included in my package definitely came in handy, so i just used them to keep any flyaways up against my part so that they wouldn't get caught inside my micro loops. So initially i flat ironed each individual micro loop to avoid putting additional heat on my hair, but i did learn a faster method later on in the video but basically you're just going to take your extension and you're going to separate a small section from your part. You'Ll wrap the plastic piece around it like you would do a rubber band, and then you grab your bead. That'S on the extension, the black bead and you basically just pull it in the opposite direction and it'll automatically loop. Your hair, through the bead from there just grab your individual strand of hair and slide the extension up the shafts, and then you just take your pliers and clamp down on the bead to close your hair inside of it, and that's pretty much how you install your Micro, loop extension, so it's pretty simple, pretty self-explanatory, so we're just going to continue doing this all the way across our row that we have here parted out. So you want to make sure when you slide the extension up close to your scalp, that it's not too close, because you don't want it to be uncomfortable when you pull your hair up into a ponytail. So you want to make sure that it's not super duper. Close to your scalp, just close enough to where it's not going to get caught when you're combing it foreign okay, so one full row is about, is equivalent to one track of hair in your hair. So this is how it looks after i got done with one full row, and so i just continued the same method, all the way up to the top of my head foreign um. So, as you can see, this can get pretty repetitive, but i pretty much finished the rest of my hair using the same exact method, just one row by row with very thin layers of hair. I didn't really leave hair in between each layer either. If you were wondering, i pretty much just stacked them right on top of each other in the back towards the top of my hair is kind of where i left out a little bit more hair. But in the background, all the way up to the top of my head, i didn't leave any rows in between my hair. So that's like a personal preference if you prefer to do that, but i did decide to install them row by row with the hairless natural state and because you can clearly separate your hair from the eye tip when you lift it up. The shorter hair will kind of fall if you can see, but i'm pulling it apart. Um i decided to flat iron it after i got done with each row just to move a little bit faster foreign, all right y'all, so i've officially installed one full bundle. Every single eye, tip from one full bundle, is in my hair right now, and this is about how much one bundle fair enough, and this is how much one bundle is in your hair. I don't know if your hair is thick like mine. My braid ended up coming out. That was too short, but so just take a look, take a look and see how much one bundle did my hair. So yes, one by northern, oh okay, all right so moving on to the front of my hair and on the sides um that very top crown area. At a certain point, i kind of stopped adding them going up the top of my head. So in that back area there is not many loops back there, but closer on the sides. I did add a few over here up until my leave out part that i have left out here, so you can kind of just buy it and see how many you kind of want to leave out. But i didn't want to leave too many in my phone because i didn't want them to show. So that's also a personal preference if you want to continue to put them at the crown of your head, but i decided not to i just added them on the side so to be even and length around the sides of my hair okay. So i'm going to take all my leave out and we're going to salad, so my leave out has a curl now because it was pink curls. So let me go over that with the flat iron it down. Oh all, right y'all! So this is how my hair looked after. I installed 250 of the micro loops. It was very full. It looked very natural, looked very much like my real hair. I didn't go over the hair as much as i could. So it's not as straight as it possibly could be, but now we're about to get into styling the hair, okay. So just a few things i want to mention with this hair that i've noticed since i've been wearing it now for a few days, um being that it's very, very hot here in houston, it gets very humid and my hair tends to poof up a little bit. If i'm out a little too long outside in the heat um, this hair did actually poof up with my hair um, which i wouldn't say is a bad thing. But if you have like relaxed hair or something like that and your hair actually doesn't poof up due to humidity or something and the weave does it you know, then it would kind of be like a difference in texture. So that's something to think about, but i think overall, if you have really thick hair on this hair, you will like straight okay, you guys, i don't know if i mentioned it or not, but i did use 250 micro loops, total, okay, so 100 micro loops comes In each individual bundle you guys know that i had two 22 inches and 120 inch. I installed both of the 22 inches, which was 200 micro loops, and then i installed half of the 20 inch bundle, which was 50 micro loops, so 250 total um. It did take me a while because i took breaks, but i think it took me two hours to do one full bundle. So when i showed you guys when i got to that one bundle mark when i installed one full bundle, it had taken me two hours to do that, so i'm gon na say that it took me total, if i would have done it straight through without taking Breaks or stopping it probably would have took me about five hours: five and a half hours to complete um. So yeah you just got ta have patience. I would do this on a weekend where you don't have anywhere to go yet um, or do it a few days prior to when you have an event, because it is very time consuming, but i think it's worth it. If you like to wear your natural hair, you like natural styles, natural installs, i think micro loops are perfect. Cheetos all right! Try and i do have a special coupon code for all my home girls y'all - can get 20 off using coupon code nikia20 on the neowigs.com website, so make sure you use that coupon to get twenty percent off when you order your hair from your wigs. Thank you. I really really love how the hair looks big. It looks really really natural if i say so myself, it looks really. It looks really good. It looks like my real hair, especially the ends of the hair. It doesn't look too straight. I mean i wanted to say that this is going to be my last time, straightening the hair, because the hair is meant to be curly. If you can see i'm supposed to be wearing this hair curly, but i wanted to wear it. I wanted to install it in straight first just to make sure that i had enough hair in my head in the event that i didn't want to wear it straight, so i didn't cut the hair or anything like that. I don't plan on cutting the hair. I plan on leaving it just like this because i know once i wear curly it's gon na probably be somewhere up here or something like that. I'M assuming i just hope that the hair reverts back okay y'all. So, as you can see, this hair is perfect for blending with a thicker texture of hair. I really really love the hair. I definitely want to give a special thank you to neil wiggs for sponsoring today's video, if you guys have any questions that i did not answer, make sure you leave them down below, so i can get those answered for you. Let me know if you're thinking of trying this hair from neo wigs and what you think of the install make sure you put a like on this video. Thank you. So much for watching and i'll see you in my next video puppy.
Comments
EboniK: You be slaying the natural looks!! Saving coin too doing your own hair. You better be using a heat protectant spray. tresemme keratin smooth ( red bottle) is a good one. I know the girls would love too see how you keep up with them during the week or night time/ morning routine to maintain it.
Luvin Apples: Your natural hair ..... so beautiful before and after. Thanks for the tutorial
m: This looks good! I think I'm loving it more than the yaki ywig tapeins you did! Which texture do you prefer?
Clouded ByL: It looks really pretty. Girl my arms would've fall off