Diy Hand-Tied Hair Extensions
- Posted on 01 March, 2020
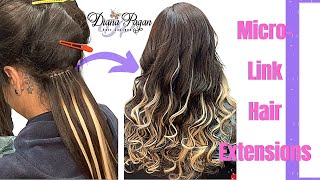
- Microlink Hair Extensions
- By Anonymous
Here is how I install my own hair extensions by myself using a hand-tied/beaded weft method. I am not a hair dresser.
Here are the extensions I buy.
https://www.bellamihair.com/collection...
Here is what you will need:
Weaving Thread
C Weaving Needle
Hair extension links/beads
Micro Extensions Plyers / Clamper
Scissors
2 large mirrors
Lighting
Clamp clips
Hair extensions
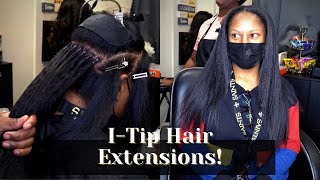
What is up everybody? My name is Jessica Jean, and I am here to show you how I do my very own hair extensions. The method that I use is a hand tied beaded wept method that I saw on Instagram and decided to give it a shot, because I didn't want to spend a couple thousand dollars to have a professional at a salon. Do it I figured. I could try to do it myself and it worked so I wanted to share my technique with you guys, so you can try it at home yourself and hopefully save some money. This technique is not for everybody and I'm not a professional hairdresser, so I don't really know what the fuck I'm doing. So I'm just gon na show you what I do. It'S worked for me and I'm gon na. Take you from the very beginning, the very first step to the very end of the steps. Okay, the very first thing you want to do is make sure that you buy high quality human remy hair. There are two types of hair out there. There is the 100 % real natural remy hair, and then there is the synthetic hair. The synthetic hair is garbage, don't waste your money on it. I'Ve made that mistake before, because it was a little bit cheaper and it does not curl. You can't wash it nothing. So it's fake, don't even use that so I'm going to show you guys what brand I used and the color that I'm using right now, which is right here. I get my hair extensions from Bellami.com and I'll post the link below for the website, and I get the guy tang regular clip in extensions on Bellami. They have tons of different hair extensions. You can get so you just go through and pick the one that you like the most there's different influencers on there. They have different collections of hair extensions, so the one that I get that I found to be the best is the Guy Tang, and I love the guy team because he does kind of balayage ombre kind of look, so it blends seamlessly with practically any hair color. As long as you're in the area of the hair, color it'll blend right in no one has ever known that my hair is fake because it blends in so well because of the Guy Tang extensions. So there they are. The color I get is the 8/60 ash brown ash brown ash blonde hair extensions, and I get the 22 inches because I want long. They have different lengths. So when you buy your hair, you're gon na get it in the mail and it'll come in the package. Like this you're gon na take out the bottom package, if you buy it from Bellami, but most hair extension places that send you hair will always have a tester, so you want to take it out test it put it in your hair, make sure it matches perfectly. If it does not match you, don't like it put it back in don't open. This is once you break the seal on this. You can't get your money back, put the tester back in the package and then mail it back to the company and order a different hair color get that hair color make sure it's perfect. I can usually get my hair extensions to last between four to six months, depending on how well I take care of them and I'll go through a whole video on how to wash your hair extensions and how to take care of them as well. So they last longer, so I have some tricks. I'Ve been doing this method for about, I don't know a year and a half two years now and it saved me a lot of money and a lot of time, because I can do my hair at night. My kids are sleeping, I'm not wasting hours at the salon and it just works out for everybody. So especially my husband he's very happy. I'M not spending twelve hundred to two thousand dollars on hand tied weft extensions, though you're welcome husband. I got your back but anyways. Okay, so you get your hair and then I take you through exactly what I do once I get the hair and then we'll keep on moving forward all right. So the tools that you're going to need for your hair - and you can get this tool at Sally's, you're gon na - need a little beader thing. It looks like this. It'S a little metal thing with this thing at the bottom. Okay, I have to I load both of them up, so I'm ready to go. Might waste some time putting beads on you're gon na need a curved needle. You can get this at Sally's as well. It has a little spot for the hair thread to go through, and then it has a pointy edge. Okay, so you need a pack of those you're gon na need some of these beads. There are two types of beads you can get. There are beads with a silicone insert and without the silicone inserts I have tried both and I have found that the one without the silicone holds longer in your hair, the one with silicone it has like a two-part to it, and the silicone tends to just come Out which leaves the bead loose in your hair and it falls out quicker, so I like the ones without the silicone insert in it, you can get those at Sally's as well. Just get the color that matches your hair. They have brown dark brown, black and blonde. So just pick the closest one - you won't see them anyway, so it doesn't have to be exact exact, but as long as it's close to your base of your hair color, I'm you're gon na use some of these clips that look like this to section off your Hair and you're gon na need clips that look like this. I don't know what these are called, but whatever they're called to hold up on the top part of your hair and as well as hold the extensions in place, while you're sewing them in alright. Here I need a clamp er one of these boop-boop. You can get that as well. At Sally's, you're gon na need one of these combs with the metal edge at the bottom. It says for parting, your hair, making a straight perfect line and see what else you need. You'Re, gon na need, string or hair strain, make sure you get this at Sally's or a beauty supply store, because it's specific for hair leaming. So get this again. They have different colors, you just pick what color matches close to your natural hair color see what else you gon na need some scissors boop-boop for cutting the string, and then these handy little things. This is from a sewing kit and this is to take the clips out of the extensions once you get your extensions, so I'll show you how I do this, but this is very handy tool to get those clips out. First, alright, so you just get your hair and you put your tester in and it's perfect, so you do decide to keep your hair extensions, though, when you get your hair extensions, they are going to have clips on the back of them. You can leave the clips on I've never done that before, but I've seen some YouTube videos where people leave the clips on. So when they take the weave out, that's weaved in they can still use it as a clipping. I'Ve never done that before because I feel like it would be super heavy. So I always take the clips off and I do that with this little tool for my sewing kit. So you take your clip and you just go around to where the string is and you pop the string off okay, so you go through you're gon na. Do that to your hair extensions, get all the clips off all right, I'm not gon na! Do it all here so take the clips off and get your hair ready to go. So the next part is setting up your mirrors. You want one mirror in front of you and then you want one mirror behind you, okay, the mirror behind you. You need to have light, so you can see the back part of your hair. This is from a vanity that I have in my closet, so it has all the lights on it. If you don't have that get one of those floodlights, it's like one of these things, so it has a cord, has a little clamping thing and you can clamp this to your mirror and turn it on, and that will give you the light. You need to be able to see the back of your head. You definitely need light like really really good light, no get back. Now we move on to how to do it. I already have two rows on the bottom of my hair, so I have one the very bottom just a straight line, and then I have another row right above that, so I'm gon na do just the top row for you guys to see one first brush your Hair brush your extensions, if you screw it up, what's the worst that can happen, you just take it out and start again right, not a big deal. So this is like a learning process. Okay, so I have my mirror here on my front, the mirror in the back and make sure I can see I'm going to start just sectioning off like a random part. I'M gon na put this up with the clip. I like to do it, so my lines are going down my hair okay, so that makes sense so down like a crown like that, a little halo on top of your head and you'll know why, in a minute, All right, so the extra hair I just take this clip and just flip it up, and then I can comb it up like this to get a nice view of the line. Okay, then I get everything ready, so I will put my beads on my beader and I've drawn music when I'm doing this or I'll put on netflix on my phone to make the time go by faster. So I got my beader ready to go. Then I'm gon na string, my string, The amount of string is dependent on what section I'm doing since I'm doing like a top section, it's gon na be a big string. I have a lot of left, so I usually do my arm length and I'm gon na make a loop with the string make sure it's super tight and does not come off because you don't want it to come. Unraveled in your hair, hey cut off the excess. So here is my knot: I'm gon na cut kind of close to it, so I don't want that popping out, make sure it's tight, pull it. Okay, that's ready to go. I got my feets ready to go. Okay, let's get it started. So here is the final. What it looks like see how it blends in really really well and yep: that's all you do.

Comments
Stephania Duncan: Wow! As a licensed hairstylist with 20+ years of experience "I commend you!" Youtube has certainly changed the market!
chanel113: I’m a certified extensionist - Never leave the clips on!!! The metal rubbing against the same spot of hair every day creates bald spots. This happens to girls who wear clip ins daily too. I see it allllll the time
clipinqueen: Bless you! Thank you so much for doing this video. There's not a lot of us who are doing this method on their own, so I commend you for doing this. It is not easy! LOL. I haven't even watched the whole video yet, but I just wanted to bow to you right away. LOL. I also wanted to add that you can buy 'weaving hair' or wefted hair from hair salons or companies as well. You do not have to buy the clip-ins, although that may seem easier. I buy most of my hair and supplies from Aliexpress or Alibaba and it is waaaaay cheaper.
Lyndsie Dull: I’ve been wanting to do this but I wasn’t sure how to do it on myself...so thanks for posting this! I have one question...are you sewing the weft behind the bead only or are you sewing the weft through the entire row? I’m so excited to try this! I think I’m going to need two packages of clip-ins to do this on my hair. I currently only have 1 package but I think if I’m going to see them in I’ll definitely need more hair! Do you have a recommendation on how to place each weft throughout the head?
Scarlett Solis: You’re a real queen for sharing this. Blessings
Melissa Duncan: So this is awesome that you can do it on yourself. I'm licensed and want to try to do it on myself but was kind of scared lol. But now I'm going to try. But just as a tip, when doing the beaded part use less hair in the bead. The part should only be as wide as the bead itself.
KrunkTina: Literally I am going to do this, I knew it could be done! It’s not hard! I am a hairstylist, I ought to be able to do this!
Gina Rocha: Loved this video so much. I dye my own hair and love not having to spend all of that money at the salon! Thank you so much for sharing! Will you be making the video on how you maintain the extensions?
Lpg 8: Watching this gave me a great idea. I'm going to put some beads in my hair then clip in my extensions to the beaded sections, the beads will serve to anchor the extensions so that they are more secure. This way, there is no need for teezing the hair and the beads can easily be removed, or not :)
Jane Dough: You freakin go girl!! Thank you so much for this idea and showing that one can totally do it on her own! DIY baby babay. P.S. your arm strength must be on point! But fr, THANK YOU
Miss Daisy: I’m so glad I seen this because every since I moved to Nashvile I have been getting severely ripped off on my hair they are charging me like 1000 to install 3 rows only And I always HATE IT LAST TIME SHE DID IT I PAID 1500 AND they fell out 2 days later and I HAVE been asking round and it’s normally 100 per row for install maybe 150 . It’s such crap because I know how to do it but I was worried about not seeing the back . I tighten them on my own and have been for years I can install i tips myself . But I just don’t feel like paying someone more them my attorney , for a class that only cost 200 bucks and 2 days to complete , they act like they went to school for years for this or something and the class is literally a few days for extensions . If I had any friends I would be doing each other’s hair lol but I’ll do my own from now on . THIS IS FANTASTIC
Dalia Omar: Wow that very helpful you did exactly what I’m looking for thanks sweetheart
Ariana Conlon: Thank you so much for doing this video ❤️
B H: Did you have any tension damage from this at all? I had mine done by someone professional and I have tension bumps and bald spots
Mel's World: Thanks for sharing .. question for you... are you putting the thread through the bead when sewing ?
stephanie wyke: I have to say a big well done, because iv attempted tape ins on myself and found it difficult myself lol
leslie mccrocklin: Do they hurt after they’re on?
J M: Yasss just the video ir tutorial I was looking for!! And you’re so pretty! U remind of Misty Day from season 3 American Horror Story ❤️
Miss Antie Buttons: Is this less damaging to your hair than tape in extensions? How long does the whole process take? You said you do it at night after the kids go to bed xx
Brittanie Boulton: How many rows did you do and how lo g did it take? Just paid $3k for mine ♀️ the hair was the most extensive part, though. But STILL..... I'm going to start doing them on myself and also get certified!
Mel's World: Also how do you take it out?
Amanda Nicholas: Have you ever bought from Amazon? Your hair that is... That's where I bought mine and I bought the highest rated hair I was just wondering if the hair your buying is better then what I'm buying. I buy 24" 2 packs $150 a pack. I do my own hand tighed aswell.
Brandi Strozewski: Bellami is really nice hair, but you can buy machine wefts without clips
Lisa Schnagel: good job!!!
dee Rosse: Did you purposely grab a section hair from the last piece of hair (micro beaded sections) ,when you were making the rows, on purpose or was it on accident?
Miss Daisy: If anyone lives in Flordia I’m moving there after Christmas ... we can do each other’s hair ... haha let’s do it !
Shelley Gomez: Wow your good! I’m gonna try it. Eeekkk
Ashley Stewart: Was that a camera or a phone with a lens attached at the end???
Jennifer Hermanson: Boop Boop! love it
Mel's World: Good job, so how do ya take them out ?
Sammi Fitzs: As far as in concerned, if its human hair, that you purchased, its not fake, its YOUR real (not natural but ppl don't need to know that!) human hair!
Sabrina Martin: Can you do my hair, good job. Where are you located?
Santi Vargas: The video should be called DIY beaded row extensions not handtied. These extensions are not handtied weft hair they’re machine weft. It’s a hair type not a method. Misleading