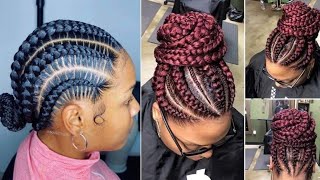
Goddess Braids With Weave Step By Step Tutorial Part 2
- Posted on 13 December, 2013
- Sew-In Hair Extensions
- By Anonymous
For Free Giveaways & Weekly Updates, Stay Connected By Email! http://eepurl.com/Am3Kb
Buy My Books, DVDs, and T-Shirts at http://www.howtoblackhairstore.com
My Website: http://www.howtoblackhair.com
Instagram: http://www.instagram.com/BreannaRutter...
Twitter: http://www.twitter.com/BreannaRutter
Facebook: https://www.facebook.com/OfficialBrean...
Google +: https://www.google.com/+BlackWomenHair...
Got Hair Questions? Email Me!
Email for Business Inquiries
In The Goddess Braids Hairstyle Tutorial I inform you of all the products that you will need to achieve this hairstyle.
To achieve this braid hairstyle, you will need as follows;
(5) Packages of Synthetic Kanekalon Braiding Hair http://goo.gl/f8Hm6e
(1) Wide Tooth Comb http://goo.gl/zLIn9c
(1) Rat Tail Comb http://goo.gl/8Pn9Vm
(1) Hair Cutting Scissors http://goo.gl/rYH7BX
Duck Bill Clips http://goo.gl/3wFHMf
Open Bobby Pins http://goo.gl/uTp56V
Hair Jel http://goo.gl/2RgJH3
In this step I am teaching you how to do a goddess braid step by step along with how to make your braids longer by adding more extension hair.
Wearing a protective style like this inverted dutch braid hairstyle is great in retaining the length of your real hair but if you always comb aggressively or handle your hair in a rough manner, many of your hair saving methods will go to waste.
Also, remember when that you do these big braids with kanekalon hair you can make your braid or your twists as long in length as you want.
To make them longer in length, you just have to add more braiding hair near the ends of your braid. The ultimate look of a style is to your discretion.
Part 1 http://goo.gl/44Rymi
Part 2 http://goo.gl/0JeItJ
Part 3 http://goo.gl/bh6ZaT
Part 4 http://goo.gl/UMbcAz
Part 5 http://goo.gl/nISwyc
Thanks For Watching!
DISCLAIMER: All suggestions, tips, prizes, techniques and advice given are for informational purposes only and should be used at your discretion and best judgment. I highly recommend conducting strand tests when trying or using new products, hair appliances and product mixes. I am not responsible or liable for adverse or undesirable effects including hair loss, hair breakage or other hair/scalp/skin/body damage as a direct or indirect result of the suggestions, tips, prizes, techniques and/or advice given.
________________________________________
FTC: I am not representing, being paid by, or endorsing any of the product brands in this video & I purchased everything with my own money - UNLESS OTHERWISE STATED in video/blog content. There are links to products that might be helpful based on the content of this video/blog. Each of your purchases via our Amazon affiliation links supports our cause at no additional cost to you.
Music Used
"Easy Lemon" Kevin MacLeod
Incompetech.com
Welcome to step number 2 of the goddess braids hairstyle, and in this that I will show you in detail step-by-step how to do goddess braids on your very own hair. So to begin, you want to make sure that you use your rat tail comb to part off a big section of hair for your braid. The nature of the style is to have very large braids across your head, but, as always, you can part as small or as big as you like, someone to part your hair and the table, your hair with your detangling. You will then apply hair gel to the roots of your hair to further prep your hair for the style. Applying hair gel to the roots of your hair is optional, but this is what gives your goddess braids that finished sleek. Look so once you've gelled the roots of your hair. You will then section off a large amount of extension hair and I will show you the goddess: braiding techniques step-by-step. So first, you start off by parting, a section of your hair as a rule to follow use the 4 of your fingers to serve as a guide of how thick your braids will be. You could, of course, part them small or as big as you like, so I will take the end of my rat tail comb and part. My first section when parting, your hair, make sure to part more narrow, as you near the back of your head, so that all of your braids can be braided to the back of your. So now you going to gel both sides of the roots of your part and then use your duck bill clips to keep your hair sectioned so that you can braid your goddess braids step-by-step. So now that your section has been prepped, I will show you how to prep your extension hair and then begin braiding. So now we are going to begin braiding at first am going to show you how to prep your extension hair to you gon na grab. One of your packages of extension hair and you can locate the very bottom of your hair once you locate the bottom, you going to pull on some of the strands to give the ends more of a tapered. Look just like this. You want the ends to gradually get thinner so that when you braid your braid, it doesn't end at a straight blunt cut, but instead it tapers off to a more thin appearance for a more natural looking braid. So just pull your ends, so they can become thin. So there's no blunt sharp edges to your extension hair and then you going to locate the middle of your extension hair and you are going to take off of the very big chunk. So I am going to take off about half of this actual package of hair because you want a lot of hair goddess. Braids are very big braids, so you need a lot of hair, and now you are going to wrap the hair around your hands. I am going to add a little bit more hair, so now what you want to do is pinch this hair into 2 parts, but you want to pitch it into a 3rd. So it's about this much separated going to wrap this 3rd piece around two thirds piece. So that you can form 3 equal legs to your braid, so now, as you begin, you gon na bring this piece here that wrapped around that small piece of this was your one 3rd piece, and this was your 2 thirds piece. You are going to grab this one 3rd piece and you going to place this piece right where it meets together behind a small section of your hair. So I am going to go up to my scalp and I am going to pinch of a small section here at the beginning of my part, it doesn't have to be precise. You just need to pinch off a small section to begin so once you've done, that you grab your hair and you want to place this portion of your hair behind the parts, even openings to legs up and put it a round apart like that, just like that. So you are going to locate your section of hair, and you are going put it with this piece that was behind the part, make sure is very smooth at the beginning and you going to grab this hair with your right hand. Now, once you have grabbed the hair you going to pull this piece up here is on the right side, and you going to hook your index finger just like that, just to hold it with your index finger ad, your thumb now with this lose hair is now The point where you going to begin interweaving it. So you can use your pincher finger to locate the middle section of your hair here and you want to pinch going outward towards the left so because this strand of hair is loose towards the left side of your head. You pinch from the middle of your hair and then you pinch a small piece out towards the left. You ae going to grab the weave with the hair. Once you grab it, you then are going to twist your right hand upwards. So once you twist upwards to use the index finger of your left hand you going to grab this piece of hair, that is on the outer edge with your index finger and your thumb, helping you make sure the hairs are separate. You want to move this hair up towards the other side of so head, so sometimes make some stray hairs caught in just one is separate. It out then move this piece over now you have a new piece towards the right side of your head. See the index finger and your thumb and you are going to locate the middle of your section of hair here and then you going to pinch towards the right side and use your thumbs up. Some your when she's done that you going to grab a section of the weave with your hand your entire hand, you rotate your left hand upwards to turn once you turn use your thumb and your index finger to grab this portion of hair here now, pull this Piece towards the left side and repeat so: you can use your index in your pincher finger to grab some hair here. You start at the middle of the section like this and then you going to pinch a little bit of hair to put towards that loose section. You have right here going to grab that, with your entire hand, turn your left hand upward and grab the outer edge of the hair, with your pincher and your thumb to loosen the section here, you are going to repeated again this time in the right side of Your pincher finger pinch, the middle section and then pinch a small piece here. That'S going to go towards the outer strand and what i mean by pinch through the middle section is that you are to pinch to the middle this area. And then you want to pitch to the middle and then scoop this piece of hair onto your section, so that way, you're not grabbing too much hair over here from the other side in your braid, looks a little funky. So now you are going to make sure you separate the hair out grab with your entire hand and take your other hand and turn it upwards and grab the section up here, which is your thumb and index and is going to continue to repeat the process. So far, I've taught you how to do your goddess braids step by step, and I first showed you how to braid braiding the right side of my head here and then I went ahead and assayed a portion of hair and upbraided the rest of my braids that You see here on the left side, so now I saved this last portion to show you once again at a different angle: how to do goddess braids, so my hair has been already sectioned. It'S been detangled and I'm going to apply hair gel here at the beginning of my part, on my roots on this and for my roots on the other side of my part as well. So now what you're going to do is pinch off a small section at the beginning of your area. This will determine exactly how far back or close to your roots, your braid will begin. My braid will begin somewhere right here. So that's what I'm going to section with my fingers. So that's how far back my braid will be, and now I am going to reach to my table and I am going to grab my section of hair. So what you want to do is pinch off a very large chunk of hair. The amount of hair you pinch off will determine how to thick. Your actual braids will be so this is a package of hair and I am grabbing about half of its size. You want to just give it a good feel to see if this, the thickness, you will want your braids to be separate it from the bundle that, when you separate your hair, you want to make sure to locate the bottom section and slightly pull on different pieces To give it a tapered look at by making sure the hair starts to thin down at the ends, it will make your braids look very natural. You can do this your entire package when remove it out of its package, for you can do this section at the time. So now you going to divide this hair to 2 pieces going to pinch off the 3rd from its amount so that you have a 3rd and two thirds separate it. Then you can wrap this 3rd section around the two thirds section, and now this 3rd section is one of the legs of your braid. This, and this is your other leg, make sure you have a hair separate, really nice clean. So that way, hairs will randomly get caught, different sections that you take this 3rd piece. That was your one third need a place. This piece behind your part when go to scalp make sure my hair is divided out of the way like that bring the hair around. This is the two thirds section we had you open it up, so you can place the hair right behind the part there and grab your real hair here, make sure it's very flat and smooth, and you are going to add it to that leg that you put Behind your part, just like this, so making sure you have all of your hair gathered, you are going to take your right hand and you going to make sure to just grab that section here with your fingers grab the section on the right side of your head Here, pull it up and you can wrap your fingers around just a hold of their temporarily. So once you move your piece back, you can better adjust your hands. So what I'm going to do is grab my entire hand around that section of this piece around my index finger and my thumb just Like that, and now I have a free leg so make sure all the hair is gathered all together and now you are going To separate a section of your real hair so that you can add it to this leg, so use your next finger to pinch or to start here at the middle of your section and then part outwards that way towards the section of hair here so grab a Small amount and add to this new section make sure you are grabbing, with your entire hand, makes sure to turn your right hand upward. So you turn in upward, and what you're going to do is use your index finger to grab this hair here. That is at the top here and its super important that you use the same amount of tension on all of the legs of your braid. So now this piece here is free because you rotated your hand and you are going to move. This is out-of-the-way, so that doesn't get caught, and now you are going to pinch off your new section of your hair here, so locate the middle here of your real hair, and you are going to pinch off towards this side, where this loose piece of extension is Separate your real hair. Add your real hair to that leg. Grab with your entire hand, grab your entire hand. You are going to rotate your left hand now upwards. So that way, you can turn the fist towards your face direction. So you just turn this way to reveal this piece. You hook it with your next finger and your thumb to add it. To that hand now this piece is free. You are going to do the same thing again. You always want to locate your real hair. The middle section here and divide with your finger going outward the reason why you do this is because, if you grab too much hair from the left side or the right side, when you are braiding, this will make its way your braid will start to look lopsided And funny because you grabbed too much hair so by going towards the middle and then moving your index finger outward toward loose piece of hair. This great more of a seamless braid so now gather all of the hair in your hand and then turn your right hand. Upward so that the backside of your fist is facing toward direction your index finger and your thumb to grab that top piece, and you are going to continue to repeat so. I will remove these hairs out of the way, locate your hair pinch, that middle section and grab the hair outward just like that separate with your fingers. Add that to your leg that stands alone grab it all together, pulling all the pieces very tightly. Turn your hand upward: you are going to use your index finger your thumb to grab that piece of hairs up top and move the hair that was behind to the side, locate your real hair pinch from the middle. Take this with your fingers slide. Your fingers through were the middle, is and then go outward to the side where ever the loose extension leg is, which is on the left side. Now gather all of your real hair and the leg of the extension in one hand, turn your right hand upward. So you can grab the new piece with your pincher finger and thumb so that you can let it go on this side now the same thing locate the middle section of your real hair and pinch outward towards that direction, where your extensions lie, which is here grab With your entire hand, rotate your left hand upward to grab this piece here with your thumb and index finger. You just want to braid that, as you are nearing the end of your braid, if you ever have any legs of your braid that shorted another, it is going to pinch off some of the hair from one of the legs and add it to your short leg Of your braid and then just continue braiding also, as you can clearly see, this braid is shorter than my braid. I have here so it’s going to ends off somewhere down here and to show you exactly how to make it braids. So right at the moment where this braid, that I am braiding is actually starting to thin, which is happening about right here. I am going to let go and grab another section of hair, so you are just and grab your hair going to pinch off a small section about this big. If you have the size braids that I have, you have small braids in smaller section now that you have that hair you going to cut it in half and then you are going to pull some of the hair is to give it a tapered. Look towards the end, just making sure you have any straight pieces. So once there is no more blunt pieces in your section, you going to begin adding it to braid so locate the middle area of the hair here, bring it up and you can open up all of the legs of the brain and the braid legs. You can add the hair on his. You can add it onto this leg here and you can add on to that middle lake here. So this outer leg in the middle leg is where you are going to add. The hair added to the middle lake in the are out of that and you going to presume braiding and when the leg is shorter than another pinch off a little here, added to the shortest leg. Just like that, and then you continue braiding and this that, in this step of the goddess braids hairstyle, I taught you how to do the goddess. Braiding techniques step-by-step to review. You want to make sure to part a large section of your real hair and thoroughly detangle. That section afterword’s, you will apply hair gel to the roots of your hair. Applying hair gel to your hair will ensure were very bleak and polished. Look but apply hair gel is optional after you've applied your gel. You will then pinch a large section of extension. Braiding hair: you will separate the hair to two-parts and use the parts to form 3 legs for your braid. When you start braiding doing your technique, you want to take your time to make sure that you apply the same amount of tension on your real hair and also on each leg of the braid that serves for your goddess, braid extension. Also, a couple of tips that I've shown you as well is how to add more extension, hair onto the ends of your braids, to make your braid longer. Now that you know the braiding technique and now that you know how to make your extensions braids longer, you will continue the same techniques throughout your hair until your style is complete and then in the next step, step number 3. I will show you how to style: goddess braids

Comments
Breanna Rutter: YOUTUBE HASN'T Been Showing You All My New Videos?? CLICK THE BELL ICON Next To The Subscribe Button to Turn on Channel Notifications To Never Miss A New Video Again!
Roxcy Lou: Thanks for this tutorial, Breanna. I am transitioning my hair and was looking for a low maintenance style. This style always seemed difficult until now. I will also be doing the goddess braid in my daughter's hair for her graduation. Once again, awesome tutorial.
T Cameron: I absolutely LOVE your videos! Very detailed and easy to copy. Thanks so much for your effort.
Denise NissiYah Coleman: Truly amazing how you can achieve these beautiful styles on your own, let alone talk the whole way thru!
Gisha Palmer: You make me believe I can do anything! Such precise tutorials, thank you soo much!
Larissa: Gorgeous!! I will show my mom this so she can help me do it on my hair.
Line Danzer: Thank you! I appreciate your teaching us how to do this for ourselves. You Rock!!
Valerie Gaston: You shared so many helpful tips and techniques that I have always wondered about. :) 1st- how to braid without have the knot be shown at the front. 2nd- how to add extensions to extension so that all the braided hair lands at the same place. As usual, very nice video. Thank you for sharing!
SlayedBy Jordan: Thanks Bre, I just learned how to do this and did it on a client . It came out wonderful
wilzahria dean: Great job! I love the way you do your demonstrations!
Shalonda Michelle: Excellent Video! So professional and clean! Thank you
God's Daughter: thank you so much, this was so helpful...... couldnt have been an easier tutorial! God Bless You! :)
missladyzee44: Didn't know you had that many tutorials. Thanx for being so detailed. I'm gonna turn my friends & family into walking billboards for my styles that I'm learning
Mel's Roadside Official: Your videos are awesome and i love the Goddess braids will try this on my hair. Thanks Breanna!
Nia Sheereen: The tutorial seemed too complicated but the end result looks great!
Bloorain82: Beautiful young lady! Thanks so much for the tutorial!
Munachi Adindu •: This is amazing !! Thank you so much your hair videos are my favourite!!!
Amanda King: Great teaching job. I've always wanted to know how to add extension hair. I get mine done at least once or twice each year to give my hair a break from relaxers. This lady done a great job showing how to do the goddess braids, step by step. I also like that there is no knot at the temples due to overhand braiding. I think I'll get me a doll head with long hair and a pack of extensions to practice on first. This is also a good money maker if done correctly.
Stacy Ann Williams: Thank you I am growing my natural hair and this is a great tutorial
Deanna Irons: Very good tutorial I enjoyed it an I've been braiding,etc for 16 years.great job
Mel A: Looks gorgeous, I'll be experimenting with these soon. It may be easier to try on someone else first
Mel A: Looks gorgeous, I'll be experimenting with these soon. It may be easier to try on someone else first
Zumba Mami Southern Girl: I totally loved the way you did all of these steps. What helped me most was pulling the hair at the bottom so it wouldn't be straight (that was genius) and then adding hair at the end when the braid turned up short???? How many X's have I had that happen in my DIY efforts...good grief. Thx so much for this tutorial. Will be doing my braids this week!
Ebony Hoffman: You are such a great teacher I love your videos thank you for sharing
Kanoie Barnett: I love your voice. your are so calm with explaining the steps! U go girl! thx
Mel A: Looks gorgeous, I'll be experimenting with these soon. It may be easier to try on someone else first
ellis7989: Hey! Love your vids. Would you mind doing a similar version with two strand flat twist?
jewelz509 leon509: Thanks so much girl I now know how to do it
YouthIsOnMySide: This was extremely helpful. Like it was so amazing. Thanks soooooo much. Like it really helped
Kalia B: I love this style. I tried it, but unfortunately I couldn't get the inverse braiding right. :-(
JaQuita Davis: Very helpful!
Bonga Mnisi-Zwane: you're very talented lady. good for you, I'm learning by the day. thank you
girlylovinron: Omg her skin is everything, glowing n flawless
Tanika Ivorri: Thank you for all of your videos, and sharing your knowledge! You're an excellent "You-Tuber" and business woman!
I. H.: Love it. I liked the way you added more hair and it didn't look like it, great technique.
Quintavia Brown: I enjoyed the tutorial on the goddess braids I just was expecting the parting to be more distinctive than what it actually turned out.
Rozlyn Alverson: Wish I could do this look so cute
Kanoie Barnett: I love your voice. your are so calm with explaining the steps! U go girl! thx
Kanoie Barnett: I love your voice. your are so calm with explaining the steps! U go girl! thx
Ha Cre: Looks great thanks for the tutorial.
mandy bowen: you inspire me. Keep doing the great job. You are so calm and pleasant. Love your videos. God bless
SHAY HAIRSTYLES: This video was very helpful thank you so much
DaCarla Howard: I don't know how you do it. But please keep them coming, that was a very well done demonstration.
I. H.: Love it. I liked the way you added more hair and it didn't look like it, great technique.
Alex’s Story: One trick is after you loop in the weave act like its your own hair and keep braiding like you would do a regular braid. Practice makes perfect.
Deborah Green: thank you.. i am definately going to try this!
Angela Wat: this is great. i learnt so much from the front view
Sonya Scott: Love the style you do. Your hair have grow.
Trinity Devine: I enjoyed your video. I was mind if confused on the starting of the basis and which way to twist your hands but I think I'll figure it out considering I'll be using a test subject vs it being me I try them on. Thank you for showing me the way.
klassydarky n iz dat: I jus love ur vid I'm all natural n I usual weave for my self, but u give me encouragement to do braid which I hate to do, thanks u r very gr8 at it all n ur explanations r fabulous.
Rachel Ramsey: I'm tottally impressed. I wish my figures were that limber still :( great job lady!
simply luziana: thanks so much. I have learned a lot from your channel.
Brenda Kabanda: Hey, would you please use the light coloured ones. They are more visible and easier to learn with. I managed to do the Senegalese twist in a day. I'm so excited to do it on my hair soon. Thanks a lot.
Olli MILLER: Très jolie. J'aime beaucoup ♡♥ ;-)
EZ BREAKBEATS: Talented!! Wish I could do that
Jacquelyn Dalton: Love your videos! I think I'm going try this style. What type of hair did you use in this video? Are there other types of hair that are used to do these types of extensions? What is you recommendation? Thanks in advance! :) #blackwomenhair
Vanessa Olszen: Awsome tutorial :)
Sitanie Dorasme: You're doing a great job girl! Those who say you talk too much are just jealous. ;)
Platinum Tresses: Your descriptions are very detailed and you do a great job on your hair. Can you do mine :-)? Nice job.
Asia Williams: U know how to do every damn thing when it comes to braids I love it! Ur awesome and u do a good job
marquita83: very nice thankz for sharing!! :)
Aisha B: Very informative video!
SHARON BARNES: I love all your how to tutorial. Videos alot
Elizabeth Mary: - Beautiful! How Long Does This Take You?
Meika Green: braiding techniques can be very intricate but the fact that you did it this well is amazing. It's a lot of haters in these comments.
Simply BJs Creations: do you have a tutorial on the inverted braid with weave fishtail herringbone braids? thank you
tammie maury: I tried to do single and you do a Good Job
Melinda Scott: Thank you so much Breanna Rutter
Deborah Lynn: May I suggest you use blond or blue hair so we can see a little more easily?
Baby Face: Hi Brennan I like your tutorials. May I please make a suggestion. Next time could you do it with color extensions see on black hair. I like how you did the tutorials on how to braid and you showed it with the light extension thanks
Meeyahx: they are very neat!
PinkToolBeltDiva3: NICELY DONE DIVA! THANKS FOR SHARING AND TEACHING!
Sonya Scott: I practice alot of your styles on my dummy head first.
Mykahl Smith: Wow I love it
rachelmm05: Thanks for this tutorial... a suggestion is since your hair is dark can you use a lighter shade of braid hair when you are doing a tutorial? Its hard to see exactly what you are doing with everything so dark on your head. thanks
Destinasia Davis: Thanks u look nice love your braids
Roxcy Lou: Breanna, I follow your tutorials very closely. First of, your box braid tutorial was extremely helpful. Now I am a pro. But just like the box braid tutorial, please use the blonde synthetic hair against your hair in order to show the contrast. Although the cameraman was trying to get close-ups, everything looked the same ( just darkness). Overall, still a great tutorial. Always looking forward to more.
Gin Hinnant-Thomas: I appreciate your tutorals are quite informative but I would enjoy them more if they weren't so wordy.
Kayla Davis: I like the video but when you explain which prices to use can you call them the 1/3 piece or the 2/3 piece
Evenia Gamanya: thanks for the video...how many packs did you use
Xvi Sashaa: How many packs of synthetic weave hair did u use and how long did this style take.? @Breanna Rutter
Denise Austin: wow thanks great video!!
Genesis Moy: it helped ,but can she do a video on 2 scalp braids wit weave ,?. your vid is awesome ❤✊
TAMMIE KEMP: U make that look difficult but pretty ❤️
MUZIQUALBEAUTIQUEEN: Where have you been all my life?!?!?! By far the Best video tutorial ive seen
Nagashi Satoshi: Do you show how you part your hair on the DVD?
Genise Davis: beautiful
Rhuldhair: U should try doing it with colored braids so we can see the process better, but it looks nice
Kenya C: I love ur channel. ur very thorough.
Felicisa Jones: Thank You, Great Video
Chanell Rogers: What kind of gel do you use?
R-Rose Beach: pretty eyes.. :).. Love the video!
Sam Suzuki: Great job girl like Fr
Sun Rise: LOVELY!
missqjulie: I wish you braided straight through first, then went back and showed how you did it step by step.
Kamilya Palmer: how can you see what you are doing im suprised can you do a video on micro braids cute hairstyles for kids
Delshaun Nichols: What kind of hair did you use and how much does it cost
TaQuanna Orr: How many packs of hair did you use?
Mimis Braids: Girl you are something else god bless
nubiantigeress: Maybe I'd better start with just two braids until I get the hang of this.