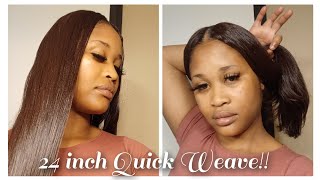
2 Barrier Protective Cap Tutorial
- Posted on 28 November, 2017
- Sew-In Hair Extensions
- By Anonymous
This was a method I can up with about a year ago for the protection of my clients hair when getting Quickweaves.this method protects the client Hair from any bonding glue and extended the life of the quickweave from 2 weeks to 3! My clients love it because it's easy to remove as their hair isn't torn out and their edges are still intact! I have a video on how to property shampoo this out as well! Be sure to watch and subscribe!
Okay, you guys for this you're gon na need em pro styling gel. It'S the dark gel. I love this gel. This is gel that I use hahaha. I'M next you're gon na need a bottle pump it up. So once you finish, molding your clients, hair with the gel you're gon na spray that and then put them in the dryer you're gon na need a bottle of Roberts, Diamond bun, protective shoe or a glue protector as we call it. This is what it looks like. It'S dark and it comes in this pretty little purple bottle. You will need a tint brush so that you can apply the glue protector on to the clients. Hair you'll also need a stocking cap, a thin stocking cap, not the dome caps that we use for wigs and you're gon na need a pair of shoes for this procedure as well. Okay, so I'm going to show you how to do the cap for the invisible part you want to start by parting, your clients, hair off on either side. You should clients preference after you part her hair off. You want to go ahead and gel her down with the hair pro styling gel. You want to make sure she's, nice and flat you, okay, so pretty much have her nice and slick all the way down. As you can see, I kind of cleaned up her part on that side. So, yes, we have her nice and slick, and it's going to look like this and then next you're going to apply your spritz you're going to make sure you spritz her whole head. Give me every part: every inch, cuz, you're, gon na make sure it's nice and hard, and it dries quick under the dryer. Next, we're gon na sit her under the dryer until she dries after she dries. You want to go ahead and take your bottle remover, and you want to apply it to your clients, hair. You want to make sure you get it all over her hair lining the part make sure you do not get it on the part. You want to get very, very close to the part, but not on it, because when you put the cap on it's gon na stick to that party, you won't be able to cut where her natural part is so you're going to go ahead and do this procedure. All through the throughout her head now, what I'm doing here is I'm making sure not to go too close to her edges, because it's thin and we want to kind of leave that part out just to kind of make it look a little bit more natural. On top of preserving her edges, you, after you finish applying the glue protector. This is how it should look next, you want to take your stocking cap and stretch it as wide as you possibly can, so that you can put it on to your clients hair. Without touching any parts of the stocking, because you don't want it to stick to your clients, skin sorry, I love the way. I tried to get a good angle in the back of the stocking cap. You want to pull it down to the edge of the clients hair so that it will stick. You don't want to leave anything out any hair out. You don' risk putting glue on your clients here. What I'm doing here now is basically taking my ten brush and I'm going through and pressing it down, so that the glue protector will bleed through the cap. Again, you want to get close to her scalp, but not on her scalp. You want to get right up on that part, but make sure not to get on the scalp of her part, because if you do, it will stick to her head and it would be hard to cut after you're done. It should look like this again make sure to keep the glue protector off of the part. It should be free and clear next you're, going to put your client under the dryer until she dries now once you dries you're going to cut off the excess cap around the perimeter of your clients head now in the back of your clients, head she's under the Dryer, it will roll up a bit, so you can just unroll that and cut off that extra continue. Cutting into all loose ends of the cap is completely off after you're done with the perimeter we're going to go head in and cut her part out now. My shears is a little dull, so police don't talk about me because I know, but it's been a bit of struggle getting through this part, but imma get through it understand that. But, oh you want to make sure that you cut off any excess cap that you see when you're done. It should look like this. This method creates a two barrier: protection between the glue and your clients hair. So the glue never touches your clients hair and it extends their quick weaves and extra weeks are now they're able to wear for three weeks. I do have a video on how to watch this out, so please check it out. Now, I'm going to show you how I do the cap with leave out. I do leave out a little bit of hair in the front like a triangle of hair, so when I'm bonding it, it looks more natural as if it's her hair in the front, I braid down the leave out that I'm going to leave out so that it Doesn'T touch the glue protect her, and this is how I mold the hair. I stick it back in a ponytail and I slicked her ponytail going upwards just like we did before you want to go in and apply the glue protector making sure not to get on her scalp but close to it. You want that cap to stick everywhere. Her hair is you you again, you want apply the glue protector, making sure to leave her edges out on the side. You want to get too close to the edge of her hair. I just think it's the safest to just stay away from the edges. We want to preserve those edges now at the top of our hair. I want to show you just like we did in the last video. You want to get it all over making sure to get as close to her part as possible when not on her part, and this is how it should look again when you're done applying the glue protector. Take your cap, spread it wide and apply to your clients. Here this is how it should look, take your Tintin brush and press it down, so that the glue protector bleeds through the cap again stay away from the hard scat part of her head stay away from her part. So once it's dry go back in again and cut around the perimeter of your clients head cut off all the excess cap go in and cut around her leave out once you're done, you can go ahead and apply your tracks and she's ready to go. Now again. I do have a video tutorial on how I shampoo this is out of my clients. Hair is real, simple and easy make sure you go watch the video please subscribe to my channel. You guys, I will be uploading more videos, make sure you visit my Instagram page at hair by Mikah, and please please share this video. If you found it helpful.
Comments
Yakeema Taleem: Love how she explains things so thoroughly ❤️
PureBeaute: I do this , this works wonders and my sister Hair still growing and her edges still in tact you go girl !!!
UrbanRawDiva: OMG! This is EXACTLY what I was looking for! You have no idea how you just helped me. Thank you so much for your video! I knew there was still a way I could get a quick weave even though my hair was so short (twa). And you did it step by step at such a steady pace. YOU are a great instructor! Now I can change my look some more. Yay, me! Thank you so much!
T Braddy: FINALLY! A CLEAR, EASY-TO-SEE, AND UNDERSTANDABLE VIDEO WITH STEP BY STEP EXPLANATION AND INSTRUCTIONS! THANK YOU!
Kristal Coburn: I've been a cosmetologist for over 20 yrs and im licensed in 2 states and I think ur amazing and anyone who thinks different can have a seat!
Teri R. M-Ware: This is by far the BEST VIDEO I have seen. I've watched several with hopes of learning how to do my own quick weave and your tutorial was EVERYTHING! Very simple process and your instructions were easy to understand and do from my own living room. Thank you! Btw...I have subscribed :-)
LaDyLuCk: As a beginner I feel much better about doing my hair after watching this video..thank you !
Beautyatafraction: As a professional I see nothing wrong with this video. I see people keep saying so many "chemicals". I think your wording is off. Chemicals are by definition the change of texture or color. This is a protective style that will lift and release as soon as water saturates it. The glue, cap, hair will come off as one unit leaving little to no glue on the clients hair. Keep your head up love. Returning clients with growing hair will say otherwise to the nay sayers.
Jolie by Jennifer: I love your method of applying enough protectant and then pressing the cap into it as opposed to using MORE protectant over the cap. Very smart and un-excessive product use!
Jay P: I love how detailed you made this video. This is great for once in awhile temporary/ want something different styling. Great job on this tutorial.
Robin Phillips: You do such a great job explaining the steps and I love how you took time to show the products and materials needed. Thank you!
Iam ChandraRachelle: The measures we go through for some weave but her teaching skills are ! Great educator ❤️
M P: I loved your video this is exactly how I used to do my quick weaves and after years of not doing one I wanted a little refresher and nobody else does this 2 barrier technique until I came across your video....
L. Chism: Thank You so much for a TRUE tutorial! You showed us everything start to finish. Thank You for sharing!
Nae Certified: Thank you. This was very helpful. From one hairstylist to another
S Lampkin: Awesome tutorial! Very detailed, enjoyed watching this technique.
Gigijamier: This was very educational and straight to the point. Some of these comments are very ignorant, little do they know this will definitely help your hair not break off or have glue all in it when it’s time to come out! I love it and I have subscribed!!
sexy red: This video was so professionally done,thank you for taking your time for a beginner like me.
Sche Sche: Thank you so much for this tutorial video!! It’s 1 am where I am & I needed this!!! Emergency status!!! Thank you for going step by step!!! ✨✨✨
Free 2 B Me: My beautician uses this method on my head, it works well. I go back to have my hair washed and another topper added, depending on the new hairstyle I want. My hair has grown and I have way less dandruff with this method.
Diamond Makaveli: Thank you so much .. I’m just starting out doing hair on close friends and family and I can’t wait to use this technique thank you
Joseph P.: Very professional and you didn’t rush the process, nor did you rush through sharing with your audience the items they will need. Also, you weren’t arrogant or vain about what you KNEW you were capable of, get’em ma!
LANIQUE BEAUTY BAR: She did an excellent job on this protective style!!! I’m not sure why/how anyone is hating on this technique. I like this better than a wig!
Marcials Blends Hair: Wonderful video. Thank you for sharing. You explained the process eloquently and clearly.
Aisha Evans: Thank you for showing this tutorial literally step by step ! I wish I would’ve watched yours first then I wouldn’t have had to watch any more to find a more detailed video! Kudos to you girlfriend .
jazzi hamilton: I looked and looked through soooo many tutorials, but when I came to YOURS, I WAS THRILLED!!! I Jumped up took my hair dryer down and EVERYTHING SEEMED LESS Complicated with You explaining it and Literally ran to the hair store and got that that Robert's gel its was the only ingredient I didn't have!!! Thank You so Much for KEEPING IT SIMPLE!!! This is My First time doing this and at least I got the first Step!!! Now Back I can Go from here, I WILL SUBSCRIBE!!! THANK YOU AGAIN!!! YOU'RE AWESOME!!
Cynn Mar: I like how you explain each step and explain what works and what doesn’t. I like how you show outcomes of steps in the process!..*thumbs up*
Angel Hamilton: Totally helping me cause my sis is gonna do my quick weave and my hair is really short and it’s a mini Afro lol thanks for the video!!!
MP Phil: Excellent ❤️! Thank you for sharing your talent! I learned a lot by watching this tutorial! Blessings to you and continue to share.
Brittney: This method is the best!! And the take down process is even better!!! Best thing since sliced bread
Pebbles Johnson: This is by far the best explanation of how to protect the hair for a quick weave. Thank You!!!
Yakeema Taleem: I see a lot of hair tutorial YouTubers and honestly it seems like they don't want to give you all their secrets but the way she explains things is like she's truly teaching you like she can give a class and she wants you to be the best you that you can be within this particular technique it doesn't seem like she's leaving anything out she's going to step by step and I truly feel like I can do what she is saying. My issue is I am a beautician but I am an older beautician so the styles that I'm aware of in my time is like finger waves just weaves braids designer braids even the pineapple was out when I started so I learned these particular type of hairstyles but now a lot of my clients are coming in one in the gluing cap or whatever but I don't want to damage to hear so my business went down I love how she makes me feel like I can literally practice you know on my daughter and learn this and start my business back up again and start earning money to provide for my family this is my livelihood so I think you for putting this video out there and honestly teaching us what it should be... And how it should be done
Jamie Lancaster: Thank you so much! I've been wanting to learn this method for my own hair❤️
Carla Boyd: Thank you so much for this video....its what I've been looking for especially when you talk about protecting the clients edges. I only wish you'd share the finished look of both styles. I'm looking forward to more upload from you. Thank you again!!!!!
Touchdbyhaze: I like to use 2 caps then the glue protectant (morning glory). It comes right off when shampooing. There are soo many different methods but whatever works for the client. Each client is different.
Tasha Hawkins: Thanks SO much for showing us how to do a VERY detailed protection cap with great camera caption I really feel confident enough to do it now Miracles and blessings to you sweetie pie
Lashaun Moultrie: Great job explaining step by step. Preparing to install my 27 piece.
PurpleZinnia: I wish you were my stylist. Thank you for this video. You show a lot of care and love for your client's hair. Not all stylists do this.
Ashlee LaNae: I LOVE EVERYTHING you do Queen!! I've been reluctant abt QW bcuz of the glue issue on the hair. DEFF trying this method on myself first!! Thank you for sharing your secret!!
Kreme Miiluv: This is THEE THEE THEE BEST DETAILED TUTORIAL I HAVE EVER SEEN ON HERE.. GREAT JOB!! AND THANK YOU SOOOO MUCH
jason thomas: Thank you for the introduction I like how thorough you are for those who don't know!
Jazz CP: I used to do quick weaves on myself often. I used this method every time because I hated glue getting stuck in my hair. I never had any damages or breakage from Robert Diamond. Believe it or not Robert Diamond has the same texture as gel, but a little thicker, when applying. When you wash your hair after taking it down its not hard it softens when the water hits it. It really does protect your hair from the glue.
Theresa Padgett: I have been doing hair for almost 30 year and I can say you did a great job. These people in the comment section need to stop the madness.
pizzachick: YOU ARE GREAT!!! I LOVE THE WAY YOU EXPLAINED EVERY STEP. THANK YOU
Teresa Norris: Thanks, loved the tutorial, Ian allergic to most hair when it touches my scalp, even expensive so called human hair. I have even don all of the recommended wash treatments. A lot of money wasted. With this method I can protect my scalp, and wear the curly styles I like.
Chosen 1: Awesome!!! Very Professional, Thank You Queen! ✨
Kristal Coburn: Thank you so much! Finally a good well explained video! Luv it and I subscribed within 5 secs❤❤❤❤❤❤
Rahnisha Washington: Thank you great job still using this method ♀️
Joseph P.: How do you hate on a video that’s merely ONE tutorial for you? Like dam, yah girl is trying to HELP PEOPLE!! I can’t stand when someone thinks they’re the best at everything, there is always someone out there that can do something better than YOU TOO!! Meekah, you did a DAM GOOD JOB HERE boo and don’t you allow any haters to make you feel otherwise! And to all my Black hair dressers make and female, DO YOU, and know that someone is ALWAYS going to hate but you stay strong and let your WORK speak for you!
BKLYN SOUTH: Thanks for sharing. I do the same technique except I don't put so much gel on their natural hair. And I sure was wondering what washing it out would be like so I will watch that video next.
MZ. J: I Know the video is old but I just watched it today. Thank you for your work you just saved my hair. My daughter is doing my hair and she brought this and my hair is beautiful I wish I could send you a picture of my hair before and after.
Arlinia Drummonds: Me and my stylist tried this method and all was great until we started to bond the tracks. The tracks would not bond to then cap, so she sprayed the hair with spritz and placed me back under the dryer. After the spritz dried then we where able to bond the tracks to the cap. But after a few days the tracks begin to side off little by little, what did we do wrong? We used the 30 sec bonds glue, and even after rebonding the tracks that slid out we still had problem with getting then tracks to stick.
Jiamesha Cavers: Thank you Video was Perfect I’m doing the leave out middle part ❤️ Super easy cause I’m in school I’m I don’t have time to do my hair I’m working lordddd lol
Flor del campo: La neta me gusta un chingo como trabajan son chingones en lo suyo me gusta ver sus tutoriales solo que no les entiendo si pudieran poner subtítulos seria magnífico
Michelle Marques: Porquê aqui no Brasil não se encontra esses produtos maravilhosos?
Cassandra Dews: I love this video stylist really did a good job thank u im a stylist and this is a easy way to protect the hair
MizzBRITE: I did it and love it thanks. Saved my hair
CC7: Super helpful OMG! Needed this video. Thanks!
Latisha Brooks: Thank you so much for showing me how to do this !
dianne bryant: This technique has actually made my hair grow I just hate the drying time
Shannon Jones: Heres a tip: the Gel GROWS your hair bc of its protein, the liquid glue Protector will also grow your hair because of its protein & vitamins provided in it. The glue protector helps keep the glue out of your hair & so does the cap. This is usually for those who plan on having the hair for a long period of time or they are natural.
Cassondra Hill: Great tutorial!!! Thanks for sharing. Will this technique prevent premature lifting (before1- 3 wks) in clients that sweat a lot on the scalp?
Queen Mo Franklin: Ima do me a quick weave now! ❤️
Miracle Monique: This definitely helped sis !!
Kat Brax: Thanks for the tutorial. I enjoy watching these videos bc I find them very informative.
Jodie Chestnut: You are very detailed; love it!!
Sharona Harrell: This worked for me in 2019!
Marie Brown: It's Your Hair Wear It Like You Want Too Relaxed Ain't For Everybody, Neither Is Natural So Rock Your Hair Your Way
ISSA MCLAUDE: Thanks for the video I was applying glue directly to my hair and damaging my hair....so I am surely gonna try this.
Katrina Atkinson: New subbie here!!! You are such a dope stylist and have a great vibe!!! Great voice and so detailed!!! Love it!!!
Mahogany Coy: Thank you Meeka! This video was very detailed! God bless ❤ Mo..
r harris: You explained this very well---watched one video and subscribed!!
Ridin WithThe G: I really like this method it was just that for me personally after three days I couldn't take it and it itch so much plus air couldn't get to my scalp. I was looking fabulous though. It's a good method, it just for some like myself it can only be worn but for so long before taking a dip backwards in the water in the bathtub to soak and rub it out.
I’m The boss: Thank you sweety for sending me this video, it really came in handy.
Mel Dee: Nice video. Thanks for sharing it. Will be doing my hair with the cap n invisible part.
Madonna Olney: Loved the video. Very informative.
YolanaG: My hairstylist did this same thing a while back and guess what???? My natural hair was still in great shape afterwards! Y’all so negative like y’all never used spritz before or got a quick weave
Kiki Janea: That gel has never worked on my hair my mom use to buy it all the time and just kept braids in my hair. As an adult I tried it because other gels were just not the wave and still nothing. Lol that gel don’t even slick my hair back no matter how I apply it. boiled flaxseed though ❤️ magical
Tuwana Leonard: Thank you this video is very easy to follow. Most go way to fast and you have to look over n over. Thank you so much
Jada Shelby: Subscribed. I used this method on myself. I’d love for you to see the results
Ashanti Bee: I don't see why people are saying this is unhealthy, it's about how you maintain it. You shed hair anyhow so how is this unhealthy? She did a pretty good job, im natural and want to do this to my hair.
Miriam Payne: Thank you much more for saving my hair ❤
C GIL: Great tutorial. Thank you.
Karlisa Gomez: I needed this tutorial!!
Debray Burton: Yes Love the way you do what you do with the hair very well done
Daughter of The King of Kings: Very helpful, thank u so much!
Lisa: Thank you for this video you save me girl going to do this until my hair grows out ... new sub if you don’t mind can you one day make a video how you applied the hair wefts to the first woman thank you so much
Cassandra Williams: Great job hun
IAM FRE'NA ROBINSON HOPE: Great tutorial !!!
Parker Ro: Love these longer videos!
Denotra Robbins: Thank you this is very informative.
Dawson Latonya: I love the idea. The problem I have is most of the stylist are not in my city.
Gerald Warren: AmPro & Pump It Up::2 old skool classics!!!! Many many 90s ponytails & other dope styles pay homage to these 2 products!!!!!!!!!!!!
Pasha P.: My mom been doing this method gel and spritz only for 20 years on my hair. I'm 35. My hair is still shoulder length
extrememelonspillage yesyesyesyes: Oh I appreciate the technique want to try this but cant get the black glue in the pretty bottle but awesome
Lashay Johnson: May you do a molding tutorial on bald fade sides? I'm afraid of that glue though, is there any other way or product I can use to mold my hair? Thumbs up on the video
dan Daniel: Idk y ppl are saying thia is damaging!! U guys obviously never used it b4!! My first time using a liquid cap i left it in way longer than what i should have (3 months) and my hair had seriously grown about 2 almost 3 inches in 3 months!! This stuff is NOT damaging to your real hair underneath! This has been out for years and obviously all the negative comment makers had no clue... Smh
pizzachick: You are verrrry helpful. I am trying it now just on the top of my hair, the side and back will be tapered. Weave added at the top only. Thx
Nubian Bambii: How should I condition my hair before getting a quick weave?
Ms. Ladi: Very good Teaching very Detailed. Thank you so muck