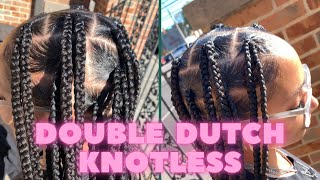
How To Do Knotless Box Braids (Easy To See)
- Posted on 18 October, 2022
- Sew-In Hair Extensions
- By Anonymous
Follow us on TikTok & IG: @GetGlamFam
Here is a link to some of my favorite products: https://www.amazon.com/shop/whoseesthi...
**For a Natural hair 4A mannequin, click here: http://www.getglamfam.com
**Braiding rack** https://amzn.to/3TwRw2H
**Braiding Gel** https://amzn.to/3Tcnql2
✨My skincare products:
Cleanser: https://amzn.to/3JoOWa9
Serum: https://amzn.to/37uNuVA
Moisturizer w/SPF: https://amzn.to/3imhbdy
Hey GlamFam!
In this video I am showing you a simplified way of how to do knotless box braids. I'm using a bright color of hair so it will be easier for you to see, which is great for visual learners. My hope is that you find this video to be greatly beneficial and helpful. If so, please be sure to subscribe or check out my other tutorials!
Until next time GlamFam, take care, God Bless, and stay glam!
Linwood
FTC Notice: This description box may contain affiliate links. What this means is, if you click them and make a purchase, we may earn a small commission of your sale. This in no way impacts your price, or our recommendation, as we only do honest reviews. We know you work hard for your money and we definitely don't want you wasting it on garbage. However, the income we earn from this allows us to continue to afford to make free content like this. As always thank you for your support!
The purpose of this channel is to educate people on how to simplify proper hair care, and teach them how to do hair and styling techniques.Linwood is a licensed cosmetologist and cosmetology instructor, and he teaches high school aged students on a daily basis.
#knotlessbraids #braidingtutorial #subscribe2glamfam
Hey Glam family here and today I'm going to be showing you how to do knotless box braids for visual Learners, and you guys can see here on a couple of these braids. I have done some tucking on other ones. I have not just that way. You can see the difference. I personally don't care for tucking because it makes my hands cramp, but I'll show you what the difference is on that on the ones where I have done some tucking, all the colors still visible from the underside. That'S how tucking Works, whereas on this one it's speckled on throughout that's the main difference. If you wanted to avoid that by adding in that color, you can just add in some of the person's natural tone, with the uh additional color that you're adding, but primarily we're doing this. Just that way, you guys can see how to do knotless box braids. Now I'm going to show you with no product, because I want you to learn technique exclusively and then from there. If you wanted to use a braiding gel or something like that, I'll put my recommendation in the description box down below. But let's go ahead and start out on technique and then from there we can go ahead and jump into the rest of the set. So first thing that you'll want to do is you're going to go ahead and pick your hair. I'Ve got a bright orange color. Just for the sake of visual learning and making it easier for you to see on camera, so I'm going to go ahead and take my section and from there I want to take my braid and feel like. Okay. Is that about the thickness that I want? My whole braid to be so once I've done that I'm going to go through and do several different pieces in that size and then from there I'm going to split these by three. Now some braiders prefer to do six pieces. I feel like that's a bit arduous and that's not quite necessary. I'M going to show you how to do it with three, because it'll save you on time and if it saves you on time. That means you have an opportunity to make more money or you can just go home early or be done with the service earlier when you're pre-sectioning out here, you can use a braiding rack like this here, but if you don't have one, you don't have the finances To get one I'll show you a simplified technique for that, as well. If you're using a braiding rack, you would just take this separate it out and just make sure you're using something of all the same sizes toss it right on over the hooks on your braiding rack and keep it moving. And then you just pull from those. As you work, but let's say, for instance, you don't have that don't have access to that. Don'T have the funds for that. That'S totally fine, give it your little table top like this. Here it doesn't matter where it's at and what I'm going to do is I'm going to go ahead and take my strands here still split by three: I'm gon na Place three o'clocks. This way, one two and three just like. So when you're doing your next section, what you can do is go ahead section out the amount of hair that you want for that next braid using the same technique, split that into three and instead of bringing them that same direction, lay them crosswise, one two three And you can literally go back and forth like that, and each layer will kind of keep your last layer separated from where you need to go, so you just pull from the top layer, that's there and continue to build up. On top of that, however, you like so that's what I'm going to show you just because it's a money saver and honestly, it can be a bit of a Time Saver. Also now this is my mannequin that I sell here and I'm going to be showing you on these sections. I already did a tutorial on how to do two strand twists on this mannequin, but I'm going to be showing you on these previously done sections, because we want to keep some of those same principles of bricklaying and that all that that I have in place there. So you guys can see it twists out rather nicely. Also, if you haven't seen my mannequin, I have links to it down description box below, so I'm going to go ahead and section this hair out again, I'm working with no product, because I purely want you to see technique so we're going to go ahead and separate That hair out into three just like so like how we would start a braid and I'm going to come under once under twice from there. I'Ve got my three strands, I'm going to add to those outside two strands. So this Strand - and this strand here on the left and the right - don't touch the middle, so we're just going to go ahead and place here, snatch one of my pieces and I'm going to place it right over top from there we'll go ahead and pass under One two hold just like that: y'all probably hear my bells go off. I have bells for everything in my house place right over the top again adding to the left and the right strand pass under one and two and down that last round we're going to do that. One more time grabbing. A third strand place it right over the top making sure it goes under one and two and then from there we can flip our hands and just begin braiding. Now let me Zoom you in just a little bit here so that way you can see what this is in terms of tucking and I'll. Show you one more time, so you can see it really up close view, but for tucking instead of us just braiding, you basically roll that color to the back side and make sure that your orange color is the primary color showing so like this here. Passing under passing under - and you just continue through that - I don't like this because it makes me Focus quite a bit more on grip and it hurts my hands and I need my hands. I love them. I love them dearly they're, amazing, so yeah we're not gon na. Do that, then, from there we just go ahead and bring these babies right on down. Now I always have somebody who ends up asking me how you finish off your braids. You can roll and dip the braids in hot water. You can't put a small dot of nail glue or super glue on the very bottom if you like, or you can go ahead and just dip them in hot water on the ends, and it will go ahead and just smooth them out also, so you can see Up towards the top, where I did some tucking down here, where I did not do tucking at all - that's the difference that it makes underneath all the dark hair is still visible here here. It'S not as much because it's speckled on top and bottom and that's the biggest difference in that I'm just going to go ahead and braid that down some that's off camera. So I'm not really concerned with what that looks like for you anymore, because what you want to see is this up here. So let's go ahead and grab another section. Put these up out of the way and I'm gon na go ahead and show you up close and personal. What this looks like here turn up that brightness for you, so you can clearly see - and let me zoom in for you all right. So I've got my section here and notice: it's a brick laid, so this braid is going to fall right in between the previous two braids that helps out with fullness, especially when you are doing knotless braids, because there's not as much bulk at the scalp area. It helps out to have those braids fall perfectly between each other, so it doesn't look Spacey or adapt. This is great if you have more fine, hair or less density to your hair in general, so we're going to go ahead and take that section same as last time and I am going to section off into three one: two and three go ahead and braid under Once twice I'm adding to these two outside strands: okay, just placing it right over the top. Now some people do add theirs in differently, one two. So some people like to braid on the middle and outside strand. That'S not the way I prefer. If that weight works. For you, then, by all means feel free, there's not a wrong way as long as your braid turns out, nice don't feel like you have to braid it in one way or another. Whichever way is easier for you, that's totally fine one, two and basically what I'm looking for is like you can see here. We'Ve got two strands added to the middle one strand on here outside one strand here on the outside. So we've got to balance that out. So now I'm placing right over top and we're adding to those two strands that are lacking. So I'm adding to that right strand that had one mat into that left strand, I had one and then from there just pass under one more time. One two and now we can just flip those hands and begin braiding and literally that's all there is to it now. The biggest thing here is going to be pre-sectioning out the hair, because it's going to take you to the largest sum of time and then from there adding in the hair. So that's why you want to go with a technique, that's comfortable for you! If it is more comfortable to add on the side, then add on the side, if it's more comfortable to add across the top like for me, it's far more comfortable to add across the top, because I can clearly see everything that's going on and I can honestly Better demonstrate that on camera you want to do that way and just whatever weight works best for you is going to be the best way for you to go about doing that now. This is without any product uh but, like I said if you wanted to use a bit of a braiding gel, something like that by all means use whatever product helps you out with that. Just keep in mind most of the time braiding gels are for the hair, not for the scalp, and you want to make sure it's not overly tight. So I'm lifting up things like that afterwards, my client's not going to be in a ton of pain, because we don't want to cause any traction alopecia around the nape of the neck, all right, so that's the tutorial there. I hope that it's been really beneficial and helpful for you, and I hope that, with the addition of the orange color that you can more easily see what to do with this hair and how to do it. If this video helped you out, if you had an aha moment, please let me know in the comments down below and don't forget, to check out some of my other tutorials for visual Learners, I'll link them right over here for you until next time. You guys take care, God bless and stay Glam. You know, I love you. Boo, bye,
Comments
GlamFam Hair & Beauty: Follow us on TikTok & IG: @GetGlamFam Here is a link to some of my favorite products: https://www.amazon.com/shop/whoseesthis **For a Natural hair 4A mannequin, click here: http://www.getglamfam.com **Braiding rack** https://amzn.to/3TwRw2H **Braiding Gel** https://amzn.to/3Tcnql2 ✨My skincare products: Cleanser: https://amzn.to/3JoOWa9 Serum: https://amzn.to/37uNuVA Moisturizer w/SPF: https://amzn.to/3imhbdy
Ashley Pearson: You've taught me how to dutch braid french and corn rows. Thank you for taking your time out of the day to teach us! You're awesome
Robin-April Frierson-Unity: This is exactly how I do mine. Love it . I knew I was doing it right.
Ron Ron: I'm learning to keep my daughter's hair up to save her the dollars. Needed this video. TY
Voila!: I LOVE ❤️ the mannequin’s textured hair - Fantastic tutorial Linwood, thank you ☺️
Salty Pretzel: Thank you for this video; right on time too! I've been looking for a good quality tutorial and this is seriously the best I've seen. So easy to follow, and using the orange hair helps so much because I'm a visual learner
Droosy G: Excellent video. This is my first time being able to understand the knotless braids. The tucking is extra. You have an amazing gift of teaching
A.M.B.: Love this teaching episode! You teach in a way that allows the information to stick with the viewer, I could do this if I want! Thank you Linwood!
undefinedinstrument: What a great tutorial. I can't believe you made it look so easy.
Jackie Dunn: Finally!!! Now I get it! Thank you!!! I’ve watched soooo many videos, right now I start mine with one crocheted piece and then feed the other two in same as you. My problem was I was having trouble braiding backwards! Definite AHA!!!
EV Scott: Linwood, thank you so much!! I am a visual learner, but I've never really been able to grasp other tutorial videos. I think maybe it was this hair placement, but placing them on the right and left has made it click for me! I can't wait to try this on my hair!
nizbet: Thank you for this! I struggle with doing my own hair but this was the best tutorial I’ve seen !
Fire Water: The entire video was an AHA moment! This video was giving what is supposed to give! You broke it down , perfectly in less than 10 mins. I’ve always wanted to learn this technique. Please give adult classes .
Benign Username: That was perfect thank you so much. Adding the hair was my aha moment, the orange helped so much
Angela Perry: Yes Sir, I needed this one. I can do this 1,2, put the hair on the two outer pieces then repeat. Thanks
Denischa Briddell: Linwood you did your thing yes sir. You are a great teacher.
Who's that girl: This is the best and easiest knotless tutorial I’ve seen so far If you can I’d love a video from u in the future on how to do diy neat and cleaner parts. It’s so difficult to do the back of my head without help.
Lauren Ratliff: Yes! This is the best explanation I have found. Thank you so much
Deb Solis: Wow! You really do make it looks so easy! Thank you!
Essex123 456: Thanks for the tip on dividing the braid hair without using a rack!
Kitten Fox42: Your videos are very informative, my BFF has very fine hair and I'm extremely new to doing any sort of box braids or just braiding in general so this has helped tremendously. Thank you, thank you, thank you!
Dolores W: Awesome video, love the close up !
moNATUREnique: Wow!! I was just looking for videos yesterday on how to do box braids and just disregarded knotless because I thought it was going to be so difficult, but you explained it so well! Thank you! This is my first time I heard about tucking that was my aha moments. My daughter wants pink hair so using the orange was good for me!! Do you think the rubber band method is more suitable for kids or someone with a finer texture hair?
Regina Gillis: Thank you so much for sharing. I always wanted box braids the right way.
Demetrius Latimer: Great video and much easier process thank you
Jessy Morel: Oml LIN yesss,your videos always make sense now I can kind of see how it's done it's perfect,not alot of these hair stylists can reach the way you teach,you're specific nd make sure it's visual,you jump right into it don't do much talking love it been a fan of you 4 so many yrs
jascal: This was a great close up on how to feed. Thanks.
Michelle Moore: You are a great teacher. I learned how to cornrow from your videos. Thank you so much for sharing.
Shannon Berry: Thank you for posting this tutorial. It was extremely helpful and the orange hair created a better visual. Now I just have to figure out the hand placement. Your technique is much different than how I braid. God bless!
Nat Cope: Best tutorial I’ve seen so far. Thanks.
Snacks & Chats: This the video I needed! Thank you so much!
Lerato Mabuela: Thanks boo. Always enjoy your tutorials as I'm a visual learner ❤
Syneathia Bell: We appreciate you so much. Thank you for sharing your knowledge
Aisha Long: This is the best visual technic on braids video. I ever seen. Good job!
that girl in okc: You’re so talented! Great video ❤
Dale Underdue: Good evening Linwood ! This video really took the visuals to a whole 'nother level! My AHA moment was the close ups and the under handed braiding. I'm sorry for the hand cramps, but they are Blessed miracle workers! Great video and we you too, Boo❣
BRE: Hello! This technique was very helpful! Thank you kindly!
Cedrica Daniels: My "a-ha!" moment: Your explanation of selecting the thickness of the braid and then splitting the extension hair into three sections. For some reason, I could never grasp the concept of choosing how much hair is needed for each box braid. Thank you for making it clear!
Ballygirl886: Thank you. I feel like I can do this. I appreciate your actually showing us exactly what your doing. Do you think this is something i can do on my own if I have someone to part my hair for me?
Lori Larose: Very good demonstrations, i will certainly try on my little girl! What are your thoughts on the rubber band method? I want to try it but I'm sceptical because I was wondering if it will be difficult to take out, hoping hair won't be all tangled in it.
Cynthia Moore: Ooh Linwood! Never saw it that Clearly. Thank You, Generous Soul. Just ❤️
Jenn Rants: I absolutely love box braids, iam have to try my hand at them (I'm not the best braider lol) I actually learned on myself so I find braiding on other ppl very awkward. But I love just for my own knowledge to know how to do more braid styles. Great video. BTW, where were you when I was in school?? I wish I had been taught more ethnic styles. So sad really. ❤️❤️
rosalyn smith: Come on with the vocab words; “ arduous”… my aha moment was the fact that you counted out the braid passovers to let me know when is the proper time to add the hair to the strands. I appreciated your methodical explanation❤
Misti Mbida: Linwood you really work magic on hair. Every time I try this, it just ends up a tangled mess. How long does it take to learn? In your experience should some people just give up and head to the salon?
marcia talley: This is the best video I’ve seen for adding hair thank you thank you thank you
jhgreen14: Thank you for the tutorial. I wonder how people are able to do this to their own hair? I never could.
Qofdanile A: So good, what a great teacher.
Katrina Waiters: Incredibly helpful (as always). Will try this on daughter very soon cause with these braid prices...smh
HrhSophia TheFirst: Watching raptly while knowing I can't wear braids but appreciate the expertise!
Gloria Garner: Linwood, thanks. I truly want to learn how to do this and save some coins..I will really need to practiced this, your video came right on time. Thank you
Rose G: Great tutorial, beautiful hands.
Musica Flowerchild: I've tried to braid underhand like you do. But I just can't do it. My mom braided overhand. That's how I learned. It is what it is. But underhand or overhand, braids are beautiful. Thanks for the video.
Thee Deevyne Goddess: Thank you I have never cared for braiding but this technique I got and I want to try
Monica M: This is so helpful! Saved!
Mari Lyn: Hey Linwood, there isn't much I can do with my hair due to how fragile it has become from having to take medication. This medication has weakened my hair to the point where I can literally pull out the strands from the roots with my hands. Am just thankful that all of it hasn't fallen off. My go to style is the tired afro, or just combing it back, and trying to get it to lay flat on my head. I've been searching for a brush and hair products which would allow me to slick my hair back, but with no success. I was told that I have 4c hair, but I think its a combination of various textures. My sides are more coarse than my back and top. My hair tends to get knotted, no matter how much moisturizer I use. Anyway, what do you recommend as far as hair products, and styling? Thanks in advance for your recommendation.
Kandace Bowman: Thank you so much!!!
Ileana Santamaria: Omg YAAAAAAAY!!!! Thank you Boo! ❤❤
Cheryl Fisher: While I don't do hair I feel like I should be paying you for your professional expertise You bring a wealth of information; my hair is better for it!! Thank You!!!
Niki Lewis: Thank u now I can braid
Call Me Mona: Great video ! My question however is completely unrelated to this video but I would really love some advice or direction. So, I have dry & sometimes brittle 4C textured hair. I notice that I experience a lot of breakage of about 3/4 of the strand. Meaning that only 1/4 of the strand is left attached to my head. I experience this type of breakage all over my head but mostly in the crown of my head. I mostly keep my hair tucked away in braids for 2-3 months at a time. But I always make sure to moisturize my hair with the braids and oil my scalp and the strands of hair. I also wash my hair when it’s in braids to keep my scalp clean. When I take my hair out, I try to do a deep conditioning and I recently tried the Aphogee protein treatment for the first time in years and my hair seemed to like it but I’m still experiencing breakage. As you can see I am trying everything possible but my hair is still dry and breaking. I hope that you can offer some advice. Sorry for the chapter long comment. I Just wanted to provide as much detail as possible. Okay love you byeeee❤
Vicky Johnson: Hi Linwood Always nice to my nice to see u and hear ur voice. Thanks for the demonstration and explanation
Cameron P: We love your videos
Ms Williams: It always look so easy watching someone else do it but once I attempt to do the same I fail lol
Shortcake39553: My AHA moment was when you said, there's 2 strands here and here but only 1 here, so we need to even out. That was when it clicked. I used to think the added strands were only for adding hidden bulk to the braid so I didn't think it mattered which of your strands you combined the weave with as long as you added it. . Thanks for sharing
Mimi: Thank you
Kendall Victoria: Thank you!
tatacousin: Thank you!
Lerato Mabuela: The balancing two strands each makes sense... I'm a bit OCD so
Nina Johnson - Thomas: Hi Lynnwood thanks for this video
JusKay Brown: OMG LINWOOD YOU JUST TAUGHT MR HOW TO BRAID.....OMG ima get me an mannequin!!!!!
NativeMoe Risin: Great video. God bless ❤
Fire Water: Thanks Linwood
S A: How long does it take you to braid a head of hair?
Nikki: Thank you !
Rochelle Katz: thank you
Quentashia Darbins: I always have the AHA moments watching … it’s the execution that has me like aha…no. Lmao
Medina Que: This is vert helpful
Kimberly Barnes:
Jazzy J: Thank you
sandy yatsko: That wad so helpful
Sonya Walls: Finally I got it.....
Antoinette:
JSalt80: ❤️❤️
Ar Woods: Excellent
Robin-April Frierson-Unity: 2nd ❤❤❤❤❤❤ love you glamfam
K C: Hey Linwood. I sent you a message on ig
Karma - Queen Of Flames: ☝I am present for class.
Willa Just Being Willa: There is someone online pretending to be you. They use the Telegram app. Is that you?
Deborah Carr: HI LINWOOD
AKIYIAKELLY: 1st