Sew In With No Leave Out
- Posted on 08 November, 2022
- Sew-In Hair Extensions
- By Anonymous
Referenced Video: https://youtu.be/FBsZKJQ4SjM
Shop My Website For Hair Extensions, Mentoring, and Business Services! https://badchickhair.com
* Join my Girl-Talks here: https://www.patreon.com/join/Brittneyb...?
Offer “Buy Now, Pay Later” Options For Your Business!
️* Tune Into My Podcast Here:
https://anchor.fm/brittneybundles
Check Out My E-Book Here! https://badchickhair.com/products/e-bo...
Create your website with Shopify: https://shopify.pxf.io/Xx3Wea
***Business/Reviews: [email protected]***
•Shop my hair site: https://badchickhair.com
Ready to start your Hair Business?! Click the links below...
•Drop Shipping: https://badchickhair.com/products/drop...
•Wholesale: https://badchickhair.com/products/whol...
**** Check Out “I Sell Bundles” Merch!***
https://teespring.com/stores/brittneyb...#
Let’s stay connected
Instagram: https://www.instagram.com/brittney_bun...
https://www.instagram.com/badchickhair...
Facebook: Brittney Bundles
Twitter: Brittney Bundles
Email: [email protected]
Disclaimer: This video and description may contain affiliate links, which means if you click on one of the links I’ll receive a small commission
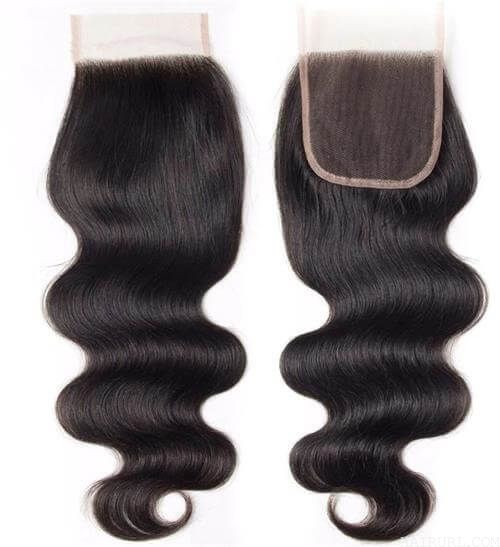
Hey there welcome back to my channel. My name is Brittany, bundles and today's video is going to be kind of like a tutorial. I'M going to be showing you how I sew in my deep wave, curly extensions from my website that checkcare.com, as you can see right here on my card and um, I already took the bundle wraps off and I already made some um. I decided to go ahead and post some pictures of this set on Instagram as well, so make sure that you're following me at bad Shakira on Instagram and Brittany underscore bundles um. I have a few other pages on Instagram too, but make sure that you're following those pages that way you do get to see. Um pictures of my finished product you'll be able to see the finished product in this video too, but you'll also be able to see other pictures of the different types of hair that I offer as well um. So that being said, I'm going to be installing two bundles of 14 inch deep wave and then I'm also going to be installing a closure that is um. I believe the closure is 12 inches. 12 inch closure two 14 inch bundles um. I do get asked a lot like you know how many bundles should I get to do a full head and it all depends on the style that you're doing it all depends on how full you want your hair to be um. For me, a closure and two bundles, because my bundles are so thick typically works. Well for me. Sometimes I do go ahead and I add in three bundles. Sometimes I do two and a half it just kind of depends on how I'm feeling, if I feel like I need to add more hair. I can always do so, but I'm going to go ahead and get started. The first thing that I'm going to do is I'm going to go ahead and start washing and well I'm going to co-wash the bundles and the closure, and then I am going to go ahead and get started sewing my hair in. If you hear those baby noises in the back, it is my baby, so let me go ahead and get started. This should be interesting with my baby, but um I'm gon na go ahead and get her fed burped changed. I'M then I'm gon na go ahead and wash the bundles, and I will be back with you all in just a moment, be sure to give the video a big thumbs up and let's get right into the video all right. So this is the conditioner that I am going to be using to co-wash my bundles and my closure. I'M going to go ahead and wash them co-wash them like I've stated before nothing, fancy to the way that I wash the hair or anything like that. I am going to let them air dry and then I will show you all my braiding pattern and I'll show you. The other um supplies that I'm going to be using and we'll go ahead and get started all right. So, as you can see here, I'm using a c-curve needle I'm going to be using some thread and also a wig band elastic wig band. I'Ve never used an elastic wig band. I'Ve always used just like the elastic that you get from like a Hobby Lobby or Walmart, but this should be interesting. This is the closure that I'm going to be using. I am not bleaching any knots or anything like that. I'M just going to be using concealer in the part, and here are the bundles that I'm going to be installing again. These bundles are from badshahair.com my website and I'll have a link down below I'm also currently offering a pre-black Friday sale so make sure you take advantage of that discount. If you are interested in these bundles or any other bundles that I have on my site. So right now what I'm doing is. I am sewing in the elastic wig band to the side of my closure. I'M going to take one in and sew it and then I'm going to kind of measure to see where I should cut the elastic band to go ahead and connect to the other side of the closure. You'Ll see that in just a moment here now um, I did also use a wig cap which was not featured in the beginning of this video. I wish that I would have had a black wig cap. I always recommend using a black wig cap when you're doing a sewing like this. However, I only had like a brown wig cap, a light brown wig cap or tan, and it was already used - and it's ripped and things like that, but I'm still going to go ahead and use it because I don't feel like running to the beauty supply store. I really don't feel well, and I kind of just want to get this style done, so I can move on with my day so right now, you can see me measuring the band. Like I mentioned a moment ago, I'm going to go ahead and connect the other side and I'll actually go ahead and insert music here and I'll be back in just a moment. Thank you. Thank you all right. So now, I'm about to start sewing down the closure. I'M going to sew one side down and then the other side down the back is going to be the last part that I sew down. It'S always worked this way. For me, it just comes out more flesh in terms of how to close your lace and um yeah. It'S just it's not as much um pulling the closure back, which, if you do sew in your clothes you're all the way around without just sewing the sides down. First, you may experience the closure going back a little bit too far, so just to kind of cut. All of that out. I just like to sew the sides first and then the back I'll show you all keep on watching. I don't know laughs, laughs foreign pattern. I have I have a simple braid pattern. I just braided my hair straight back um. I think that I did. Let me see one two, I'm just cutting the braids now three, four, five, six braids. Normally I do four, but my hair has grown a little bit since my pregnancy and also gotten thicker, so I did six braids um, the back. I put the braids in like a rubber band um after I braided them up just so that I could have them. Lay a little bit more flush because I didn't braid too tight. You don't have to do that. A lot of people don't do it, but some people do and then I'm just going to sew in the bundles over all of my braids, including the braids that you see in the back. When I turn my head one side or the other so right now, I'm actually cutting open, um, there's a bond on my bundles and I'm about to get started sewing in. I just want to show you all how the hair looks, how pretty the curl pattern is, and I am going to keep the wefts folded while I sew in the back just so, the back can be um, the density that I want it to be. I don't want the back to be super thin, so I'm gon na go ahead and start sewing in my bundles. Now in this video, I don't turn around in the back, so that you can see um how I'm sewing it in behind me. But I do have a video linked below this video that will show you that it just wasn't enough room for me to be twisting and turning um. But I am going to go ahead and use my c-curve needle thread it up and I'm going to start sewing in so continue watching for the finished product. Oh and another thing to note is I do like to make sure the elastic band is out of the way. The last thing I want is to sew in the elastic band with my bundles it just to me it doesn't feel comfortable and it can also make your closure slide back over time. So I try to just keep that band free from any stitches that I am making for my bundles, and you can also do that by taking the elastic band and pulling it below your ear. I thought I broke my needle for a moment, but I didn't thank God, because I did not want to go to the store. That'S one of the reasons why I'm wearing a wig cap - that's ripped because I did not want to go back and get a black wig cap for this video, so everything worked out. Um, I'm gon na continue sewing in and you'll be able to see the finished product in a moment. Thank you, laughs, laughs, I'm fine foreign thing to note too is: I do go ahead and I fold over my web, so I don't cut the wefts um, which is something I just wanted to know. You can cut the west of wefts if you choose to. I just find that it's easier when I go to reinstall. If I don't cut the weft, so I don't cut my wefts really at all um, so um yeah, I'm going to continue to do the same process and um trying to think. If there's anything else that I'm leaving out that, I would like you all to know. I don't think so I'll go ahead and continue sewing in the bundles and I'll be back in a moment. Thank you. Thank you. Everybody. Thank you. So again I wanted to Circle back and remind you all. This is not a very, very detailed tutorial for the simple fact that I'm not turning around, so I do apologize for that. But again the video is down below. If you do want to see how it looks when I sew in my bundles from like the back but pretty much all I'm doing, is I go under my bundles? I don't go through the wefts again I go under the wefts. I do fold over the wefts when I get to the ends where it's time to start sewing in the next um layer and what else I also try to ensure that um I turned around a little bit, so you can kind of see some, but also try To ensure that I am either sewing on the cap or on one of my braids, because this cap is so old and has so many holes. It is a little challenging, but I'm just filling around to make sure I feel like a braid um in the spots that are ripped, because, just because I wanted to have as much security as possible - and I don't want it to feel uncomfortable, like tugging out little Strands of hair, or anything like that, so I try to go through a braid if the cap has a hole in a certain part or you know anything like that, but if you do have a wig cap that is not um as janky as mine is then You shouldn't have that issue, so I'm going to go ahead and fold over the track and begin sewing it in that way. The same way, and as you can see, I did take the elastic band and I put it below my ears just so that I'm sure not to sew in the elastic band with my bundles, and so we are almost there I'll show you, the fitness product. Just stay tuned okay, so this is pretty much my finished product with two bundles um of my bad chick here, Mongolian deep wave. I did not put any mousse on it nor conditioner. I did co-washer before installing and it's a little bit wet still after that. I'M going to show you the back. I don't know if I can show you the back this way, but I'm about to get out and go pick up some things, I'm loving it. I put some concealer in my part, I put some water on the edges um. I didn't cut them or anything like that. Yet put my um eye liner and Float on my eyebrows. That'S about it, but I'm about to get dressed. Let me get my baby. Okay, you all so today is actually the next day. I am a little under the weather. I was under the weather yesterday too, but today it's really hitting me. I just wanted to come on here and close out the video I wanted to show you another look of the hair. Um still didn't put like any mousse or anything like that on my hair, just a little bit of water and conditioner, I am loving it again. This is two bundles of 14 inch Mongolian deep wave from badshankcare.com. This is a 12 inch Mongolian deep wave closure. I do have concealer in the part that bleach the knots or anything like that um this video was not a really in-depth tutorial. I did link a link down below this video with other tutorials that I did go into great detail with. It was just kind of hard for me to turn all the way around in this little space. I'M still trying to get my recording space uh set up to a point where it's a lot more comfortable than it is right now. So I do want to thank you all for watching the video, if you have any questions, feel free to leave them down below and I'll see you all in the next video bye. Thank you.


Comments
La Garbage: Hi. I know with the baby it may be hard now. But do you every feel like just getting the longest nails possible for a day or a week? Maybe you have done this before off video but it would be interesting to see.