How To Get The Perfect Seamless Crochet Braid Install | Detailed Invisible Knot Method
- Posted on 24 January, 2023
- Sew-In Hair Extensions
- By Anonymous
Hey Babes!
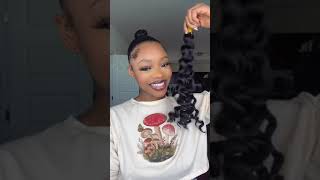
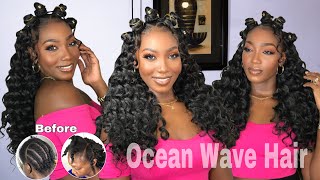
Today's video is a detailed video on how I do my seamless crochet braid install with very minimal leave out. Leave out is optional, especially with this method. If you give it a try, let us know down below how it worked for you
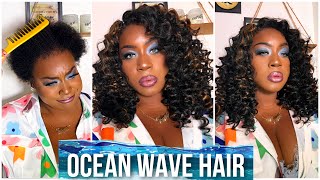
KIMA BRAID OCEAN WAVE INSTALL: https://youtu.be/GS2x_ce4GE4
NEW VLOG CHANNEL https://youtube.com/@IndyaAjaiEveryday...
LOUNGEWEAR BOUTIQUE: https://ajaiofficial.com
INSTAGRAM | https://www.instagram.com/dr_indya_aja...
TIKTOK | https://www.tiktok.com/@indyaajai?lang...
BUSINESS INQUIRIES: [email protected]
Foreign, hey guys, it's India welcome or welcome back to my channel. Today'S video is going to be another crochet braid video. We are going to be talking all about how to get a seamless, crochet braid installed. So, as you guys can see here, I am starting off on freshly washed hair, getting ready to go ahead and do my cornrows so normally for my crochet braid styles, I do anywhere from 14 to 16 cornrows. It really just depends on the style that I'm doing for this style today. I believe I did 14. So I'm taking out my little bit of my edges right here: um just not too much leave out, but just a little bit around the front perimeter and then I'm going to go ahead and do seven braids on each side. So I'm just showing you guys here. Just a little bit of leave out that I have leave out is, of course, always optional. You do not have to have it for crochet braid styles, but once I'm done with all of my cornrows, I go ahead and lock up that last piece. So I braid mine one into the other, and then I just use this beater to put that last braid up into the other ones. Just so it's locked in place. You can also sew it. If you'd like to do that, I guess you could maybe bobby pin it as well. I just find that this way is super easy. The hair that I'm going to be using today is the keema braid ocean wave. I already have a video on this hair on my channel. I will put it in the description box down below, so you guys can go check that out for the review, but I'm just showing you right here how I split the hair. So that's one piece that came out of the pack and I always split it into at least two pieces and then I'm gon na take those pieces and put it on this little braiding rack that I have. I find splitting the hair in half before and then putting it on. This allows me to move through my crochet braid style a little bit quicker. Now you guys can just ignore me cutting this here um. I know you guys saw it earlier, so I wanted to just show me cutting it out. It was for a technique I was trying, but it did not work out. So we're going to be doing this one today. So basically here I'm taking the beater and inserting it forward, and then I am pulling one piece of the crochet braid hair through and then I'm going to use my beater again to bring that hair even further back. So you can see here, I'm inserting the beater. I'M taking that piece of hair I'm pulling it through, and this is going to just allow that knot to be further back and not right at the front, so you can bring it as far back as you'd like I'm just doing it. I feel like kind of like the middle of my head and then once I've done, that I'll be able to actually tie a knot and then it will be nice and secure in place. So you guys can see here how it looks and I'm just going to start knotting it. So I kind of just wrap it and then pull it through wrap it and pull it through and just do the same thing. You can do it three or four times just to make sure that it stays in place, and then you guys can see what it looks like from the side here. So now you guys can see that I am actually on the same braid. So I am doing two pieces of this, so two halves is the way that I'm installing it so the two pieces that are in the front actually equal one single piece out of the pack, but remember I showed you guys that I split the hair, so I Am using those two pieces which is really one piece on this one braid and then this is how it looks in the end, so you're gon na do the same thing. Pull it through knot it about three or four times, and then it's going to look just like this in the front, you guys can see how seamless it looks. So, even if you didn't have leave out, it would still look really good in the front. So now we are moving on to the part. I want to show this part to you guys. It'S super simple, um, you're, basically going to do it the same way that you did those pieces in the front except you're, going to make the beater go in towards the part. So you can see that when you pull through here, you're still pulling through one piece. Just not all the way and you're gon na Loop that, through this about three to four times and then you'll, just pull and so you'll see you'll have one knot on one side and then nothing on the other and you're gon na. Do this all the way back for this side of the part so put the beater inward you're going to take the crochet braid hair, put it through the loop and then you're going to pull it through. So then you have the loop on one side. The two pieces on the other grab only one piece Loop: it through about three to four times: pull it tight and then that's how you do this side of the part. Now, when you get ready to do the other side, you're going to want to switch the way that the beater goes want to make sure that you point it inward, like always go in towards the part once again, you're only going to pull through one piece of The hair, just like you, did on the other side knot it about three to four times, because this is Silky your hair. If it was more coarse, you could probably just pull it through and be done, but because this is silkier not at least three to four times and then this is what you're going to be left with once you're done. The part - and these are the final results guys I did not show you me like kind of flat ironing my leave out, but it was just a very little amount of leave out. I put a little bit of heat on it. Girl lay my edges, and then these are the final results. The seamless part really comes from the way that you tie the knot. So if you do it that way, you should have really great results. Whether or not you have leave out. If you guys enjoyed this video be sure to hit that subscribe button down below turn your post notifications on give the video a thumbs up, and I will see y'all in my next video bye,


Comments
Ashya Andrews: Very creative! I look forward to trying this with colors outside of my natural hair color, to see if it’ll create a more seamless install. Thanks for sharing this!
purplegal05: This might be just the solution I need. I had to stop crochets because the front of my hair was breaking off because of the knots at the very front. If I do your seamless method, there won’t be any knots at the front, thus not putting any pressure on my edges! I am going to try this asap
Victoria The girl wonder: Absolutely beautiful!!!
chanel joop: thank you for sharing! I'll be trying in 8 inch pack!
Joanne Stoute: That looks so good
Gill Perry: Good job
P N: How do you remove the hair without experiencing breakage? I always get knots and tangles with crochet
Nicolette Hugee: Gorgeous
Like Jans: Hey I have a video request can you try to do crochet braids with this hair but add a bang in the front area?