How To: Senegalese Twists For Beginners! (Step By Step)
- Posted on 11 May, 2017
- Sew-In Hair Extensions
- By Anonymous
Rope Twists With Kanekalon Hair Supplies I used https://goo.gl/55rGiB
These twists are called Senegalese Rope Twist also known as Senegal Twist or Rope Twists! These twists are achieved with kanekalon braiding hair but feel free to use whatever braiding extensions you would prefer to use, just as long as you follow the same twisting techniques to achieve similar results with your rope twists. Breanna Rutter teaches in this tutorial how to do rope twists on your own hair! This is definitely a beginner friendly twist tutorial with braiding hair so that you can finally master Senegalese twists on your own hair! Breanna used only 5 packs of kanekalon braiding hair to do these individual twists! Comment down below your video requests so that Breanna can know which hair tutorial or braid tutorials you want her to do next!
ROPE TWIST HAIR SUPPLIES
#2 Kanekalon Braiding Hair (5 packs) http://amzn.to/2mvidVN
#27 Kanekalon Braiding Hair http://amzn.to/2mvidVN
DooGro Hair Vitalizer Triple Strength Formula http://amzn.to/2q28Nq0
Hicks Edge Control http://amzn.to/2pxRBWe
Rat Tail Comb http://amzn.to/2iJlL6o
Hair Cutting Shears http://amzn.to/2hVVg09
Duck Bill Clips http://goo.gl/Jyxrkg
Wide Tooth Detangling Comb http://amzn.to/2mviyZ8
Bobby Pin http://amzn.to/2pj1pY9
Hair Tie http://amzn.to/2piREcc
CHECK OUT MY NEW HAIR TUTORIALS YOU MAY HAVE MISSED!
Cornrow Braid Hair FOR BEGINNERS! https://youtu.be/wkjQEde0AX8
Feed In Braids FOR BEGINNERS! https://youtu.be/yDYRPcRZxeI
Goddess Braids FOR BEGINNERS! https://youtu.be/g2ealpvva8Q
INVISIBLE PONYTAIL WITH WEAVE! https://youtu.be/khA436-g82A
$5 High Ponytail w/ KANEKALON BRAIDING HAIR! https://youtu.be/tpYE14_IN00
Buy My Books, DVDs, and T-Shirts At
Website http://www.Howtoblackhair.com
Personal Instagram: http://www.instagram.com/BreannaRutter...
Facebook: http://www.Facebook.com/OfficialBreann...
Thanks For Watching!
DISCLAIMER: All suggestions, tips, prizes, techniques and advice given are for informational purposes only and should be used at your discretion and best judgment. I highly recommend conducting strand tests when trying or using new products, hair appliances and product mixes. I am not responsible or liable for adverse or undesirable effects including hair loss, hair breakage or other hair/scalp/skin/body damage as a direct or indirect result of the suggestions, tips, prizes, techniques and/or advice given.
FTC: I am not representing, being paid by, or endorsing any of the product brands in this video & I purchased everything with my own money - UNLESS OTHERWISE STATED in video/blog content. There are links to products that might be helpful based on the content of this video/blog. Each of your purchases via our Amazon affiliate links supports our cause at no additional cost to you.
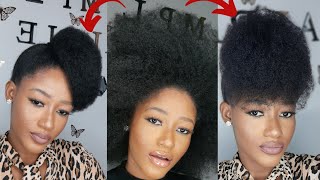
Hey, ladies, this is Brianna from howtoblackhair.com, and I want to show you how to do the senegalese twist for beginners, subscribe to my youtube channel to watch me break down more hairstyles for beginners, so that you can do them on your skull for free one of my Youtube goals is to get my channel to five hundred thousand subscribers and I'm more than halfway there, because I currently have three hundred eighty-two thousand subscribers. So click the subscribe button, if you haven't already and let's get started with these beautiful senegalese twist, these are the hair supplies. You will need to do your senegalese rope twist extension to start off. You'Re gon na need roller side curls. At the end of your twist. You'Re also going to need a wide toothed comb for detangling. You will also need Hix edge control to make your edges for this look, I use five packs of kanekalon braiding, hair optionally. You may want to lose a hair growth, oil or hair grease for your hair. Now I have a small section: look so that I can demonstrate exactly how to do these clips and when starting off with the blonde braiding hair, because I want to make sure that you can easily see this file. So the very first thing you want to do is remove your braiding hair from your package and you're going to separate the rubber bands or the hair tie holders. That'S on the package appear now. What you want to do is make sure you locate the in and take a good look. Don'T you see how blunt both ends? Look, you don't want it to look like that. What you want to do is actually do a technique. That'S called feathering when you're feathering the ends of your hair you're, pulling on random pieces of the end, so that you can make the ends. Look more tapered because fresh off the pack, the ends are very blunt and straight across. This is going to make it very difficult for you to twist all the way to the end, because the twist will abruptly end. You will cause the end to unravel, to prevent the ends of your twists from unraveling. It has to come to more of a finer point so to see here, I'm grabbing pieces of hair that still needs to be worked on a little bit more by slightly pulling on it, while my other hand is loosely holding the package now run your finger foods To clear any tangles, so you can take a good look at how well you feather clean and now, if you keep working on the rest of the hair, you want to make sure that you run your fingers through because, as you were feathering it is, you are Basically, creating like a tingling effect along the hair, so after running my hands all the way through it's now time to begin cutting those loose ends. So I'm just going down at an angle to cut so that I'm not creating a blunt straight appearance at the end. Cut down head again - and this is how your package of hair sugar now to begin twisting. I'M going to demonstrate on this section that I have here by dividing this into two parts, because I have to twist left to do make sure you clean up the parts really good. So that way, wherever you choose to part your hair to where your style, your parts looks, very nice now put the rest of the hair out of the way with a duckbill clip and we're going to focus on this pieces. So now I'm just showing you all the way around that you want to have a square size. If you want other types of party, then you can do triangle partings. If you want it to as well. Now I'm going to take some hair growth free. You can also use hair growth serum if you wanted to this is optional. You want to use a hair growth serum if you want to help speed up the growth of your hair. So I'm doing is I'm smoothing this along my parts on my scalp and I'm going to divide this in half in preparation of doing my twist and I'm also adding some hair growth grease in a sense of my part as well. So now. These are your two pieces and you want to make sure they're pretty much equal in size so that you have a very consistent way now taking our light, color braiding hair, I'm going to show you the amount of hair, you want to pinch off and you want The hair to be slightly thicker in width as you have this on top of your head, so that way, your quiz don't look too or two things now, taking that direct sensor, I'm going to lay it right at the part where you see my scalp and I'm Going to begin twisting the side here that you see me home so now, you're just going to place it there and use your left hand to hold firmly the other side as you prepare to twist your hair into the braiding hair. So, as you can see here, I'm rotating this hair sports in my face, so if you are facing the exact direction, is meet in relation to the direction I'm going, I'm twisting towards my face so now after posting a couple of times in the hall. With that hand - and this section here is going to begin twisting going a way for my face. But if you were to push this piece of hair off your scalp, both sides are actually going in the same direction but you're going to put in the opposite direction. When I'm actually twisting your hair another way to see exactly which way to twist is that one side, that's unlisted, will automatically start twisting on its own. Not at this point that second area that we twisted you're going to overlap that over top of the first leg, that decreases so remember, you're, going to twist your right leg. First and then your left leg, the opposite side and the left leg goes over the right leg. Now, as you see here, I'm twisting both pieces of hair opposite of one another and rotating the piece. That'S in my left hand over the piece. That'S in my right hand, if you notice that your twist is loose, I suggest that you start over and repeat the process, because once you suspect this clips at the top, you can actually create a perfect slip. Going all the way down continue to put both pieces in each trader simultaneously, as you overlap one over the other. You should see that it's not looked at all as you're doing. It is actually adding up every single time and overlap twist and overlap. One important thing that I want you to keep in mind is that you have to consistently twist both legs with the same amount of tension and pressure, so make sure that the twist does not look like sided now. We'Re near the ends, and one side is a little longer and a little thicker than the other side. You just pinch off a small piece of hair to the other side, so that they're, even in sickness and in length. This is very, very important in getting the Eclipse to reach all the way down to the end without unraveling, if one of your twists and lot sooner than the other, it's going to cause your tips to not be able to affect the release lipids on to you And what the very important is to papers as you complete the clip of getting thinner. This reinforces the strength of the clip so that it does not unravel you want to put that bad boy, all the way down 3in when you're done. This is the staff in how your cushion look and upon letting go you push and not unravel. If it does, I suggested to be your twist over again so now, as you can see here, I'm just holding it up to show you how well is tapers at the end, and now, as you can see here, when you don't twist to site, you can rotate Your twist in all directions, you don't need your twist to be extremely tight on your scalp. You just want to make sure it's firm and entire. Now for my second demonstration, I will show you on black hair, because you will pretty much probably be actually doing these twists, the color of your real hair. So I'm going to show you as realistic as toxic. We have is Christmas and I'm going to demonstrate the steps and once again just in case you may not have done so - I'm laying a piece of life here over that braiding hair and I'm twisting this section towards my face. As you can see here, I'm just rotating it very firmly making sure that my hair is lately interweb within the wheel. Now, as you can see here, as you're twisting and using your other hand, so hold the hair down in place and now you're going to start twisting this section going away from your face, so that means my left hand is rotating the second time going away from My face so myopic twisting is section far enough. As such a section goes over the first section, and then both sides have to be twisted and opposite direction before you overlap the leg. This is very important in preventing it with some unraveling. You always want to twist. These twists going opposite of one another and overlap for your appropriate leg over the other leg. So, as you can see here, I'm just moving the hair around, so I can see how it looks and you're just going to continue twisting all the way down now don't mind if the twist is not extremely tight at your scalp. This is actually preferred when you're wearing senegalese twist is not the twisting type, because this causes traction alopecia, which is so unnecessary. Tie styles, don't last longer neat styles group, so, as you can see here, continue to twist in the opposite direction, as you overlap the piece in your left hand, over the piece in your right hand, always move out your hair to prevent any lumps within routine in Rotate each section in between your index and some so that way it's high before you ever met. Now that our twists are finished, you're going to use your scissors to cut off the in fist account the reason why you're going to have ends of hair that stick out at the bottom is because you pay for your braiding here we need paper all of these. In don't film it simply that's why you have random pieces of hair sticking out at the bottom, make sure to be careful not to cut up too far up your twist, because you may begin cutting the end of your real hair. So keep that in mind, because it may be easy to forget exactly how long your real hair go. So I suggest that you only do this at the ends of your face now that the twist is finished. Look at how gorgeous it looks with these simple but key techniques. You can create such a beautiful senegalese twist by only using braiding hair, and you can rotate your clips in all directions if you didn't twist so now that all the parts are installed, I want you to check out how gorgeous the style work. So I'm just going to do a spin around to show you how the Christmas once they're clearly installed at this point, you're free to go. If you want to leave the end straight, but I have some core techniques to show you so stay tuned. As I salute you how to curl the ends or mrs. as you curl the ends, what you want to do is grab a clump of hair about four to five twist. Is there about this size and you're going to grab the ends of your twists to make sure they all go at the same point so that you can curl the ends very effectively wrap the ends around the wrought, and once you wrap the ends, you're then going To wrap the remaining section around the ends and then roll your way up the wrought so that you can effectively curl all the way down to the bottom without it unraveling, and this is how you should look right before you dip it in hot water. Now slowly enter your twists into the water and you're just going to leave it down there for about a couple of seconds, and you want to do this to release air book now. After taking it out try to drain as much water as you can before, putting it on your towel and then you're just going to press to release all of the water, it's a help really sustain from your roller as well. Now, when you unroll it off, your curler be sure to do this card very gently, because if you don't, if it's nagging and cooling it's going to call some of your senegalese twists to unravel because it's books are so warm now use your fingers to run your Hands or the tips to release them individually and then you're just going to use the equipment to clean up the end so now this is how it should look, and now that all the curls are finished check it out. Look at how beautiful look is it added a light touch of gas to the staff? I absolutely love freddy-san degrees. Now I just want to show you how much more fuller look at the end beam at the intimate anchor. So now it's time to style up these edges honey. What I'm using is just a little bit of my favorite edge control. I have like so many favorite edge controls that it's not even funny but for this clip I'm using the Hicks edge control to actually style up my edges as well as using a small system, but if you would rather use a toothbrush, then I'll perfectly fine. With that, just as long as before your edges all right, but for this look and for many of the looks that I like to do, I always like the look of the small tooth comb. That'S why you look small so called edge, except such as bottom edges. So, as you can see, we didn't even need to use much product because we barely have as much education so a little later, I'm going to do the other side, and this is exactly how my edges look once I finish full. As you can see, we have some looks and plays going on which I love so now, ladies as you can see, I got a hop on me Phil's, going on here with those edges looking too late. So now, I'm just going to spin around to show you how gorgeous and simple this style looks was such a beautiful classic high ponytail style. The very first thing you want to do when creating a high ponytail is using a small patch of hair supposed to come in exactly where your placement will be. This is very important so that you can smoothly create a high ponytail without the extra fussing. What I mean by that is, because you just finished installing it with the scalp, might feel just a little bit sensitive. So you don't want to pull or maneuver your hair more than necessary. That'S why you first want to predetermine exactly where your placement will be and then smooth your twists into position. So that way, you can effectively create a high point, sense, be sure to also rotate in one hand over the other, to give your shoulders a little bit of respite to take you a little to actually create your ponytail so now, just further smooth. All of your twists into position so is very flat and smooth, so we don't have any kinks, and now I'm just going to show you how it looks all around if I get ready to put it into a ponytail. So now, at this point, I'm going to go ahead and put this hair into a ponytail and because of the size of my ponytail holder, I only need to move it around my ponytail once if you have a large hat band or large hair type, then you Want to loop it around, maybe about two to three times the thing is you don't need your ponytails tight, because I'm going to show you how to tighten it up a little better to create a slight bandit effect that your ponytail, but for now just loop. It around once and I'm going to show you this little trick that I like to do with my high ponytail to make them just a little bit tighter. So now, I'm just spinning around really quick to show you that's exactly where you want your high ponytail to be for this knot at the very back, I'm grabbing anywhere from about five to eight clips and I'm going to go ahead and wrap it very tightly around The band of my ponytail, this reinforces the ponytail holder. What that actually needs to tie it to tighten so very tightly, I'm driving the twist and I'm wrapping it around the very start of my pony and then I'm slightly consuming in and I'm going to make sure to the bobby pins attended. At the very back of my ponytail and this technique also gives you a slight lift in the high ponytail, so that it's not flat at the top that has a slight lift at the very top of your pony and now with your hair in position. This is definitely a super cute and easy file that you can wear with your senegalese. Please, ladies, I hope you enjoyed the tutorial in itself be sure to subscribe, to this YouTube channel, to see more videos in hair tutorials for beginners. Also, I'm getting ready to post some amazing hairstyles mix. So if you don't want to miss it be sure to turn on notifications and until then I will see you all in my next video bye, bye,


Comments
Breanna Rutter: Subscribe for more beginner friendly hair tutorials! COMMENT VIDEO REQUESTS DOWN BELOW!❤
Soul.Friend Agape: i don't see how anyone Could thumbs down the video. she is one of the most professional on YouTube. Guess some folks just aint having a good day! You're GREAT
Mary Thomas: Been wearing this style for about 8 years. Love it! Very protective style, and helps to grow your natural hair. It usually last me about 6 weeks before I get a touch up. Just the outer perimeter. Recently lost my beautician. ...maybe your tutorial can help my new stylist who haven't mastered my twist yet. Thanks for sharing.
Yasmin Keeling: I have seen soooo many videos demonstrating these twists and this is BY FAR the most educational and professional video I have seen !!!! New Subscriber !!
Jessica Owens: I do my daughters hair at home and I’m getting really good at it and saving money in the process, thank you for making this video diy with such in-depth demonstration! This really helped me get in a groove of my own to perfect my process. I wish all diy hair videos were as easily and carefully shown. Thank you and you are so beautiful too btw!
Paulette Sands: Your tutorials are sooooo detailed and informative! I box braided my hair last week for the first time...this weekend I shall be installing the senegalese twists!! Keep up the great job! Protective styles rock!! :-)
tajbabii711: Omg thank you for this tutorial! I could never really get the technique down but now I'm ready to try this so I don't have to pay anybody $120 + thank you!!
Sharifah Namukose: Oh my gosh you literally give me so much confidence to braid my hair even though I know I might fail miserably
Regina Carr: I cant wait to try this on my teen she's gonna love it! You made it look so easy!
HolliWoode Castncrew: My Mom use to do my Senegalese Twists & Box Braids. However, her health has deteriorated & my personal stylist is no longer able to do my hair. I’m thankful for this video for explaining what she was doing up there. LoL! Box Braids were easy, but I was lost on how to anchor the hair for the twists. Thank you, thank you, THANK YOU!
Kally: This is one of the best tutorials I’ve ever seen. Really well narrated and thoroughly explained. Thank you!
Sara Sara: Wow... absolutely spectacular video Breanna. I learned so much! I've been doing rope twists in my natural hair for years and last summer I had rope twist extensions for the first time. I've learned a better technique through you. My mind is full of ideas! Thanks for the inspiration
Ebony Jones: This is the best tutorial video! I got it the second try and it looks so natural coming from my scalp. I have been trying to figure out how to do these myself rather than paying someone $130+. I haven't worn extensions or weave in a year and I struggle with finding natural styles I actually like on me. Thank you soooo much for posting it!
Nairobi McMillian: I love how you explained everything. You are so professional but yet so down to earth also. I love also that you put everything in the description box. That was very helpful.
Charmaine Bacot: I'm using this video to do my daughter's hair and save some money. I am doing extremely well so far! Thanks to you being so clear and detailed with your directions. Great job! I must subscribe...
Treashure Spencer: Whew! Thanks a ton. Hair too short to start from scalp, but this technique and the rubberband method ! Thank you!
Ashley Usher: Ok! You've convinced me that I can do this myself! Especially since I've wanted twist since my cousin did them last year! In case no ones asked, how did you prep your hair for this style and how long does it last? Also, does it matter what type of hair? My cousin bought everything for me and I have no idea what kind of hair to buy. Thanks!
Shawn & Michelle Mitchell: Thank you for an amazing tutorial!!! I’m gonna do my Daughter’s hair this weekend but I needed a lil more info on the technique. You rocked it Giiirrrl!!!❤️❤️❤️
Tche-lin DeVahn: You broke this down so good Thank you! I’m doing mines next week!
Nedra Bloodsaw: I saw this video after watching other tutorials that went to fast and didn’t explain properly! She took her time love this video !!! Good thing I’m a stylist so I kinda figured it out. So I’ll do my touch ups only using her method
Brittney Channer: As someone who has been struggling to learn how to do braids and twists, this is the MOST effective video I have ever seen in my life. Thank you sooo much Breanna!
Jipsy Queen: I absolutely love this look. Perfect for the summer
KJ Batts: I love this video I did this for the first time and it came out so cute. I’m going to do it again in two weeks with more twist. Thank You, Thank You
Nynah Ali: by far the most well explained tutorial i have ever seen on youtube. it was explained so simply that i am trying this on myself in a few minutes.
Patti cakes: She did an excellent job showing us how to do this style. Love it
Sjsodnxb Zhaidbxisn: I use to watch your videos late at night and they inspired me to go back to learning hair!! Love all your tutorials!!! They help a lot and not just with hair
xXSentient RaptureXx: I've watched ALOT of videos on how to do different hairstyles with braid hair and this is by far the most well explained. Thank you so much for this!
VMalone: Thank You Sister!! … I DEFINITELY Needed this!! It REALLY HELPED ME WITH KEEPING MY TWISTS FROM Unraveling
Tiffany M: This was so easy to follow, thanks girl!
BreezyCheezy: I just found this video and immediately sent it to my older sister! We’ve been slowly learning how to do protective styles (she’s been natural for a few years, I’ve been so for almost 10 months) and I recently did twists for her for the first time! And this tutorial is sooooo easy to follow, I’m excited to try it! Thank you for posting this!!
Blk Rose: You are so blessed to still have your hair edges young lady, I have seen so many near bald from this and braids. You make it look so easy but I've tried over and over the hair slides right off my hair. You are a pro,
Diana Dzene: I finally managed to get this twist done. Thanks to you
Allena Rust: I just love your channel because you really take the time to explain step by step a variation of hairstyles with us. Thank you so much.
Quashunna Pope: Very detailed tutorial exactly what i was looking for !
Kim Sealy: My friend is currently twisting my hair and this video has been extremely helpful. THANK YOU!!!!!!
Musue kaneh: Your video is very educational, precise and clear. I am now empowered to start twisting my own hair, therefore saving cost, efficiency and time/flxiblity. Thank God for your skills and highly creativeness.
Claudia Moore: This is the most detailed video I've seen so far. Very professional. Love it❤❤❤
Fair Amy: Beautiful, easy tutorial!
C'est La Vie It's Me!: This is so comprehensive, thanks Breanna ❤️
Flawlessenvy Beauty: I ❤️your channel !!! Your videos are so thorough!!!! I did my niece's twist today and they turned out great!!!! Now I'm ready to master faux locs !!! Blessings and success!!!!
Lilmisscostumedrama: This must take foreverrrrrr! Looks so effective! Beautiful shiny twists!
Its_divimoon: Thank you girl!! This is an excellent tutorial
Michelle Watts: Beautifully done totally trying these!!!!
Kimberly Natasha: Your videos are always awesome and so informative. I love how you throughly take the time to educate and explain things.
Roxanne Cummings: Amazing u did well with your tutorial,pretty clear.Love it
Shanita: That is Sooo Cute!! I Love how it came out!! Great job sis!
LaToya Brooker - Simmons: I am so glad I found this video! Straight to the point and easy to follow along! This video gave me encouragement that I can do this on my own. Thank you for taking the time out to make this video for people like me.
Jeanbabyface: Wow i have been struggling forever trying to figure out how to do this and u explained it so simply ...thank you ❤️
Diane Melendez-Norales: It's about time I find a tutorial video with actual instructions! I only find videos that have music instead of someone giving the step by step instructions. I'm definitely going to subscribe and watch your videos. And I'm sure my hair will look so cute thanks to your video. Also your hair looks amazing keep those videos coming!!!
Shoneyone: Love this style but the twist never last more then 3 days in my hair like they never stay attached at the scalp. Have no clue why but I still end up trying it every summer. Absolutely love this style
Rae Jones: Thank you Thank you Thank you! The absolute Best tutorial video I have viewed! So detailed and explained Great ! Gonna try this, you did a awesome Job! Thank you love!
mykul: thank you so much! I’ve been doing my entire head for three hours and half of my twists were messed up! best tutorial for this.
Candace M: Beautifully done
Melle Indie: This was one of the BEST hair tutorials I've ever seen! The instruction and quality of the video is A+++++!
Jo Rhodes: The best totorial I've seen out of many. I'm going to try this one more time. Thank you!!
Essence Reid-Oxley: This is probably the easiest tutorial I've seen - nice job!
Queenlova: This video is so informative & detailed. I think i'm going to try this on my own. thank you
Tiyesha Wilson: I've watched 6 videos this one by far is THE MOST HELPFUL.THANK YOU
Heather Taylor: You’ve got about he best tutorials I’ve seen. I’ve braided my entire hair thanks to detailed instructions. Will try this at some point. Thanks
Jacqueline Brown: I LOVE, LOVE YOUR VIDEO!! WONDERFULLY DEMONSTRATED, AND YOUR VERBAL EXPLANATIONS WAS PERFECT!
Belle Kay: Great tutorial. Very well explain, best I've seen thus far.
Sharlene: Beautiful and simple. I feel so inspired! Your hair looks so moisturized beforehand, I would have liked to know what you did to prepare your hair for the extensions.
Jarizzle Chez: Those are so beautiful and look so professional. Very well explained tutorial
Sabrina Young: Thank you for making this look so easy
Arimathea Jeffers: Big help here! Thanx love. I'm now attempting my first twist and so far me likey!!!! Thanks again for your video lady!!
Jennifer Appiah kubi: Just learned how to braid my hair whiles watching u My dear u are so detailed, step by step. Thank you so much I made it !!!
Nylotis Slaughter: I love the way you do your twist they're so simple and easy and so easy to take down because they're not braided they're just twist it all the way to the end thanks for sharing just saying
Red_Vibe: Amazing video. Easy to follow. My only problem is parting the back of my hair evenly
Aging Gracefully: Thank you for this tutorial I just got these done over the weekend for the first time YES my brain hurts you ga e me some great ideas to style
Joyia Sells: Thank you for this. I’m gonna try this style on my daughter’s hair.
Kate Wandler: Hey, just wondering if anyone knows roughly how long it takes to install your own twists? It takes about 9-10 hours for me to do medium box braids, is it pretty close to the same, maybe quicker to do twists?
Kelley Kellz: I love how u go step by step & make it easy 4 beginners
Debra Carrier: I love watching your tutorials You teach me something new everytime. Thanks
Tulsagirl2006: That style looks amazing on you. Your tutorials are the best.
tayse melody: Parabéns muito bem explicando
Khaleef Nassir: Thank you so much this was a big help ❤
Tee Frazier: GURRRRLLL! I can't thank you enough for sharing. I'm so inspired. Excellent tutorial. I'm a new subbie. You earned it :)
flower Hercules: That Was Amazing, after watching I actually think I can do this. You're hair is gorgeous and your Make-Up is RiGHTEOUS
Alyssa Holden: Thank you for breaking it down step by step now I can do my own hair btw I'm 14
Barb Narly: THANK YOU.! This is the easiest video I have seen. I have extra hair at home that I wanted to use. I doing these for sure.! Anyone that disliked just mad that we will now know how to do our own twists and we won’t be paying them.
MiMiLuvsMakeup: This is by far the best tutorial for twists I have seen on youtube! Bravo!!!
Kathleen White: Wow! Such talent! You look gorgeous!!! Love this video! Wish I could do it! Thanks for sharing !
Sylvia Smith: Very pretty, vill be trying this style. Thanks for sharing.
Janah Dawson: MOST HELPFUL TWIST VIDEO I'VE EVER SEEN!!! THANK YOU!!!
Shirley McMurrian: Love this tutorial will tag you when I recreate!!!
Dee Gumbs: Fantastic job I love the wedding band ❤.. I have the same set.
ajanay23: You did that! Really the best I've ever seen and a great tutorial
Mona Jenks: Wow I didn't know it was that easy. I am going to try it on me. I know it takes A LOT practice and it's not going to happen overnight. Thank you for the video. I subscribed ❤
Shimira: Love your tutorials , you make it look so easy Thank you Brenna. Plus you are just gorgeous...in some of these styles....
Yacine Dia: It's funny I'm Senegalese and I didn't know you call it "Senegalese Twists" lol. In our country we call it "raw" (you have to read it like a french word to pronounce it right). Great video btw
Michelle Aforka: You're so detailed and i luv that. Great job!! Thank You!!
Pusheen's history: My daughter saw this video and had to get it done. I was skeptical and didn't think I could do it. Thankfully your easy to follow step by step tutorial was all I needed. Her hair looks great. I thank you and my pockets thank you. I subsribed promptly!
Bea Loved: I think it's excellent the way, she throws in self- care tips in as well...how to take care not to braid too tight to prevent alopecia,and how to protect your shoulders!✊Good looking out Breanna!
xmichela: Lmfao i thought it was so easy watching the video, I tried it and my arms were tired after a couple seconds and I didn't even started lmao that's why other people do my hair u'r talented
Donna: Thank you for this video. I’ve watched several videos and this one made it clear for me. Please continue making these videos.
Shakeytha Burgess: Excellent demo!!! Thanks✌
Jenn Nkiru: great job! super helpful!
Ash B.: Very well explained, Thanks !
221B Baker: Clearest tutorial on the web. Thank you
Jennifer Wallace: Very pretty! I think I'm going try this:) I love those twist! How long did it take for you to do it all?