Diy Bantu Knots | Glue-In Quick Weave | Quick And Easy | Affordable Hair Style
- Posted on 30 July, 2022
- Sew-In Hair Extensions
- By Anonymous
Hey ladies, welcome back t my channel. In this video i'm showing you how I did this cute bantu knots with glue-in quick weave at the back
The items I used:
1 pack of hair extension - I used all three bundles
1/2 pack of expression braiding hair
Hair Wax
Crochet Needle
Don’t forget to like this video if you found it helpful and subscribe for more creative budget friendly hair videos like this.
… My Socials …
Instagram- ladywhxte
TikTok- ladywhxte
My Email:
Music by Madison Rose - Better Off Alone - https://thmatc.co/?l=103DB068
-------------------------------------------------------------------------
•My Filming Setup•
Camera
▪︎Canon EOS Rebel t5i/ 700D
Lens
▪︎Canon 50 mm STM 1.8 Lens
Lighting
▪︎Neewer 18 inch Ring Light
▪︎ESDDI Soft boxes (2)
Audio
▪︎BOYA BY-M1 3.5mm Lavalier Condenser Microphone
Memory Card and Storage
▪︎SanDisk Memory Card
Editing Software
▪︎ Wondershare Filmora9
▪︎ VN Video editor/CapCut- Mobile
FAQ:
•Nationality – Jamaican
•Height – 5’5
#quickweave #halfuphalfdownquickweave #quickweavewithleaveout #versatilequickweave #quickweavenoleaveout #middlepartquickweave #bantuknotsonnaturalhair #bantuknots #bantuknotswithbraidinghair #howtodobantuknots #bantuknotsonshortnaturalhair
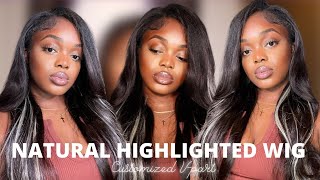
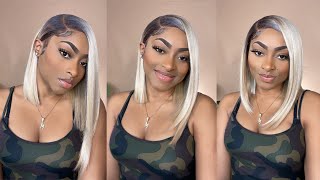
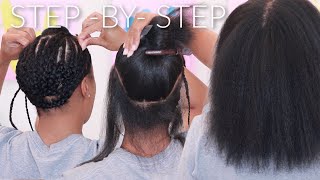
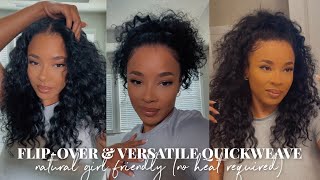
Hi welcome back to my channel. If this is your first time seeing me, i am melody m-l-o-d-y. I create hair beauty, fashion and lifestyle related content here on youtube. So if that is something you're interested in, you should definitely subscribe for more in today's video. I'M going to be showing you guys how i achieve this quick weave with bantu knots at the front, which is a very quick, easy and beginner friendly, hairstyle yeah. Let'S get straight into the video so prior to coming on camera, i did braid and section my hair and what i did was part, my hair ear, to ear to make the back part bigger than the front, because i don't know when you're doing styles like these, The front has to be smaller than the back now. This is the mesh cap that i'm going to be using it's just a regular mesh cap. What i'm going to do is sew it down onto my ring here, since i will be doing the gluing method. I just want something to protect my real hair, so the glue doesn't touch it directly. Guys, as you can see, i don't have any edges the edge them still not come back. For this part, that's hanging down, i'm just going to stitch it so that i can have a flat base to work with the hair that i'm going to be using today. Is this miracle synthetic hair in 20 inches and it is in the color 1b99j. So this is me showing you how thin the weft is. Normally, when you're working with synthetic hair, it is very thin. So what i normally do is just double the waves, just like what i'm doing here and what i'm going to do next is take that piece and i'm going to measure it onto my head just to see where i need to cut it so that it fits That area perfectly going in with my salon pro here bonding glue, i'm going to apply that directly to the hair extension. Now you want to make sure that you're applying enough, especially to the ends when i'm laying the track, i basically glue them in a u shape. So that the hair can fall directly on the piece that i previously glued, so it can cover the track as well as the sides of my hair. Now, when i'm doing my hair, i basically feel my way around, because i'm used to doing my own hair, but if you're a beginner, i suggest that you use two mirrors one at the front one at the back, so you can see exactly what you're doing from Time to time i go in with a little spritz. I really don't like the center piece. I really don't use a lot of it, but it helps to keep the glue firmer and makes the hair more secure. So if you want the hair to hold um longer or if you want it to last longer, you should definitely go in with some spritz to secure it all right. So to finish off the back you're going to notice that you're still seeing the chalk, but i'm going to show you how i hide that right. After doing the bantu knots, if you've watched any of my previous videos you're going to notice that i always do this, i always use hair wax to make my parting straighter and neater. I also use a hair wax to apply it to my right hair because, as you can see growing on the edges, so she has to has to get herself together. I know this hair walks works like magic. I like how it makes my hair smooth and just make it look presentable, and it's just one of the regular hair walks that you get at the here in jamaica. It'S the brand of fashion plus the one that i have is the number four and it's purple with a black top. Now you have to be careful when using this, because it will make your hair white so try not to use too much of it and make sure that when you put it in your hair, you blend it out properly again for the bantu knots, i'm using some Expression braiding here that i already had and i'm just going to crochet it onto my real hair. Just like that and then i'm going to actually um separate, take a little piece from each side. Just like that, and then i'm going to join it with my real hair so that i can have three pieces to braid with and i'm doing a regular plating, nothing special, just a regular plating um. It doesn't have to be necklace or anything like that, because you won't be able to see it you're going to wrap it anyways, oh picking up, oh, maybe so, for the actual bantu knot. What i'm doing here is bending the braid in here at the bottom part. There and i'm going to use that as my base, so that i can wrap the rest of here around it and for the ends. I'M wrapping it around the base of the knot so that it's tight and doesn't unravel is so using that same hair wax to do my edges, because you know no hairstyle is complete without edges and i'm going to show you how i get the invisible arm flip Over method, right after this clip, so i glued the tracks towards my face in the opposite direction that i glued the previous ones after that, i'm just going to flip it over so that it falls on top of the wrist and covers the tracks. Just like that - and this is the end of the video guys - i hope i explained everything properly so that it's easy for you to follow, and you know the drill, like the video comment, your thoughts down below and subscribe if you're not subscribed already. Thank you. So much for watching and i'll see you in my next video, my
Comments
Andreana Bartley: Love this
Jane Atungo: Beautiful ❤
Shereka Green: Very nice❤❤