How To Create Flawless, Flat Sewins Using Micro Stitching Method
- Posted on 06 July, 2018
- Sew-In Hair Extensions
- By Anonymous
EDUCATION: https://swankducation.teachable.com
SERVICES: https://swankdnation.com
PRODUCTS: https://swankdorganics.com
EXTENSIONS: http://swankdnation.com/extensions
INSTAGRAM: @iAmSeantaeMarie
FACEBOOK: Swank'd Tresses Salon
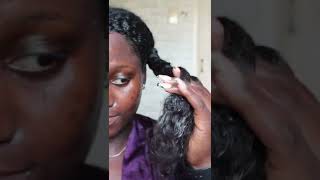
As hunty, you are in the right place at the right time. I am Shanti Marie and welcome to my look in there in class for micro stitching, ok, so again, this is for any install, and this is just to close off your ear tracks. Okay, some people like to use glue and break down that last track just so, they can get as close to the leave out as possible and they won't have any spacing. What I'm doing here is I'm showing you how I'm using nylon thread, and I will show you the difference between nylon thread and cotton thread throughout this video and I'm just securing the thread by doing two two loops through that track. Again, you want to make sure that you don't have any any gaps or, I should say any bubbles with the thread, so I'm just making sure that I pull both sides of each thread and making sure that I secure that onto the wet. As you can see here, I do have a track, that's already placed above or all the way to the end of the beginning of her last braid. So what I'm gon na do is I'm gon na start by placing my needle do the part where I can then place another track, and I'm only adding it to that that previous track, just to make sure that it's see it's um, seamless and also it's acting As an anchor for the last track, because I'm not placing it literally on top of a braid, as you can see, there was only just her hair strands. You also want to make sure that you minimize in tension. So if you can place that track and sew it to together with another track, then please do so. But if not, if you already have a braid, that's free, which is should be the last one, then you can go ahead and place your track there. At the beginning, for my first track or that last track that we're ending off with I do use braiding hair just to make sure that that braid is sturdy and it's able to take the strength of the lash track, because I'm using so much threading you, okay And I went back one time as you can see, my track is still flat, nice and neat, and I don't have to add an additional west or extension just to fill it in it will blend seamlessly with her here. So what I'm gon na do is I'm just gon na finish off with this nylon thread and then we're gon na go ahead and get into the cotton thread. For my finish, I do not like to use the thread all the way through. You will see how I'll finish it off with doing knots. You can either cut the needle off and then tie it three times knotted three times or you can go ahead and just keep threading while you're looping in that one position or that one that one place as you can see, I'm just holding the lead thread down And just doing the knots and I'm staying in place because it's so short, I can only do it this way. If you want to make sure that your knots don't loosen or your tracks that don't loosen, you can go ahead and start with a new needle and you, instead of starting right after where you stopped you're, going to just take it back like a centimeter and then Begin again, so that that that thread is going over where you stopped so let's can get into the benefits of why I love me. Some nylon thread. Okay, so nylon thread, it's easy to pull through. So if you want to go and pull through your webs or just pull through the clients hair, I feel like it glides better than cotton thread. Does it does not remove the essential oils or you know suck it all up, just like how a cotton thread does and it's it's way on thinner than a con thread? So it's still sturdy, but it's it's thinner, as you can see it blends very well with human hair versus cotton. Cotton thread tends to stick out, so that's the benefits of using nylon thread over cotton thread, and also it would not tangle on me as easily as cotton thread would so as usual you're seeing here, I am showing you how cotton droid does look versus how it Did look when I showed you the nylon thread and that's what I'll be using now, so you can see the difference. So what I'm doing is just making sure I'm securing that thread and then you're going to start so one two and then you're going to go backwards and for demonstration purposes, I'm showing you how close I will be doing it one two and then go backwards. One time and as you can see, the cotton thread is way thicker and you can see that it stands out more. It does not blend with the human hair, but again this is for demonstration purposes, one two and go backwards one more time again. This is just one method of how you can go ahead and do micro stitching to finish off your extensions now that you see the difference, I'm sure you will not be using cotton thread anymore. Also, please keep in mind that I have been using my left hand as a guidance okay, so my track has been placed upwards versus literally on top of the braid just so I can fill in that gap. As you can see here, my thread is starting to get short so make sure you get your knots in before you can't get going you further and there you have it, even though I am using cotton that right there, it's still nice and flat. So, as you can see, we are now on to the closing of this last track and what you want to do is you want to start right before your last closing of the last thread or not up the last thread. So again, please keep in mind that if you do not have a anchor to stitch on or a braid, I should say then go ahead and use a previous track. If you can so what you're gon na use, what you're gon na do is, instead of going through that whole two tracks, you're just gon na, go through the weft of that lash track. If there's no braid to you know so under, but you should have a sturdy braid, so you should be fine and when I say sturdy braid, I'm saying that if you use, if you braided the clients hair with extensions which thickens up and makes the breed a Little bit stronger, okay, so right now, I'm just pressing down using my fingers to press down on that track and ensure that it's flat when you get to the end, you can do double stitching if you need to single stitch in if you're doing single stitch in Make sure you stay in place and just stitch it again multiple times to secure it and again the method for this video is you're going to stitch forward twice and go back once. Okay, that was two times and I'm going back one time. If you don't stitch going from top to bottom, you can stitch going from bottom. To top, it just depends on your your comfort zone, whatever you, whatever is your cup of tea, you do that. Okay, so again, the beginning of this check and the end of this track is very important. You want to make sure you're securing it as flat as possible, as you can see, I'm holding that hair down and right there. That'S where I went through the track. That'S previous to this track, just to make sure that I'm not putting too much tension on the hair. That'S right there and now I'm just going to work my way backwards, because there's no braid right there! I did have a previous braid that was pushed forward towards that and, as you can see the flatness in the install now, I'm just going to make sure I'm looping and closing off this thread, and there you have it. Ladies. Thank you so much for tuning in to this online class. If you have any questions, comments or concerns, please please please get back to me and let me know I will be doing some more online classes, depending on the feedback that I get from these three classes. Again, if you haven't, went ahead and take a look at my other online classes, I do have videos on how to do. The install of reverse is also on and also how to do a a flat foundation. Braid pattern. Okay, so there's a difference as you can see, that is the nylon thread versus the cotton thread and it's very close to her leave out talk about slayage. Thank you, ladies. Once again, I appreciate you all stay tuned, bye,


Comments
Deleal Gladney: Hunty - the jaws of life are going to be needed to get that track out of her head! That track is IN THERE and it is not going ANYWHERE! It's so flat! Good lawd almighty! GREAT JOB!
Seana Gill: THIS IS EXACTLY WHAT I AM LOOKING FOR , A CLOSE UP DETAILED WAY TO STITCH......THANK YOU SO VERY , VERY MUCH.❤❤❤
PrencesNisha: Thank u for the tutorial. This helped me a whole lot and keep up the awesome work
Lala's Land: Thanks doll! I really appreciate it! I would like to see a seamless installation for sewin for the edges. How do you make it flat and not bulky when the hair is pulled back?
Sherry Evon: I been watching different videos on what’s best to do a sew in. I really understand your way on how to do a sew in own my teenage daughter she really wanted a nice sew in........for the holidays....
Rehenia Jones: Beautiful technique. Thanks for sharing
wysta01: Thank you for the needle work detail. Thank you queen
Zoie Lee Collections: Do you sew through the braids or around the braids?
Tatiana Esteves: Amei
Kayla Kenke: I never hear of this technique, seems interesting so I’m gonna give it a try with my upart. However, I wasn’t able to tell if you were sewing through the weft? Or under?
Classy Cassy Kells: Very informative!
Giggles Gigs: Very nice!
Vanessa Gonzalez Carpintero: Me encanta este método, lo necesito urgente
Keyia Parés: Awesome
Love Love: I literally hate Nylon thread, idk if it’s that I’m so used to cotton but I can’t get into it
Natasha Maloy: Thank you for this! #Newsub
SHe SiNGS: Om gaaaawd! That intro scared the shit outta me, ha! REALLY great video....you are highly talented!
Tae: Same name except spelled Shawntae Marie