3 Way Part Sew In Tutorial
- Posted on 11 July, 2014
- Sew-In Hair Extensions
- By Anonymous
OK my luvs...here is the sew in tutorial!! Enjoy!~
*** Looking for a stylist in the North Carolina area? Book Me!
https://www.styleseat.com/Glam ( currently taking new clients).
Looking to take some classes on hair extension techniques? Visit my website: http://www.glammoreeducation.com
Follow Me on Instagram: #letsglammore
Twitter: IGlammore
Facebook:https://www.facebook.com/GlammoreAcces... ( Like My Page)
http://letsglammore.wix.com/glammoregi... ( check me out!)
Ask me anything @ ask.fm/GlamsCorner
My Accessory Store: www.letsglammore.com
Where can you purchase my hair?: www.letsglammore.com
If you are a company and would like to contact me email me at : [email protected]
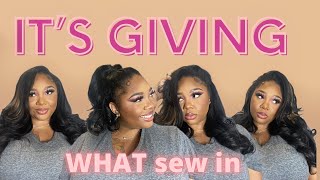
Hey my love's, so I'm back again with another video tutorial you guys this is the 3 Way part or sleepover make it so in. I already have it braided, but all I'm going to do is fill in this bottom section of my braid base. Now the most important thing is try to fill in this bottom section, with as many words as possible, I like to aim to like 7 or 8 West, and I'm going to do is continue to fill in this bottom section. You, as you, ladies, can see. I never ever cut my thread. You just want to continue move, make thread right along through your sewing and just take it to the next piece. Don'T ever cut your thread, this helps your cell win to move a lot faster and all I'm doing here is just positioning this top web for fill in this portion of the braid base, really simple, nothing, scientific about it. You guys just keep watching. Okay, you guys so now we're ready to start on this top portion of the Sonia I like to like this first with going in the opposite direction of the rest of the hair. Why? Because it helped to eliminate a gap between your leave out your weft and your brain. So if I was to put this with facing downward, like the previous whisk that I laid to me, it creates a gap between your leave out in that whip or that brain. So I like to so this portion of the whip going over in the opposite direction, and this also helps when your client or you want to flip your hair over to the opposite side. It looks really natural, so all I'm doing is Linda's wealth, we're just going to sew this down and keep the moving you guys. Okay, you guys so now that we have this website down. You want to take this left and fold it down towards the ear and you want to clip it into place now. The way you lay these next limbs are toe different dentists first wheel. Now you want to lay these remaining wheels in this section, going laying towards going down towards the ear the same way we laid the West in this bottom section. The reason why is because you're going to have a middle part up here in the middle, at the top of there so in and you want of these western lay really flat so just clip the hair down in place and begin someone going your West, you guys. Okay, so we finally reach the very top. All you want to do is just continue sewing this well on to your braid base. Until you are done, and then at this point all you have to do is imitate the exact same that you did on this side of the head to the up side of the head, and then you are ready for styling, okay, my baby, so we are at The styling portion, I'm just going to show you guys that you can rock a Miller part. You can have a side part on either the left or the right side. You could brush all your hair away from your face. You could pin the top back. Do a top knot or a ninja bun and yes, you can even rock this as a versatile so in if you guys are wondering what that looks like I do have a picture on my Instagram page. My client has blond hair in that picture. It is a versatile soul, winning with three-way part in the front so yeah. Thank you guys for joining me. Don'T forget to get your glam on and swing your hair in them. Haters face so love. You guys see y'all next time, bye,
Comments
Forever Fallon: who gave this a thumbs down?! this is the best sew in tutorial i have ever seen! i wish you were my stylist.
Krystal Jones: Thank you for sharing this technique with us! I plan to try to make your U-Part version of this. I would love to see you your whole braid pattern for this...not sure if I missed it...thanks again!
JQueenHair: This is awesome, great tutorial, very talented. Thank you for this tutorial
FancyFay: Thanks for sharing. .you are on point with your skills girl:-)... keep up the great work!
Only1Stacks: Omg !! Thank You So Much This Is The Most Detailed Tutorial Ive Came Across Best Video On The 3 Part Method . Well Done
NickeyVI: How many bundles were used for this sew in? It looks AMAZING
James Adams: I'M so happy that you shared this tutorial I'M 12 and Iove this tutorial
KimmieSquare: This would be fire with big curly hair
London C: This is EXACTLY how I was thinking about sewing my hair. But I couldn't find 1 video on this method. I was starting to think it wouldn't come out the way I wanted it to. And I almost skipped it because I saw a mannequin head. But finally! Lol Thanks.
Sydney The Solution: I tend to always have a hard time braiding my hair down , may you please do a video on how too?
Rays: Love your work!
BeauteeLovee000: the only vid that is actually a tutorial frfr Thank you hun
3ishie's Tube: Hey...would you be able to share the braiding pattern?! I'm feeling this method!
charda Nichols: Helpful Video . . . & How Many Tracks Should I Sew In Between Each Part ?
Dominique Stephens: hey can you do a video on how to do a versatile sew. thank you very much for this video
Nkechi Enwereji: God bless you!!! Thank you for the video!!!
Tikeyah Gillis: I love your channel and this method could this be done as quickweave if so can you do a tutorial
badlilbrownie: beautiful!
Malaun Chambers: When doing this method..do you use more hair? Excellent video
Bri V.: What if you dont want a deep side part? And can you do a video on the braid pattern.
Live, Love & Learn Naturally: clever girl lol love it xx
carday12: Good video. What hair extensions did you use in this video?
Yo Co: did u buy the net like that or is that something you did? If you bought it, did u get it online or in store
SuperPhillychic: Genius! !!
ladywoodford1: Great video
Mont. Manii: This look good
xoxopeacebringer: I know the video about other stuff but I made bomb lip tars hunty using EOS balm and dollAr tree lipsticks yesss
Lorraine O: Do you have to have a lot of leave out for this
Yo Co: did u buy the net like that or is that something you did? If you bought it, did u get it online or in store
jay: Where You Get The Manikin Doll From ?
Shenice Cox: how much bundles did you use
TheRealJayla: What if you want to leave your edges out all around to put up in a ponytail.
Starr Dust: Where are you in NC?