How To Thicken Long, Thin Hair With One Row Of Hand Tied Extensions - Vision Hair Extensions
- Posted on 24 April, 2020
- Tape-In Hair Extensions
- By Anonymous
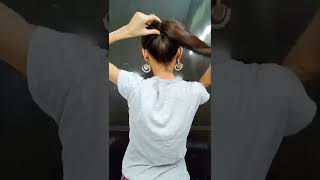
How to apply hand tied beaded row extensions on thin/fine hair. One single row for thickness using 3 bundles of Vision Select hand tied wefts. This is the most gentle hair extension method. With before and after pictures.
Get the extensions here: https://visionhairextensions.com/hand-...
Music: https://www.bensound.com/royalty-free-...
In this video, we're showing application of a single hand, tied and beaded row for thickness we'll be using three of our vision, select hand tied webs all glued together, see our previous video on how we glued these webs together for this application, we start by parting the Front section of hair forward about mid ear on both sides. This is where we want the wefts to end next. At the ear part, the hair one and a half inches above the hairline angling down in a horseshoe shape going below the occipital bone, making sure you stay at three inches above the hairline use, hairspray to keep down any flyaways or be pears. You'Ll want to apply your first bead just behind where the West will end take a large rectangular section of hair and apply the first bead off base at about a 45 degree angle, going back. We like using extra-large beads, so you can put the most amount of hair in them, making a secure base and preventing too much tension on the hair for the next bead. Take a slightly smaller section of hair, along with half the hair coming out of the previous bead and apply the bead like before continue chaining the beads three-quarters of an inch apart following your part until you reach the middle of the head repeat this process on the Opposite side flip your prepared west along the beaded chain. You just made making sure the web ends just in front of the first two beads taking at least two wing spans and length of your weaving thread thread your curved needle pulling it halfway through. So the thread is doubled up not the end to secure for your first stitch, go up between the first and second beads before pulling the thread all the way through feed the needle through the loop at the end, locking in the thread hold the thread up towards The head and stitch again in front of the previouse making sure you stay under the thread that's being held up, make two stitches at the very end. Then stitch coming down at an angle, to lock in the last stitch make sure the thread doesn't slide off the end of the weft. Now that the hard part is done start sewing in the opposite direction along the weft making sure you're always sewing either behind the chained hair or a bead. Each stitch should be three quarters of an inch apart. This is called a blanket stitch. Make sure to keep your thread fairly tight. The end will be just like the beginning. Properly securing down the ends is very important. Go back a few stitches to complete the row once complete, cut the end of the thread and pull one string out, leaving one behind knot them together. Three times snip the excess and you're all done thanks for watching like and subscribe for more hair extension videos visit us at vision, hair extensions com for all your hair extension needs.


Comments
oldpennyloafers: Great transformation!!
Ann Lapadula: Looks good . Thanks for showing straight hairstyle instead of curly . This way with straight hair you can make it look natural and not see the difference between clients hair and extension . It’s harder to see if extensions done right of hair is curled .
hmm designs: How do you safely remove this sewn row?
Alii Graciano: So this client only needed one weft?