How To Install Tape In Hair Extensions | #Tapeinhairextensions #Hairextensions #Installation
- Posted on 04 February, 2022
- Tape-In Hair Extensions
- By Anonymous
These are Champagne and hair Extension tape ins 
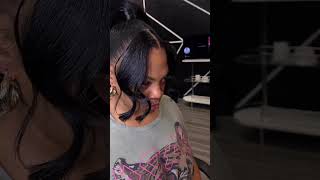
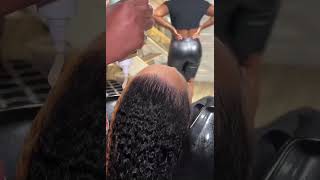
Hey you guys welcome back to my channel. My name is sierra. If you don't already know i own champagne, hair studio in carrollton texas and we're going to jump in and see how to do tape and extensions today, okay, guys so i've already kind of started. A couple of rows: we are doing black and then this beautiful burgundy red, so you'll see me, put the burgundy red right under this um and then kind of push them together. Um when doing tape and extensions, you want to make sure your parting. Your sectioning is really really neat and clean because you don't want to pull on any of the hairs. So i basically take my tape. Ins take the paper off of it and then i'd like to stick it right under pulling the hair, nice and tight and then push it against the scalp. This allows for the hairs that i'm wanting to be picked up to be picked up and then i'll go and clean up my sectioning to make sure it's all nice and even no hairs are being pulled in any other direction. So i'll pull the corners out and just make sure that the hair that's getting picked up is a nice clean, even row, and then i will place the tape in right under it. So if you're a visual learner, this is kind of gray. I'M not really the best at describing things, so this is going to be a really good visual video for you guys to kind of better understand how we do tape ins, so you're going to see me again pulling the hair down, putting it right notice. I don't put it right on the part, i put it a little bit below the part, because you don't want any kind of tension that can cause alopecia, so i'll put it a little bit off the part just so. The tape ends can slightly flip up and down and not be too tight, but still tight enough, where they don't look grown out and then again, cleaning your sectioning up and then putting the red tape right under it. I find doing this method a lot easier. Sorry for the motion sickness with the videoing - you guys, but i find this easier, because the hairs that i'm wanting to get picked up are already getting stuck to the tacky part of the tape um. I just really didn't like taking the hair and pre-sections because i feel like sometimes you don't put enough hair into the section that you're needing - and this just allows me to have the appropriate amount of hair in the tape ends. So using this device. I kind of squish the extensions together just so they can hold nicely these tapings will last for anywhere from four to six weeks. You can already see it kind of coming together. She has, i believe we did three bags total, which is equivalent to 150 grams, and you will notice around her hairline, though, that the tape ins that i put in are shorter and look a little bit different, and that's because she wanted to use her old, um Tape ins for her hairline only because they have that invisible banding in them and you'll, see what i mean. The invisible band for tapens basically looks like hair on where the tape kind of starts instead of the shiny nest of tapens. I don't know if that makes any sense, but basically there's two different kind of tape. Ins you'll see that these almost look like hair that are coming out of the tape versus the other ones are honestly kind of shiny, and the only reason for that is because they were out of stock of the invisible ones. So we kind of had to improvise. So that's why they look so short and cut off, but don't worry we blend it at the end um. So here's a side-by-side comparison. Actually, you can see that one is shiny and then one isn't. If you look at the left and the right one right next to each other um, so the left one is the old tapens and then the right one is the new tape ends. So that's why you're going to kind of see a disconnect in the front, but we blend it all together right afterwards, so they look really really nice and neat. I love the invisible tape ends and if they had them in stock, i would have much preferred those because they just look so natural but um. When spacing my tape ends, i honestly put them right next to each other. She likes them right on top of each other back to back to back for the max max max fullness um, and that way it just i don't know it just - has a lot of thickness to the hair and i can fit as many as possible um. I was gon na say again. I am so sorry for the video you guys my camera person. She um. I guess she was following every move. I made um, so i am so sorry if y'all are getting slight motion sickness. Whenever i was voice overing this video. I honestly got a little nauseated, but this is me finishing the section i did the left side. I did the right side and then i kind of meet in the middle and you'll notice, as i get to the top that i honestly stop doing so much red um. So i did red and black and patternized it all the way up to the top. But i'm going to end on black just so it doesn't look so stripy and it blends with how much dark she has up top um and again i'm going to take my little. I guess you go like a tapen plier. I don't know. Um almost looks like pliers and you kind of squish them nice and tight together. I love these tape ends. These are from my company, champagne, hair, studio or champagne, hair extensions um, and they will be coming out shortly, but i just love how thick they are. They last up to eight months to a year and the extensions they never slip or slide. So this is just me cleaning up all those stringy parts in the hair, making the cut nice and even - and you can kind of see that i ended on black. So you can see that red peekaboos. If i kept doing my red and black pattern, it would be just too much red to blend with her hair. So i ended on black just so it looks more like a highlight um and not too too vibrant, and then i made nice big red pieces around her face. So this is how i cut the extensions i cut the back and then i bring all the hair forward and cut the front just so i can see that it's nice and even and it doesn't square off in the back. I had issues combing this one, so i just pulled it all towards me, but then i take my face. Framing layers and you'll see that it was a little bit difficult, like i said, blending in those short short pieces, but she likes a lot of layering. So it honestly worked out, but because those um invisible tape, ins were already so short. It made a little bit of a bluntness in the hair, but once it was curled it was perfect and then maybe eventually we'll get those old ones replaced um. I did notice like after filming them all the tape ins were stayed in really nicely, but those old ones did slip. So i do not recommend using old extensions. The red ones had lasted full six weeks and then the old ones barely made it three weeks because they were ready to honestly just come out. But here's the final result: nice and curled. You can see how bouncy how much color is in the hair and how well it all blends together if you enjoyed this video, give me a thumbs up or comment um. If you want to see more like this, just let me know, and my instagram will be linked in the bio. Thank you for watching


Comments
Luli Hair Bar: You do a really good job explaining! I just subscribed to your channel! You tell it simply and make it easy to understand! Thank you!