Diy Tape In Hair Extensions Amazing Beauty Hair Review
- Posted on 10 January, 2022
- Tape-In Hair Extensions
- By Anonymous
#Hair Extensions#Tape in#Amazing Beauty Hair#
?Video hair: https://bit.ly/3ef0kHH
?Check more hot pre-styled Tape ins: https://bit.ly/32vAehe
Coupon code: "ABHKayla" to get $20 off
~~~~~~~~~~~~~~~~~~~~~~~~~~~~~~~
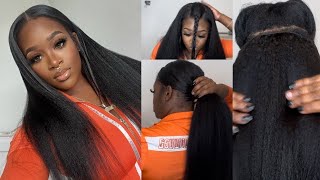
Tape in Hair Extensions
Hair Texture: Straight Hair
Hair Length: 22 inches
Volume: 50g/pack
Color: Balayage 8/18/60#
~~~~~~~~~~~~~~~~~~~~~~~~~~~~~~~
Amazing Beauty Hair Contact Info.:
Website: https://www.amazingbeautyhair.com/
Instagram: http://instagram.com/amazingbeautyhair...
Facebook: https://www.facebook.com/amazingbeauty...
? Shop with me: https://bit.ly/3i6fRw9
Everyone thank you so much for watching, i hope, you're all doing it wonderful. Today, i'm going to show you how i do the diy tape and extensions. Once again, i have done this video several times, but it seems to be helpful to a lot of you, especially if you have thin fine, basically, no hair like i do and you want to have some hair, then i believe that tape ins is the way to Go but i have teensy tiny little hair and i still end up having hair once i put tape. Ins in and they're covered really nicely, and i just i like how it looks. So if you are interested to see how i do the diy extensions, then just keep watching so before we get started. I just want to show you guys really quickly my hair color right now, and this is the first i think, the first time i've ever put. The extensions in without dyeing my hair or changing my hair color, and that's just because this year, i'm trying to go a bit more natural, i'm wanting the darker roots to come through anyway, but here is my hair color. It does get lighter on the ends. It does naturally anyway, and then i do have i always put like a box color and stuff in it. So that lightens it. But here is my root: color, it's kind of dark, but not as probably not as dark as what it looks on here. But you know i could color my eyebrows and i don't have any tan or anything on right now, so i'm kind of looking a little bit like pale and blue, but that's okay. This is the beginning of my new year's glow up. It is like the sixth or seventh now, so i haven't done a whole lot to pamper myself yet this year, but i've just been working on my new closet area and new column of the dream suite. So i have a whole new series of videos. Gon na be coming out this year, so this is the first time i've really sat down and pampered myself. I have had just my natural, then this is the front of my hair, but my hair is thin and short. I'Ve done several videos on uh the extensions, but here is how long my hair is. It is very thin. Very short, hypothyroidism didn't have good hair to start with, so i am going to show you how i make these extensions work in my hair and i'm just so used to it now like having the thin short hair, doesn't bother me because uh i like wearing extensions. I, like changing my hair up. It'S not a problem to me, but here is the extensions. I have this time really beautiful, color it's going to match nicely. I have two sets of these in the package. I'Ll have the information up here on the screen. This is the same brand that i had been wearing. I'Ve got gotten so many questions about them. Yes, they hold up beautifully they're, really nice extensions, very soft and they were easy to take out as well. I had left them in longer than i ever had because of just having the baby and stuff, but they were pretty easy to take out, and then here is the box that they come in. They do come with a little comb and also one of these cool hair clips. I might be using that and then also extra tape here is both sets. There'S the thickness. They also look a bit thicker once they're, you know like washed and stuff. I have a mirror here behind me and also a mirror in front of me, so this is how i do it. Sometimes i get brooklyn to help, but i do find on my own and i have made several videos if you want to go back and watch some of my other videos when my hair was maybe like a little bit shorter. It was also a bit thinner because the past year i have been on a prenatal vitamins and my hair is a little bit thicker, not really anything to talk about, but let's go ahead and get into how i put these in on hair. So we have to section the hair off and obviously we start at the bottom, so i'm gon na go ahead and get the section of hair that i'm gon na do so. I do that about this much hair at the bottom and you girls that have thin hair as well. You know the struggle. Some people really do just have really thin hair, which is crazy, like i don't even think that it's crazy to have such thin hair, but it's off so at the bottom. I normally do three pieces across so it'll actually be six pieces total because it does sandwich your hair in so here i have three pieces and i don't ever section my hair off perfectly. It is what it is it's just. This is how i've done it every time, and it's worked for me, but i'm going to take this piece, i'm going to stick it right at the hairline. I have a mirror right here, so i can see we'll show you guys as well too i'll turn around and show you after i get it in, but i'm going to put it right at the hairline right in the middle of that hair, that's parted and then Taking another piece and putting it right beside that and then another piece putting it on the other side of that. Okay, now here comes the part where we do the sandwich. We take three more pieces. Well, i just start on the end now and flip that hair take one piece and flip it up. You want to make sure you want to take your time on this part and make sure that you're lining them up really good that way they stay longer. So you flip that up and then you take this other piece of hair and you go like this and i'll try to turn around and show you guys take this one, and you literally put it right on top of that one, and you have a minute like To kind of wiggle it around and make sure that it's lined up with the other one, can you see that and then just keep squeezing it, and then it looks like that and i started a little bit higher up than i normally do, which is fine and There is those three pieces: there is those three pieces. Hopefully, you can see what i did there and now i'm just going to do another thin section here and i will be going all the way over to about right here: five pieces across and sandwiching those in so it'll be 10 pieces. Total, i'm not going to bore you guys with showing you each of those, but i am going to go ahead and do that now. 26 pieces back here and we have 12 pieces left and i saved those for the sides in the front bits of my hair, which is my favorite to do. I love just framing my face. I think it's a lot of fun and also i can like see it mainly from the front. So i do have a little mirror here that i'm going to just sit inside of me that i can look into. I feel like a little house on the prairie or something with my hair like this, and this knocked down okay, so i have two pieces here and i just kind of wing this every time that i do it, but it pretty much ends up the same. I'M going to just put it right here over my ear, my fingers, this is from this is what happens when i put things in the oven. I burn my fingers every single time. Such a mess hurts too so there's that piece and as you can see it just really blends with my hair really nicely without me doing my roots this time, i'm just going to put it right there and then flip it up. This is really super simple. To do, and quite enjoyable in my opinion, i know a lot of you probably are thinking, there's no way that i would actually try that on myself, but it's not bad at all. If you've done clipping extensions, i think this is kind of easier, they're, easier to blend and they're so easy to cover, like you can just put like a little bit of hair down and it's covered. Whereas if you have a big clip, it's a little bit more difficult, you have to kind of tease and stuff. With these, i don't have to tease my hair even as thin as my hair is this just kind of covers, which is really nice and now we're down to four pieces, and i normally like to put a piece on this side here, because i like to part My hair over and i'll actually probably put the rest like right here on each side. That way, i have enough to just like part on either side. If i want to love how it looks - oh my goodness, i normally uh curl it and stuff for you guys, but i think i'm gon na leave it straight. I kind of like how it looks straight this time. Brooklyn gave me a like a blowout kind of, not really i mean i don't have enough hair even called that, but she did blow dry it for me and it does look really pretty so there it is, and if you guys have any questions at all, you Can leave it down in the comments? A lot of people have um thoughts in their mind that the extensions will damage your hair and i guess maybe for some people they do. But for my hair it's actually helped me to keep it healthier, i'm not even sure how, but it doesn't break off nearly as bad. I think before when i was using the clip-ins. That was a lot harder on my hair than the tape ins are so, but i'm really happy with them. I hate going without them anymore. The few days that i didn't have them in, i just felt lost without them, so i'm so happy to have it back again - and i know i've done this video without any makeup on and i'm not going to be putting any on. But that's, okay. It'S kind of a chill day anyway, but i am happy to have my hair back and i will wait a few days before washing it, but once i wash it and stuff, it does look a bit thicker. But i'm happy with the volume of this. If you have thicker hair, obviously you probably want to get about three to four sets, but i'm good with the two sets. But if you guys have any questions at all, please don't hesitate to ask. I will do my best to answer. I know i had a lot of questions uh before i did. The diy extensions you know just had no clue anything about doing my own extensions, but really it's not that big of a deal you just place them where you want them and sandwich here together. That'S the biggest part. You want to make sure that the you know, like the tapes are lined up really well and you have enough hair in between them, but as far as like taking them out, i normally uh. I normally just take them out with oil. I have to take them out with like the tape in the tape remover, so either way it works, and you can also reuse the same ones several times but company, but the company did want to send me some fresh ones and i'm very grateful i like having The fresh ones for sure, but thank you guys so much for watching. Please leave me comments down below give this video a big thumbs up subscribe. If you haven't already - and i will see you guys next time -

Comments
Glenda Roldan: Love the tape ins! You look so beautiful!! I recently tried tape ins on myself and so far I love them, it’s only been two weeks but I am a bit nervous for when I have to remove them…I’m afraid of ripping my own hair out. Also, one thing I don’t like is that my scalp doesn’t feel as clean when I wash my hair now, since I worry about matting my roots if I massage too vigorously and keeping conditioner + hair oils away from the tapes is also kind of hard to do. Any tips on those things? Removal, shampooing/conditioning, products? A video would be super helpful but I know you just had your beautiful baby girl and you must be extra busy and exhausted! Love your channel Kayla!!
Black White: The only woman who looks younger after having a baby- beautiful as always ✌
CandyLamb: You don’t need any makeup, you’re a natural beauty!
TreeKnome: I tried this technique with my own hair. It works so good!! Thank you for sharing ♥️
Marilyn Hodgkinson: Hi Kayla l love it when you show how to do extensions tape ins. They look so good on you and such a lovely colour. Thanks so much for sharing love to your family.
Jacqueline Carter: Hello and congratulations on your new baby!! You did a great job and the color blend is always so spot on!! You are such a doll. Thanks for all your beautiful and feminine content.
JILLIAN L: The straight hair is so flattering on you!! Very natural!! I just love your videos.....no matter what the subject is
Ryan Bowers: Your tape in hair, looked soo natural! You look amazing Kayla girly. How long does it take to remove the tape-ins?
Ana Stasia: What tape do you use when you redo them?
Katrin Murnain: Excellent review , you are looking beautiful a natural beauty , wishing much love to you and your family , from Kat in Australia xo
highendchicks: what do you use to remove them??
Mina22: I’m thinking of getting tap-ins How many packs do you use
Scarlet Dragon: ive never tried tape ins i so want to find these. i dont like the glue ones much
JILLIAN L: You are so missed on YouTube!!❤❤
Elvia Ramirez: I used to have a lot of hair but it has thinned out so much.
Paula Espiritu: Wow very realistic
Lisa Greig: You look beautiful
chantel george: Love the video
TANIKKA PADGATTE:
Amy Rutherford-Close:
Cognac Wellerlane: Your hair looks beautiful! Nice job Kayla darling catch up with you later darling have to go edit another video Pink Champagne Kisses!
Sue ann Ann: Love you from middle east ♥️ say hi to white-hearted shawn ♥️