I-Tip Hair Extensions Tutorial - Full Install By Dreamcatchers Head Educator Dorothy
- Posted on 29 October, 2020
- Tape-In Hair Extensions
- By Anonymous
DreamCatchers - The World’s Best Hair Extensions
For Stylists: https://bit.ly/3hCG1Dn
For Clients: https://bit.ly/3c3Yw2l
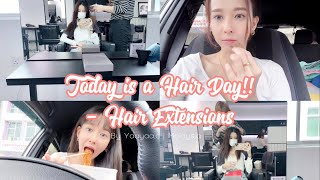
Hey everyone dorothy reitzman here today. What i'm going to be doing on my model janae is a full install of eye tips using five different blends, so for this classic installation that i'm going to be doing, i'm sectioning off the hair to make it easier to diagram and map out i've sectioned off The front two, because i'm not going to get to there until at least row three now that i'm here in the back, i'm going to be starting at the nape working. My way up, my first section is going to be horizontal now that i've sectioned her hair up, she is blonde and her hair is nice and healthy. So you are going to have some flyaways from time to time. You want to be careful with these because, as you're doing an installation, they could become into the cylinders and create crosshairs. It can be very irritating. So what i'm going to do is i'm going to take my flyaway strip right through here. I'Ve clipped the hair up. Nice and neat, so i'm just going to take my flyaway strip, you put it at the bottom of your section, push it up and it makes it nice and clean and takes those flyaways away with my model janae. She just got her color done and it's very beautiful. So what i want to do is i want to emphasize that so i'm going to be doing something between an ombre and a balayage, something like a sombre. So what i'm going to do is i'm going to put light down here on my first couple of rows, then i'm going to intertwine some darker pieces and then i am going to end with that light again to give her that soft dimension, but really brighten her Up down towards the bottom, [ Applause, ], now that i've started my install, i do want to give you a little tip that i did with the dreamcatcher's hair. It'S 100 human hair and the quality is very, very strong and high, so i actually prepped the hair by purple shampooing it because, like i said she just got her hair done so her toner is nice and fresh. The hair has been sitting in the bag for a little while, so i wanted to fluff it up with the dreamcatcher hair once you shampoo it, it really gives it that body and that volume that you're really looking for so i prepped the hair by purple shampooing. It giving it a clean blow-dry so that it mimics more what she has in her hair right now. I'Ve now completed my first row, so just a couple of tips that i want to point out. You can already see that her hair is melting in with those extensions, something to look at more during your consultation. But it's something to realize through your application, the more cylinders and hairs that you can fit in the bottom, the more hair you're going to need for the head. So when doing your consultation, take a look down at this nape section and try to gauge how many cylinders you're going to be able to fit inside of this one row. Because if you can fit a lot of cylinders here, you're going to need more double almost triple through the top up through here, rather than less, and that could make or break your application on how dense and how full your hair looks. Now. The other thing i wanted to point out is you want to double check and make sure when your client pulls their hair up, that it's not going to be seen. So what you can do is gauge leaving one to two fingers around the hairline and then i'm going to grab her hair here and i'm going to pull it straight up as if she's going to pull it into a pony and you'll notice. You cannot see any of those cylinders they're completely hidden, which means you left enough space underneath to cover that as you're going forward. So now i'm going to continue up the head, you'll notice with my second row. It is slightly different than my first row. My first row, i took horizontal sections: that's going to help create that maximum density with section number two i've worked from behind the ear to behind the ear and i'm now in a u-shape. This is going to help emphasize the natural structure of the head. So as i'm installing some people are afraid to crimp it too tight. This could be a factor depending on the type of quality of hair that you're working with. So with dream, catchers with dream catchers, the tip of the extension is rubberized or fancy word polyurethane. So what that means, and why that is important, is because, when i stick the tip inside of the cylinder here and i break it down - and i pinch it right here - that eye tip is then going to fill the entire cylinder and cushion the client's hair. Not all individual extensions are like this a lot of times they have more of a hard coating or a plastic coating so that when you crimp it tight, it's going to break down and it's also harsher on the client's natural hair. So, finding that good quality tip is really going to be essential within your application and really the longevity of both your clients, hair and how long you can actually wear these extensions. So now that i'm approaching my third row, depending on the situation or how many bundles you need to fit into your client's head, you can alter your sections just a little bit so with my model janae here, i've done more of a deep! U, where i'm like! More scooping, underneath that's going to allow me to fit more hair inside of my client's head. If this was just a classic install - or i was just doing about four bundles, then i would just go with more a softer you, that's not as deep and dramatic adding that deepness allows you to add. More hair in she's naturally got that dense hair. So we're probably going to be going upwards of six bundles, i'm about three quarters of the way through my third row. I did want to point out in the back you're doing that: u shape to help emphasize that natural flow of the hair. You also can put more cylinders more hairs in the head as i go and transition to the side here, you will notice that it is now horizontal. The reason for this is the sides are always weaker. The main reason is because it's lacking so much of a hairline, that's in the back always also around the hairline. It'S always going to be more of a fragile type of hair just because of that transition on the head. So when i'm working towards the front, i'm working with a horizontal always on the sides here so horizontal on the side and then i transition in the back. Do i've now completed row? Three, a couple of tips that i want to point out is when i'm working through my row here, i am putting everything side by side. No natural hair in between this is going to build that maximum density as i'm working up through the head. Once i get to the top you'll see that i start to space them out to allow that natural to come through, but i just wanted to show you here. Everything is laying right next to each other, it's slightly away from the scalp. You have enough room to give. She could throw her hair up if she wanted to it's not going to harm her horizontal on the side. Again that deep? U, in the back, allowing me to add more space for my next row and then continuing to the other side. The last thing i do want to point out is, like i said, i'm doing something called a sombre, which is a soft ombre in between ombre and balayage. So you will see that i started to add a little bit of that dimension into her hair through here. I started off with solid blonde and, as i work up, i'm slowly introducing those darker to mid colors. So i've now completed row number four. It looks identical to row number three because we're putting so many bundles in her hair because she naturally has that thick, dense, hair, so you'll see on the sides. It'S still that horizontal and it's still u-shaped in the back. This is going to be the last row that i do side-by-side with no natural hair in between, as i go to the next row in the back i'll start to space out my cylinders to allow that natural to come through on the sides. I will always stay horizontal because i always need that maximum density, so i've now completed janae's full install. I wanted to point out on my last row here my row number five. She does have a heavy side part on this side over here. So i have raised the section on this side a little bit higher than it is on the other side to help compensate for that weight. Difference from her heavy part to her, not heavy part. So on the side here, i'm still horizontal side by side with no natural hair in between. But as i go back through here, you'll notice, i have now spaced it out my row number four. It'S one cylinder space apart. My row number five. It'S almost two leaving that space there to allow that natural hair to come through. Once i finish, my application, what i like to do is i like to go back row by row and just double check check my sectioning and my cylinders as you're going through. Sometimes you can get tiresome, so you just want to go back through ensure that everything is nice and tight so that they don't have any fallout as they come back now that i'm finished with the install i'm going to go ahead and do the haircut when you're Hair cutting with extensions typically, you want to use a feather razor because it helps give you those rough edges as you're going through it, because it's nice and perfect. So it's going to help mirror that client's natural texture. So you will notice that my client here my model, has more of a horizontal line, so i am just going to carve out on this top layer just to help it diffuse within the extensions i'm going to do that last, because i'm going to create that layering Effect first within the extensions see how it falls and then only cut the client's hair as much as you absolutely need to taking where her natural stops. That'S where i'm going to start softly feathering creating a face framing effect. It helps that transition from the natural to wherever you're ending your extensions just creating that movement within her extensions. So now i'm just going to take her top layer of her hair just above row number five. So what i'm doing now, as i am noticing, i can still see her structured line, so i'm going to go to her in between on where that line is appearing and help carve out right in between now, you don't want to go on top with your feather Razor because all that's going to do is create more layering and shorten the client's hair, and that's not your intention. Your intention is to help break up this weight line from them, either having dense hair or a structured haircut. So when working with the clients, natural you're going to work from that underneath to only remove density, not linked, you can see how it just starts to diffuse that line and it starts to disappear within the extensions. So what i'm doing now, as i am noticing, i can still see her structured line, so i'm going to go to her in between on where that line is appearing and help carve out right in between you. Have that nice perfect application, it's easy to section and get out of the way. So i'm going to finish up her haircut and then i'm going to get to styling hi, i'm janae and i came to the dream catchers studio today and i got some extensions in. I got six bundles of eye tips and i used to do the clip-ins, but i switched today and it is way more comfortable feels more natural. I don't even notice that they're in there and it lasts longer, so definitely check it out. You


Comments
Jordyn Richard: I am 13 years old and I want to become a cosmetologist, this video was very educational and interesting
Jamay Waters: This is gorgeous!
Emiliya: Brilliant video. I wish just the small sections of the application of the extensions be shown slower otherwise the main sectioning of the hair is so brilliant. Thank you ❤️
Vasti Bernard: I watched you all the time , excellent
Anna Elizabeth: look so great, I’m in Florida need this ASAP lol
EatinGreens: How much would you charge per row + hair? Also this was super helpful. Would love to see how you thread the itip onto the natural hair because it skipped it each time.
Nichole Shackelton: I lost all my hair last year and the ability to use my arms to "do" my hair, I want this done so bad so I can just look pretty, I have no one ( but my husband and he only kinda even tried) to help and I know people say shorter is easier to maintain but I couldn't disagree more! I wish so bad I could get these till my hair grows back but I don't think they do that here and I'm assuming it cost more than my house! ( Does anyone have an idea on the price? Maybe I can save up?)
Monge Yadira: I love your job !! Thank you for you videos
Vivianisnotaboy : It’s really amazing!
Marisa Jasmine Arellano: How many inches is her hair? Please include the inches so we know how long we want our hair thank you!
Virginia Schear: Absolutely beautiful ☺️ excellent installation ❤️
A search 4 insight: Been searching for ever for a detailed video on installing extensions. Best video I’ve found. Thank you
rosalind pilling: Love this Fabulousxx
Lisa Jams: MARSHA MARSHA MARSHA!! Lol! Too cute. LOVE the technique.
Celeste Salas: I look on the website and there was an option for sizing: half point or full point. What is this and what is the difference? Thanks!
DivinelyBlessedK: Awesome! I'm looking for an educator in Nashville to learn I-tips. If you have anyone to recommend please share!
Veena Ali: hi this is great could you please tell me where I can get this done in New York thanks
Tracy Garner: Wow looks amazing
Mackenzie Smith: What tools did you use?
Sophia Maniaci: oh my god her hair is so beautiful and shiny
Ashley Siang: So beautiful hair so bouncy,soft and shiny
EierkopfFuchsgesicht: Extensions on a person who already has reaaally long hair? What? Great video though. Helps alot. Thank you
Phoenix Scott: How thick is the section between the nap row and the 2nd row?
Anabel González: Great video
LoraLu: She has such thick hair! Why on earth would she need extensions!!! My hair is baby fine and even when i get extensions it doesnt look that thick. Very envious of her natural hair. Nice job installing!
august wood: how many strands do you need to do a full head set
PauLyn vlogs: I wish i would be there hair model too To get that stunning hair extensions for free hehehe
ana mercado: Good job girls
Mona Sellenger: i did this extentions 10 years ago, was very expensive but i cant handle, its so uncomfortable, itchi. and i asked my husband to uncliped them. it damaged my hair too.
Lovely Indeed: How much on avg would an install cost? There is a salon in WA charging $2,800-$3,500
Ruthdelyn Quezada: How many grams do you use?
A.G.: Does it make the head bulky?
Cheery Tunsaw: How long the extension last before they removed?
Markita Russell: I would love the pliars you are using I can not find chunky handled pliars anywhere. could you please share with Me where to get the ones you have. x
Venezuela Mia: Thank you!!
Andy Maribel Claros: do you have to take your own extensions
Stacy bea Valdez: She wouldn’t have to cut the length if she added more hair it looks choppy
Nene Cisse: Where did you buy your pulling hook
Emani Davison: How many grams did you use?
Color Hearts Asmr: ❤️
saba hair extensions: Wow thank you so much
Nikki Rayner: How.many bundle did it take? Can 5 bundle be enough for full head
Terri: I can’t nothing u did !
lilSanq: I am enrolling because of this video.
Raymond Tyner: How much would the extensions and install cost??
Larry Eller: how long does this last?
Serra Kozlova-Cartier: How many grams is 6 bundles?
Ruby lv: Hi how many grams of hair was used hair thanks xxx
magnetic salon & spa: Thank you
Nene Cisse: Very nice job
prateeksha singh: Can we wash our hair after putting extension
Christie C: The hair dresser looks just like young Sarah Michelle Gellar!
Jay Ben: How many bundles do u need ???
BlaqueSuggaDesigns: greetings how many tips in a bundle
THE ROBBOS COUPLES: How long does this lasts
kanush Ya: How will u remove the extension which has been tightly cramped n how will u sleep with soo many bumps in the head
WideAwake *: Where can i f8nd the kits to order this?
Paula Reis: Nice video
Shannon Nicole: Whyyyyyy would you not flat iron the hair before blending???
brody jones: Typically you want to have similar density in the extensions as the natural hair. These should be 30%+ thicker to blend.
Telly Barnett: Where can I buy these exact extensions? ☺️
kh88ld: These girl had a nice hair if i have same i will never think about extensions
Gagan Deep: Mam pls cost bta do address vee
Jess Steahman: Cool hair
Cheery Tunsaw: How much ? Do u have in Florida?
wendi rivera: WHATS THE PRICE RANGE IN OTHER STATES??!?! iM A LICENSED COSMETOLOGIST New York but if you’re somewhere else let us know to see the difference!!!
Ashleigh Goldsmith: Are they heavy ?
Genae Jordan: My name is GENAE same pronunciation
Katsu Classic: Does no one see the three large brown spots on her “just got done” blonde hair? Omg it looks horrible. Is it the lighting?
Mya Gonzalez: How long do they stay in?
Ria Emma: How about if short hair ?
Ana Contreras: Where are you located
Amber Chavez: Can you wash your hair with these in?
Sneha Athreya: She looks like Miley Cyrus!!!!
Harlee Seiler: Can you color your hair after getting this done?
Meera Banu: Price
Suzanne Bird: Can I ask how many hair strands you used and also how many grams xx beautiful work
Musings: Hair extensions look fake and they are as dreadful as acrylic nails, heavily pencilled in eyebrows, spray tans, false eyelashes and tattoos. ugh
YAHAIRA: Do they come in 60 inch Rapunzel hair
Change Eye Color: ftytyt