*Diy* How To Install Tape In Extensions On 4A/4B Natural Hair | Curls Queen Hair
- Posted on 29 June, 2022
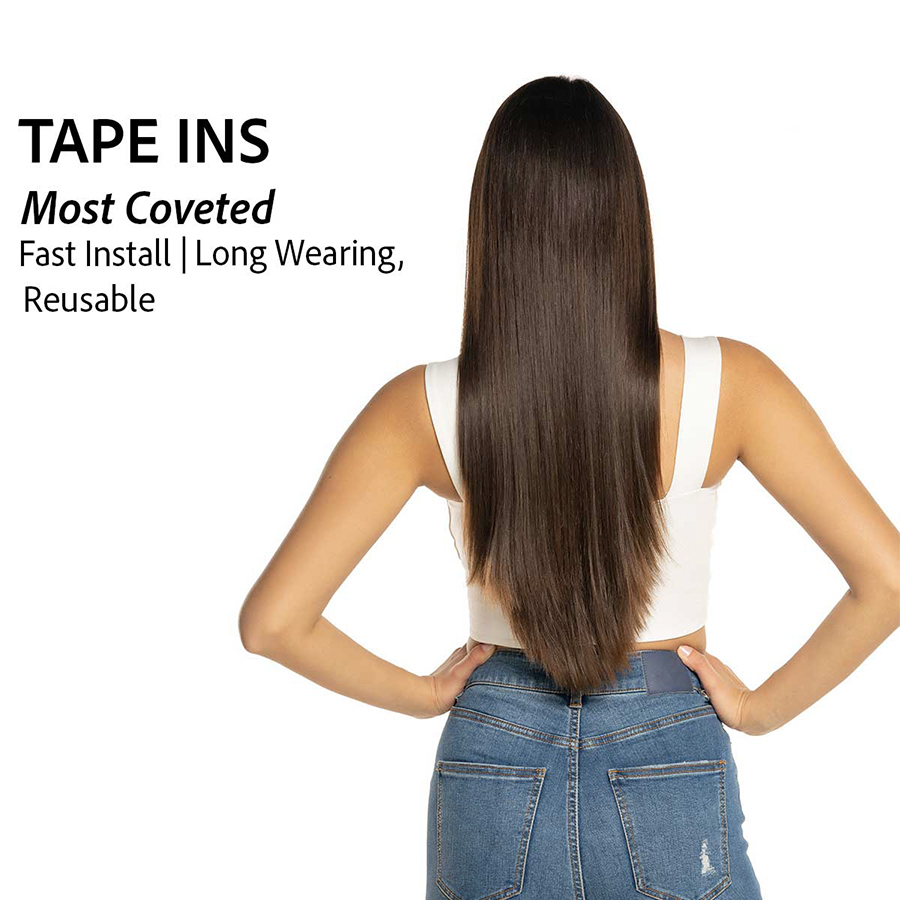
- Tape-In Hair Extensions
- By Anonymous
▬▬▬▬▬▬▬▬▬▬▬▬▬▬▬▬▬▬▬▬▬▬▬
Use Code JANIA to save $$$ OFF
I am wearing a 18 inches tape in hair extensions in water jerry curly comb texture from CURLSQUEEN .
Shop the same #waterjerrycurlycomb #tapeinhairextensions for #naturalhair
https://www.curlsqueen.shop/C24266Ac
Suitable for 3c/4a natural hair type
√Natural Glam Set-80 Pcs-200 Grams
√ 100% High Grade Brazilian Virgin Human Hair
√ True To Length
√ Thick & Full From Top To End
Connect with Curlsqueen :
Instagram: https://www.instagram.com/curlsqueenof...
Tiktok: https://www.tiktok.com/@curlsqueen.com...
▬▬▬▬▬▬▬▬▬▬▬▬▬▬▬▬▬▬▬▬▬▬▬
Thank y’all so much for watching! Feel free to comment any content/videos you guys want to see from me down below! And remember, God is love. Whoever lives in love lives in God, and God in them. His love endures forever.
————————————————————
Let’s get to 30,000 subs !
——————————————————
Business Inquiries
Subject: YOUTUBE
——————————————————
Keep up with me:
IG- janiaaliyah https://www.instagram.com/janiaaliyah
Tiktok: janiaaliyah
My Podcast: https://shepraysfirstpodcast.buzzsprou...
My Amazon Storefront: https://www.amazon.com/shop/janiaaaliy...
———————————————————
Subscriber Count (at the time of filming): 25,800
——————————————————————
FAQ about me:
Name: Jania
Age: 20
Birthday: December
Camera: Sony Alpha A 7iii/ Sony ZV-1
Editing Software: Final Cut Pro
————————————————————-
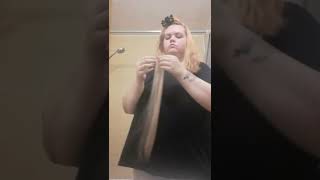
Is way back, what's up beautiful people, it's you gretchen, i alia and welcome, or welcome back to my channel so in today's video. Hopefully y'all been waiting on this because i'm very much excited to do this. I have been wanting to do this style once again for a very, very long time. So, as you can see by the thumbnail in the title today, i'm going to be installing some tape and extensions on myself, all myself, and so the hair was sent to me by curls, queen hair, and so i'm gon na go ahead and show you all the Hair before i show y'all everything that came with the hair, and so here is the hair, and i can't remember off the top of my head: is the exact length and stuff of this hair. So if y'all want to know the exact details of this hair check the description box below for sure for all the information you need, but i do know that i have two bundles that come with 40 pieces, each so 80 pieces in total that i'm very very Much excited to install this time, and so just as a little disclaimer i have done this install before, and so if y'all want to know. Like the background of how i kind of you know, um set up to see the back of my head and stuff like that check my other video for that and so yeah. So this time around, i'm going to be doing more of a curly install and i will suppress my hair later on, but not in this video. So just stay tuned for that little maintenance, update and whatnot, and so things that also came in the bag include a little brush which definitely would not work on my hair, because honey type 4 would not be a clip, a comb and then these velcro things that Will definitely come in handy when it's time to you know start applying the tape as well as some extra um tapes for when you want to reuse the hair so without further ado, let's go ahead and get into it. Okay, so what's up y'all? So let's go ahead and get started first things. First, i went ahead and kind of parted off my perimeter, so the leave out around my perimeter, um, which is going to be what's able to cover the tape ends when i want to put it in the ponytail, and so the important thing here is behind your Ear you're going to have to leave out slightly more hair because for some reason i always like would basically do that part like too light or too short or whatever, and that's always the part that ends up being a little. You know too thin. So, as you can see just kind of doing a straight line, but when i get over by my ear i kind of do a curved one and then going towards the back. It'S not the neatest. Obviously i can't see, but just leave what feels like enough and also keep in mind, like obviously places where the back of your hair in the front of your hair, where you have your edges and your kitchen is going to feel like you're leaving more hair than You actually are so that's why i always just make sure that okay yeah this is enough, and the way that i do that is. I flip the hair like over the end of my comb and that, in fact, if i can still see the tail of my comb um because it's silver then i may need to leave a little more hair or you could try the exact same thing with, like A small sheet of paper or whatever, if you covered a piece of paper, then cool you got enough, leave out left, you know, and so i just went ahead and braided that up so that way it doesn't get in the way of my other hair. When i'm, you know putting the tape, ends on and whatnot, so once i finish, sectioning off my um leave out it's time to go ahead and place the first clip in now when you're doing it yourself is a whole lot different from doing it on somebody else. So it's a number of ways that i could recommend you to do this, and so the first way that i do is simply sticking it on as like the hair is up in a ponytail and then getting a comb and parting the hair. That way. So i guess, like literally you're parting, like piece by piece, and so, if you guys can see i'm taking the comb and you can kind of feel where the hair on the tape is and so just kind of part, that little part as much as you can And then flip down and then from there you're going to be able to you know, remove any extra hair, so you guys obviously see the amount of hair. That'S there right now versus the amount of hair that needs to be there in order for it to just be a nicely balanced out tape in and if y'all. If y'all watched my last tutorial, then um, you remember me saying that when you're doing tape ins there should be basically more tape than hair. So that way, each piece of tape is able to stick to each other, because if not you'll have like tape, ins that may stick on the outside, but because it's so much hair in the middle, it won't stay in the middle. So, that's why it's kind of important to make sure like it's kind of evenly, spaced out and also evenly laid on your head, because the worst thing that you can do when you're doing the tape ends is kind of have it like nice and snug close to Your root on one part and then the other part, be like very, very loose to the point where you have like this weird tension thing going on and that's actually how some people end up. You know pulling out their hair and whatnot so just make sure. Whatever part you do have the tape in on it's equal across. You know entire parting of like taping and so right now, i'm kind of just sectioning off all the hair that was not supposed to go in there and i'm just going to go back through with the top piece of tape and stick it together. And so here i'm doing the exact same thing, but except when i work up my head and sorry y'all my camera's trying to work a little too hard, but as i'm working kind of upwards on my head, you see, i match the tape in the direction of The angle that i'm going in because this way when i want to flip it into a ponytail, i actually can some people kind of you know just keep it straight. Keep or keep them horizontal as they're in the back and then kind of move. A little more diagonal as they're going to the front, i mean different strokes, different folks, whatever works for you, but as long as we can get the little ponytail that we're all going for and then i don't know if i showed it in this video another easy Way that you guys can apply the tape ends if you kind of have a hard time like applying it first and then kind of parting it out. Is you have your hair in a ponytail ahead of time or whatever, and then just part out super skinny pieces? Every time and then do your tape that way, that may be an easier way for some people, especially if you don't really. If you can't see the back of your head or see like you, can't put a mirror behind you or anything and actually see what you're doing that definitely is an easier way and then you'll also know how much hair you have in each tape in at you Know each time, and so as we get to the front of my head, you guys can see i've kind of changed, my angle that i'm putting them at and once we got to the front, i went ahead and parted out my middle part because i knew okay. I'M going to be wearing this in the middle, so i just section off that piece of hair as you would for sewing and boom. This is what we have now. This is why you guys why i definitely recommend only using about 40 pieces of this hair, because little did, i know how big this hair would get, and when i do my tape ins, i tend to put a lot in the back, which i do not recommend. I feel like you should definitely space them out evenly. So when i went back, i actually went back and took out a lot of tapings, probably about half of the tapings i put in my head, because i got like the 80 pack. So when you do your tape, ins, i recommend applying tape, ends to one row. Then parting, hair down skipping that row and then applying tape into the next row. Then you know skipping the next row then applying tape into the next row. So basically doing tape ends on every other row until you kind of get to the front where you want to like make up for like length and whatnot, but especially with these curly tape, bins, because i did aim to wear them curly, please, please, please don't do Too many child, because you will not be able to do anything with this hair y'all, i'm telling you i'm telling you so don't take that lightly: okay y'all! So this is what it's looking like so far, curly and i feel like i like it, but i kind of want to see it straight at the same time, because high key it meant straight would definitely be a whole lot easier to manage. I am probably going to go through and like cut a little bit and maybe layer, but i'll probably do that once i try to straighten it and then we'll see, but as y'all can see here it goes so some of my hair is out. Well, obviously, some of my hair is out and i just have a little tuck behind my ear, but i didn't cover. I didn't blend all the hair back there, but i just want to kind of show you all that it'll go up in a ponytail blend. Whatever you want to do, only thing is like i said, since it's currently curly right now, it's a little harder to do because you actually have to maneuver through the hair and stuff like that. So let me go ahead and show y'all. It'S not the neatest, because obviously a major detangle is required, but here's the back, here's the other side and here's the other side. So i can try to do it a little neater, but y'all have to give me some time because i'm tired but yeah. Let me try to do this one a little neater and then i'll be back. Also, you guys, if you all, want to know the products that i use on this hair, to kind of make the curls a little more defined. Let me know and i'll do a video okay y'all, so we got the forehead all out and y'all. Now i said i was about to straighten this hair, but, as you can see, i got a little rubber in the background, because i ended up just using that to kind of stretch my curls out, because it was just a little too hectic trying to straighten the Hair, so i really don't know if i'm going to ever wear this hair straight at all i'll, probably let y'all know when i have the mental capacity to straighten his hair out but anyways. This is how it looks and, to be honest, i would definitely recommend because, like i said in the beginning, i was sent 80 pieces of this hair, but i underestimated the thickness and just the overall texture of these extensions, so i definitely recommend only using 40. Maybe even less if possible, because, oh, my goodness, is a lot of hair and i had to put a decent amount of product just to kind of get it like to a manageable state and whatnot. But nonetheless it looks cute. You know very natural looking. I definitely do love it and it's definitely gon na be a cute little summer hairstyle. I can get in the pool and put my head in the water now, but with that being said, thank you all. So so much for tuning in you already know, click smash smack that subscribe button down below, and i will see y'all on my next video

Comments
shayfrompluto: i love your hair videos!! keep it up girl
Vibinwidkay: Your hair videos >.
Jada cakes: Ate the girls up with this oneee God bless love “The Lord is my strength and my shield; my heart trusts in him, and he helps me. My heart leaps for joy, and with my song I praise him.” Psalms 28:7 NIV
LTETobago: I almost hit buy on 2 40 packs..maybe I'll still get 80pcs and save for another install, TY
Drita Laviva: How do u remove them?
Vantiia: Can this hair be straightened?
Abra Home: Hai anna iam Nagendar Anna na age 42 Savilaa.Uno qualification m.l.t medical lab technicianc ,Srpt lo jobs unte cheppagalaru anna.with govt Jobs
Chantels Collection: Did u start leaving your own hair out going to the top
андрей нифантов: LP reacted d ryt way, she is Kayantanii.UNO need of over drama, or over consider ations. She don't deserve *considerationsm. Lp പറഞ്ഞ പോലെ,, ജീവിതം തുടങ്ങിയല്ലേ ഉള്ളു, പഠിക്കട്ടെ.
Jada cakes: “For God so loved the world that he gave his one and only Son, that whoever believes in him shall not perish but have eternal life.” John 3:16 NIV ✝️