How To: Installing Amazon Tape In Hair Extensions At Home• Suyya Hair •
- Posted on 21 June, 2022
- Tape-In Hair Extensions
- By Anonymous
Welcome
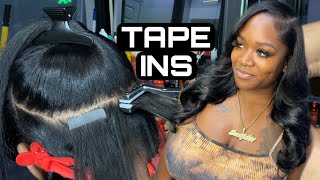
Hey loves get up close and personal with me as I show you how I install my Amazon tape in extensions by SUYYA
hair at home! This detailed DIY will show you exactly what steps I took as a beginner in installing my tape in extensions. You get to see what worked for me and what didn’t.
And HEY Don’t forget to like comment and subscribe! Enable your notifications so you never miss a post!!!
LETS BE FRIENDS
IG:@LeteshiaMonique
TikTok: @HerVisionMediaCo
Hair DETAILS
Exact LINK TO HAIR: https://amzn.to/3y43dWz
Products used:
EZ Wax Stick w Coconut Oil
HOT COMB
RAT TAIL METAL COMB
DUCK BILL CLIPS
•
•
•
•
•
#tapeinhairextensions #tapeinhair #tapeinsforblackwomen #tapeinsonnaturalhair #howtoinstall #howto
#tapeintutorials #hairtutorial #amazonhair #amazontapeins
Hey guys, it's leticia monique here and today we're going to be installing this suya hair tape. In extensions, i got five boxes. It ran me about 275 with amazon prime shipping, and i got it in the color, 1b and 20 or 24 engines inches. The details will be in the description box. I will be installing as much as this hair as possible and i believe there was 20 strips of hair in each package. So, let's get into it. So i got my rat tail and my duck bill clips. This is what my hair looks like before and yes, my hair is brown. I did not feel like dying. My hair, i relaxed my hair flat iron straightened it so i was like color is probably not the smartest thing to do so. My hair is freshly relaxed in this clip. So what you see me doing is you see me testing to see if i can see the end of the comb with my hair, because that would let me know if i'm going to see the tape ends when my hair is pulled back so now, i'm just Braiding down the perimeter of my hair, everybody's hairline is a little different. Mine is a little jagged, so i went a little further back with my um perimeter, hair that i'm leaving out and y'all. This is essentially kind of like a traditional sew-in. The foundation is about the same. You take out the perimeter of your hair all the way around and then leave out the middle section, whether you want to do a side, part or a middle part, and just basically go from there. So that's what you see me doing right now now the amount of hair you leave out is entirely up to you. I have fine hair, so i'm leaving out a little bit more of my hair around the perimeter, because i want to be able to put my hair up in a ponytail without being clogged, so i'm doing a side part. So this is going to be the hair that i left out honestly, i feel like i could have left out a little bit more, but it's all going to work out. So this is what i decided to do with my leave out. So all i'm doing here is just kind of sectioning off where um i want to leave my hair out at and just kind of going all the way around and leaving the hair out all the way around. However much i want over my ears all the way to the back of my head and i will come back in a little bit once i start installing my clip-ins. Yes, all right guys, so this is the first strip that i will be applying. I will be removing the tape off of the strip of hair extension, and this is the adhesive that will be applying and sticking to my head now. I had a great idea to put it on my head. It looks easy, but it's actually pretty hard you're. Basically, flying blind when you are installing this, so i am going to put on the calm and attempt to do it that way, which sounded like a good idea. I saw a girl on youtube, do it, but it actually turned out to be harder doing it. That way, so i'm gon na go ahead and apply this first strip with the comb. But, to be honest, it just takes too much time when you are applying the tape ends. You don't want to put it close to your roots or close to your scalp, because it's going to hurt when you pull your hair up into a ponytail and it can and will pull your hair out. So, that's why you see me putting it up a little bit further away from my scalp um. This is my very first time applying these tape ends, but, as you will see throughout this video, i will get better, but this is my very first one. I just want to show you guys what worked for me and what didn't and that were not all professionals at this, so that was my first strip, i'm going to grab another strip and what i'm going to do is i'm going to sandwich them on top of Each other, so the hair - that's in between that, can really stay on that, but you don't want a lot of hair in between that's stuck to your tape in so what i'm doing is i'm just sandwiching it together um. If you have nails it makes it a little bit harder, but it's it's! It'S not impossible to do so. That is my first tape in and i'm pulling it up. So i can see what it looks like if i pulled it up so now, i'm just moving to the side of my head. I'Ve got a couple of these done already and i just wanted to show you guys what it looked like when i'm on the side of my head, i'm doing a curved um section. Honestly, honestly, you guys this is kind of like doing a quick weave. You know you leave some hair out. You glue the hair. This is kind of the same thing you leave some hair out in between you tape, the hair on, and then you sandwich another piece of extension on top of that. So that's what i'm showing you guys right now and i'm going to give you guys a close-up of what i am doing now that i have an idea of what i'm doing so, i'm removing the paper off of the hair extension and now i'm just going to Apply it on my hair right below my scalp remember, to leave a little bit up at the top, so i just laid that flat down and make sure i am really pressing that down. So it sticks to the hair up underneath and i'm going to go ahead and lift that up again, whatever hair sticks to it. Naturally, let it stick whatever is loose separate that because you want, your tape ends to stick together and you don't want a lot of hair in between that, because it will not last, it will fall out. So i'm now going to slow this down a little bit for you guys, so you can see exactly what i'm doing and i am sandwiching another piece of the um tape and hair on top of the other one. You want to line these up perfectly, because this is what's going to help your tape ends last and then just remember to press that down some people use flat irons, but suya left instructions on not to do that. So i didn't and there we go. So this is what my hair is looking like at this point. I'M ecstatic because it looks good doing my little dancy dance, all right back to business, so i am a pro at this. It feels like so i'm again going to show you guys what i'm doing, and i have curved parting towards the top of my head, because whenever i pull my hair up in the front, i would like um to not see my tracks. I would like to not see the tape ends, so if you do it horizontally, it's going to be harder to cover that up, so i would recommend just kind of doing a curved parting and then just going from there again, i'm going to sandwich another piece of My tape and extensions on top of that one and i'll just let you guys watch the rest of this. I is all right so now i am just kind of testing what my hair is going to look like in the front as i'm prepping. To do my side part, i obviously want a little bit more hair on the side with my parts, so i'm just kind of seeing what it's going to look like before i apply my tape ends and making sure i'm still going to be able to pull my Hair up in a ponytail all right, so what i'm doing here, you guys is i'm just kind of looking at my hair and just kind of seeing where i can add more because at this point i still had a lot more of the tape in here. I definitely didn't need five boxes. Um and i didn't use all of it, so i'm just kind of filling around and seeing where i can add more hair, so it looks fuller and so that my um natural relaxed hair is not showing or exposed as much. I swear to keep things is all right. You guys - and i am officially done installing my suya hair tape and extensions, and now what you're going to see me do is just kind of check and see if there was any gaps. If all of my tapings are covered by my hair, which it is, this is my first time doing this install - and i am super super excited. If i can do it, you can do it too girl. So now i am doing this ponytail test just to see what it looks like if i put it up and it's passing all of the ponytail test. So now i'm going to use my edge stick and i am going to lay down my hair and i am just going to go in and just really just press out um, my relaxed hair, so it blends in with this nice suya hair. So i'm going to go in with my pressing comb, and this is the hair that i have left. Probably i always say it's one pack of or one box of the tape in so i probably used about four full boxes to get this full look. So again, i'm just going in and just pressing out my roots and with this pressing comb and just kind of blending it in there are some other hair extensions that would match um my texture a little bit better, but my thought process was after a while. The sew your hair isn't going to be so silky, so it will match my hair over time, and this is what it looks like you guys. Thank you guys so much for watching. Um leave me a comment and subscribe to my channel. If you want more tape, in extension, videos bye, you guys

Comments
Brittney Francisco: if you part out the piece of hair that your gunna sandwich, instead of just placing it on your hair and using whatever hairs stick to it,i think it will make a neater and overall better application.
Liv: Did you end up using all the hair ?