Amazon Youngsee 16" Remy #60 Tape In Hair Extensions Fitting & Review | Clare Walch
- Posted on 24 May, 2022
- Tape-In Hair Extensions
- By Anonymous
#youngseehairextensions #amazontapeinextensions #diytapeinextensions
AMAZON YOUNGSEE 16" REMY #60 TAPE IN HAIR EXTENSIONS Fitting & Review | Clare Walch
Hello!
Watch me fit and review the 16" REMY 100% Human Hair Tape In Extensions from @Youngsee Liu .
Enjoy!
Clare x
TIMESTAMPS :
0:00 Intro
01:00 Unboxing Youngsee Tape In Hair Extensions
04:13 Fitting Tape In Hair Extensions
16:16 Trimming My Hair Extensions
18:30 After Tape In Application
20:24 How To Maintain Tape In Hair Extensions
21:25 Outro
Product Link:
Youngsee 16" REMY Tape In Extensions #60 Platinum Blonde -
Discount Codes:
£5 OFF Makeup Revolution - http://rwrd.io/g6d9ofd?c
15% OFF Zeesea Cosmetics with Code CLAREWALCH121 -
https://zeeseacosmetics.com/?ref=CWALC...
10 % off at Glossier - https://re.glossier.com/5e520670
20% off at Look Fantastic with code: LFTFCLAREW
£5 Off at benefitcosmetics.com with code: Clare Walch
https://benefitcosmetics.mention-me.co...
Here to share my passion for Makeup, Beauty, Shopping & Lifestyle♀️
Welcome to my channel. The fact that you are here and reading this shows that we share an interest and so I hope that by subscribing to my channel you will enjoy the makeup and beauty tutorials and reviews that I upload regularly.
I upload 3 times a week on Monday, Wednesday & Friday at 18:00 GMT with varied content.
If you enjoy what you see then please like and subscribe, as they'll be plenty more where that came from!
Thank you
Clare x
Instagram: @clare.walch
Music Credits:
All music supplied by Epidemic Sounds.
#youngseehairextensionsreviews #tapeinsonshorthair #amazonhairextensionhsreviews #howtofittapeinextensions #tapeinhairextensions #amazontapeinhairextensions #youngseehairextensionsreviews #youngseehairextensionsamazon #youngseetapeinhairextensionsreviews #youngseetapeinhairextensions #youngseehairreviews #youngseehair
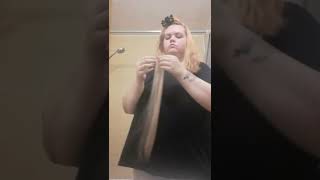
Hi and welcome back to my channel or welcome if you are new, if you are new and you like makeup beauty, hair or hauls, then please consider subscribing. So today i'm going to be fitting some more taping hair extensions. I'Ve had my last ones out now for a couple of months and i'm ready to have some more in so this time i got them from a company called youngsie hair who are on amazon and i actually went for 16 inches instead of 18. This time i don't know, i just i just fancy going a little bit shorter, but yeah. So these are the extensions themselves. They look really nice. Actually, this is obviously just one pack. I got four packs, which totals 200 grams, so there's 50 grams in each pack. I i have quite thick hair, i mean, obviously it's quite straight at the moment, but it there's a lot of hair, so i do need about 200 grams. Normally i only have a few left over so yeah we're gon na go in with these ones. These are in the shade 60, which is platinum blonde. I have to say normally i get mixed colors, because i find that with the platinum blonde extensions, they often come a little bit like yellowy and i have to tone them and everything, and i was planning to do that with these. I was planning to tone them, but they're not actually yellowy at all. They are quite ashy, so i think i'm going to be all right. You know i don't think they're going to be too bad at all, so i'm just gon na apply them as they are. So this is the hair itself, it looks really nice, i have to say it feels quite quite nice and thick um and it's cuticle correct from root to tip. So you know you've got an equal thickness on the root and at the tip as well, and it is 100 remy, human hair and obviously they're taping. So we've obviously got the the tapes at the top there as well. So what i'm going to do is go ahead and fit these i'm still going to do kind of like a well. It'S not really a tutorial. I'M not i'm not qualified. To do tape. Ins. I am qualified to do um, bonds and micro rings, but not tapings. But, as i said in my last video, the method is pretty much the same thing to be honest, like placement and that so yeah there we go. But what i'm going to do is just do kind of like a mini tutorial, should we say, rather than do an in-depth tutorial, because obviously i've already done that and um yeah, it's more to show you like the quality of the hair in this video really. So i'm gon na do is i'm going to start at the back of my head and then i'll work my way around and do the sides last obviously doing the back is going to be a little bit tricky to show you. So i will probably just show you me applying one extension finish, the back of my head and then i'll show you a couple on the sides as well um. So this is one extension so yeah they seem really quite lovely uh, so obviously you're going to need two for each each piece. If you know what i mean so basically you use these and you sandwich your hair in between them. So obviously, you've got your hair in here and then you're gon na sandwich it - and these have obviously got the the glue on here. So you just peel off the sticker and there's like the glue on the other side and then obviously your hair is in the middle and then they're going to stick together. You don't want to take too much hair. I think that's where quite a lot of people go wrong. They put too much hair between between the two tapes and they end up slipping out because you know they're not adhering to each other properly. Obviously, if you've got less hair, then you know they're going to stick better and also don't put them too close to your scalp. You want like really a millimeter or two distance from your scalp, because it's going to pull and then you could end up like pulling out your hair, so just make sure you leave a tiny bit of a gap between the bond and your scalp right. Okay, so i've just come down on the floor because obviously i've got my big mirror here and it's just easier for me to to film like this. To be honest, when i do this, so the first thing i'm going to do is just section my hair. So i'm going to go kind of around the top of my ears around here and then just clip that bit out the way and then we can concentrate on the bottom half, which is where i'm going to put my back pieces in. So i'm taking my comb and, as i said, i'm going around the top of my ear kind of to where my parting is. Should we say you can't really see this? I know, but i'll show you from the back in a sec and then i'm gon na just clip that bit out the way there. I'M gon na repeat that on the other side, around the same so around the top of my ear again and clip that out the way. So that's obviously going to be my my sides right so they're out the way now and then i've just got my back here. Okay, so we're kind of looking like that with regards to sectioning. So obviously this is the line where i'm going to take my back extensions up to. I don't like to go too high with them, because i find that you know you can see them more, so i'm just going to take them up to here to start off with anyway. So next i'm going to take my comb again and kind of just above the nape of my neck. Just here i'm going to take my first piece: that's not enough! So when i do this bit at the bottom here, i like to leave enough hair to cover the bonds, if i want to put it up. So if you want to do that, then obviously take a little bit more down all right. So we'll put that up. There, okay and then just with this bit i'll, show you putting one pairing. So obviously i've got my extensions just here so obviously take the stickers off. So then you kind of want to do it like a a brick weave effect. So on this one, i'm probably just going to put where can i get two? Maybe i'm just going to try and check now? Maybe three? Actually so i'm going to put one in the middle to start off with so gauge where the middle is take. A small section of hair yeah that's about right and then underneath take your first piece kind of lift it up. That'S not very straight kind of put that, as i say, a tiny bit away, get rid of any hair and then just stick yeah, that's fine and then give it a squish. These are actually really sticky. Do you know what i might not use heat on these ones, they're, actually really quite sticky, which is nice? Do you know what i've actually put that a little bit too low? I wouldn't normally go as low as that, like from my scalp, but it's fine, because it's it's at the bottom, so you're not really going to see okay, so i'm just going to quickly go ahead and do these two pieces here fantastic! So there we go. There'S my first three in i know: they're kind of you know they're not too bad they're not perfectly placed, but obviously i'm trying to do it on the back of my head, which is really quite tricky, and so i'm going to go ahead and, as i said, I'M going to kind of brick weave up now in like a triangle, so the next one i place will be here and here you can imagine like two two bricks and then obviously the next row, i'm gon na do alternate so and i'm gon na keep going Until i get up to obviously where i've put these sections at the side, just here right, okay, so that's the back done so i've got two packs in there. So that's 100 grams and yeah that's gone in absolutely perfectly. When i got to the top bit just here, i i only managed to get two in here because um i could have really done with two on the sides here, but i'll see. When you know i come to the end, i might have a couple left over that i can just squeeze in, but i'd rather get the sides done. First, okay, so i have to say they have gone in really really easy there. The glue is quite good. It'S really sticky, so you know they seem to have stuck quite well and i haven't actually put heat on them this time because they were, they seemed to be sticky enough that i didn't need to do that. Obviously, as time goes on, if they start slipping then i can always put heat on them like later, but for now i think i'm just going to leave them as they are. So i'm going to do the sides now uh, so i'll, just flip that back around to the back, so i'm going to do one at a time. So i do this side first, just let that down and just give that a brush through. Oh that's, nice. I'Ve got a nice kink in there now. I can sort that out after right so like i did below i'm gon na take in kind of sections and just start from the back of the ear, so that one just here so i'm gon na put one probably yeah, maybe two just behind my ear. So sorry about all this mess around me by the way, it's because, obviously you know i need my lights for you to be able to see properly so i've had to put those there, so i've got wires going across me. I'Ve got, i mean tape, bits all over the floor, but it's fine right. So i'm going to open up another pack, so i'm going to try and do it so i've got one pack on each. I i like to kind of get to get it. Even i try and work out that i've obviously got four packs, so i put two in the back and one on each side, so this one is gon na be on my side. I'M gon na take this bit just around the back of my ear and take some hair. Get my tape place it around the root area, just kind of make sure the hair is stuck to a bit and get rid of the excess bits and then get my top piece just sandwich it on the top squishy squish and it's in. So i actually think that one there is going to be okay because um of a feeling, that's kind of a continuation of where i put them at the back. If i'm honest feeling it kind of feels next to it. So that's fine and then we're gon na go kind of just above that really now, just above my ear there and then on this bear. I don't want to go too close to the front of my hair, but obviously i want to go close enough at the same time. So i'm going to take it kind of from about here. So i'm just gon na pop another one just behind that and then what i'm gon na do is carry on until i get right up to about here and then uh yeah i'll, do the same on the other side and i'll show you when they're all in I'Ll probably come back before you know. The final reveal um because i just want to kind of trim them a little bit so i'll probably come back and show you that first, but yeah i'll just continue with this bit now right. Okay, so they're all in i've got literally two left so like one one bond so yeah, that's all that's left over um, but i'm really happy with them. They look really really nice, i'm actually quite pleased. I went for a shorter length this time because i actually think it's quite a nice length. It looks really natural, i mean the other ones. You know they blended in nicely as well, but i've never gone for a 16, but it actually is quite sort of natural. Looking i like it right, okay, so what i'm gon na do is just you know, they're, not actually too bad on the end. Do you know what they're not actually they've kind of gone in quite nice? I don't think i actually need to to trim them really. Maybe a little bit around the front, but that's about it right. What i'll do is i'll just grab my scissors and kind of just a little bit do the front so obviously just angling down just kind of wiggle the scissors. I'M too scared to take too much off to be honest, yeah that'll. Do it's hardly anything, but it's not really made much of a difference. Has it really but yeah um yeah, i'm actually really happy with them. My fringe, this bit goes really nice and this bit just always stays straight, but there we go right. Okay, so i'm going to sort myself out and i'll see you in my usual my usual position: okay, so yeah all finished that didn't actually take too long. Today. I think i'm getting a bit quicker a couple of hours, it's better than four um, but yeah. I think it's really nice really really like it feels beautiful in it feels so soft, so silky feels a nice thickness as well. It doesn't feel too thin or anything like that, because that is something that i'm always a bit worried about, because i do personally have really thick hair. I always worry that it's going to be too thin when it's in and - and you know it's noticeable then, but it's not at all. It'S it's a beautiful thickness. Really nice um yeah, absolutely love it. To be honest with you, and as i say, i'm glad i actually went for the shorter length. I think it's um yeah. It definitely looks really nice and natural, so yeah yeah. I really like it so yeah. Here you go. Here'S how it looks sort of from the front really nice, you know, so you can't see any bits underneath or anything like that. Looks really nice from the front and i'll show you from the back as well. So here you go! Here'S how it looks from the back as well. I think it's really really nice, i'm kind of crouching on a chair here so but yeah. I think it's nice yeah and one more thing the color match is absolutely brilliant, so yeah, if you're, if you're a bleach blonde and uh or itchy eye - and you know you just use the odd orbit of silver shampoo like i do then yeah it's it's a Perfect, perfect platinum, it doesn't have a yellowy yellowy tone to it or anything which is is really good yeah, as i say, i didn't have to tone them at all, which was great so with regards to aftercare, i'm just gon na leave it now for three days. Maybe four, if i can get away with it without washing it, because obviously the bonds need to settle and you don't want any water getting in those for a good few days really so i'm going to stock up on dry, shampoo and yeah, just yeah just just Spray it and to maintain your extensions, a lot of people ask me this last time i did actually do a little video on maintenance of them, but yet to maintain them just treat them like they're, your own hair. You know, condition them condition the ends. Leave it on for a bit, you know when you bath or shower um, put serum on the ends. Uh, you know leave-in conditioner, detangler spray, whatever um but yeah, just look after them like they're, your own hair, and you will get a good. You know a good few months use out of them without them, you know looking tatty or anything so yeah and possibly you might be able to reuse them as well. So what i'll do is? I will leave the link for the hair in the description box down below for you. If you want to check it out for yourself, i do actually really recommend it other than that. I hope you enjoyed watching and if you did please give me a thumbs up and i'd really appreciate it and mean the absolute world to me if you'd enjoy watching this video, and you would like to see more content from me in the future and you would Like to subscribe to my channel until then thanks for watching you want bye for me, isn't it my birthday yeah cause, i got ta, say you're, looking like a gift for me, baby
Comments
Sarah Crocker: These looks gorgeous! Love how healthy and shiny they look
baby hulk: The great thing is that you explain everything in detail from start to finish you do such a phenomenal job at your craft. Looks too real fantastic job
Lucy Fletcher: You do such a good job of putting these in your hair I couldn’t imagine trying to do tapes myself. Love the look of your hair at the end it’s so pretty. Got to love hair extensions ✨
Wil Average: You always do such a great job with these videos. They really look good. You are sooo knowledgeable in so many different beauty techniques! ✨️
Beauty Lover: They look so natural! Really lovely x
LaBriaNaje: i’ve been hearing and seeing alot about these, they look really good
Dawn Watson: They look so good i cant beleive how much hair it takes im glad i've watched again so now i know how many packs it has took when i first watched i thought it was only one pack just goes to show i dont listen properly when i get mine im going to get some sticky replacement pads so when they get a bit scraggerly im gonna replace the tapes & get more ware fingers crossed thankyou for this your enjoyable to watch.
Nicola_cooking: You did a great job , very flat install with those tape in nice sharing
Belinda Chapman: Beautiful great tutorial
Annie Bray: These look beautiful!
Tasha Hind: Lovely extensions clare xxx
SmartPsych: forever baffles me how you look so young would guess in your 20s