Mixing Extension Colors 101 | Jz Styles
- Posted on 06 September, 2021
- Tape-In Hair Extensions
- By Anonymous
Creating depth in a client's hair with color is difficult enough but it can be super intimidating to mix extension colors and trust that it's going to look good and blend well with the colors you've already used in the client's hair. So I'm showing you how to do it with confidence and to give your clients the look you want!
♡ ♡ ♡ FOLLOW ♡ ♡ ♡
Instagram:
www.instagram.com/justjessiiii
www.instagram.com/educationwithjessi
www.instagram.com/shopashandjae
LISTEN TO THE JUST JZ PODCAST:
SHOP HAIR EXTENSIONS:
SHOP CLOTHING:
https://www.jzstyles.com/shop-ash-jae
SHOP MERCHANDISE:
https://www.jzstyles.com/merchandise
BUY THE J WAVE CURLING IRON:https://www.jzstyles.com/curling-iron
SHOP HAIR CARE ESSENTIALS:
https://www.jzstyles.com/hair-products...
SHOP EXTENSION TOOLS:
https://www.jzstyles.com/extension-pr...
UPCOMING CLASSES:
https://www.jzstyles.com/classes
Business Inquires:
Call the salon/hair extension company:
801-404-6747
#JZSTYLESEXTENSIONS #EXTENSIONCOLORMIXING #MIXINGEXTENSIONCOLORS #HAIREXTENSIONTRAINING #JZSTYLESCO
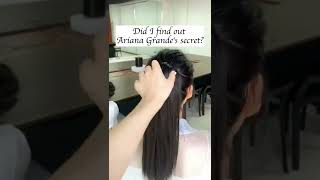
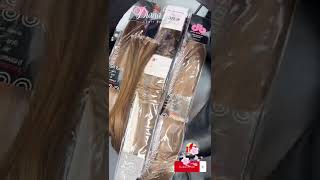
Hi, you guys welcome back to my youtube channel so for today's video i'm going to be showing you how i like to mix and match colors and create depth and pops of brightness in someone's hair using hair extensions. I know this can be a really hard process for some people, so i wanted to break down how we do it. So, if you're interested in watching this stay tuned, you guys so we are going to be mixing and matching a bunch of different things. We'Ve got all of our stuff prepped and ready to go. We are going to be using the j tied wefts revolutionary. I love it. This is in the color nikki. We also have all of these wefts over here she has machine wes and she has them in a few different colors. We have brook, we have stew, we have kendra, we also have tapens in those same colors, so i'm going to be using all of these, and i know it can be scary to see something so solid, dark, something that's a little lighter and then there's dimension. There'S so many different colors going on this is her hair and as a stylist, especially one that's new to extensions, it can be scary to mix and match those all together. So i'm going to show you how we do that in the salon. Okay for this row, i'm going to mix a few different colors, so i'm going to be doing the stew. This is a machine weft and i am just going to center. It find the center in the back of the head and then wrap it around and you can cut machine wefts on the seam. So i'm going to cut just a little bit because it's a little bit long for this row and then i'm going to place that with a clip horizontally right here and horizontally on the other side. And then i'm going to stack some j ties. On top of this j tides, i have in the shade nikki right here. If you haven't heard of jay tights, they are the hand tied wes 2.0 from jay-z styles, incredible, incredible left! You can cut it on the seam, it's still a hand tied, and it's going to lay so flat and seamless. You'Ll, never use a traditional hand tight again, it's amazing, so i'm going to find the center one more time. Do the same thing and the best part about j-tie? Is you can cut it? So i can do the same thing. I did with that machine cut off a little bit on the edge where i don't need that hair and then i can just line it up perfectly with that machine left and then do the same thing on the other side, all right and then i'm going to Stack another j tied with j type. You can stack up to six just like with hang tight because they are so delicate and they're so flat, and then i'm going to do one more. So i'm going to show you guys a little bit closer how this is cut and what it looks like. So you can see here so delicate. You can see the individual strands of hair because they are hand tied on and then we seal them off with a different technology than a traditional hand tight, so that you can actually cut it on the seam, with literally no issues at all. It'S a game changer. You guys i'm telling you and it has no return here, so no itchiness, okay, so i have the machine weft, just one layer of that and then three j ties on top of it. So i have four wefts total. I have it pinned on either side horizontally and now i'm just going to vertically clip around the perimeter of this row to keep everything in place so that we don't lose anything and then we're going to start stitching that on okay. So i just wanted to show you guys a little bit of me stitching these wefts, i'm so excited for the j type to launch. You guys have no idea. We'Ve been working on this for a long time and they literally change the game. These wefts are so incredible, you're going to love them and they are available september 15th. So make sure you head over to the website and check them out. We are going to have them in four different lengths. 16 inch 18 inch 22 inch and 24 inch, and they will be available in all of the shades that jay-z styles. Co has to offer. We are going to start with just a few shades as they start trickling in and soon we will have them all all right. This is what it looks like stitched in, so you can see that it's the nikki on top with the pops of the stew. I know this can still look intimidating because it's like two colors that look stripy together, but once everything's in it's going to be beautiful, also look how flat the j tides lay. We have one machine and three j tides and it's like so seamless all right. I have got her second row beaded and i am going to add a brook throw your ears at it. Um you can. You can clip one on my mom needs content for instagram, so they asked if she could pretend to do her hair, good yeah. That'S all! I needed perfect, then i'm gon na do the stew, which is the lightest one, so we're gon na put that sandwich in the middle and then we're going to do kendra because that one's like right in between. So we have three machine, wefts layered right here. Typically, i only recommend stacking two to three depending on the client's hair, but, as you can see, i have them staggered so at the very corner. It'S not gon na be super bulky. Okay, so i had that all clipped up and then i decided to actually flip it and have stew on top. So then, basically we have the brook the kendra and then stew, just because the kendra's a little warmer, if you can tell and her own hair, has those cool tones. So i feel like the stew matched and that's just a little tip - is making sure that the dominant tone that matches the hair vest is on top and the other colors can act as peekaboos to add dimension. And even if you have it clipped up, if you feel like you need to change it go ahead and do that because you can't be too picky about this. Okay, you guys so now we have tapens we're adding in so we did the two rows and we're going to fill in the gaps with tape. Ins. Not every client needs this, but it kind of just like takes it to the next level, because we have a little bit of a shelf here and we're going to fill it in. So we have the same colors and tapes and i'm just going to be like stacking them and mixing and matching for it to blend in. I did an instagram post talking about this a couple of weeks ago, but i do feel like tapings kind of get a bad reputation in our industry. Stylists tend to shy away from them because they're sticky and they can be annoying. But i'm just here to tell you that tapens do have their purpose. They help when filling in gaps like this on this client. Some may need more than others. Some may only need like one or two tape ins in the front, and it's just going to help fill in that shelf in the front. So i just want to encourage you if you are a stylist who exclusively offers wefts just know how to do tape. Ins too, and offer them just because some clients may need them and you never want to turn them away. Okay, you guys, so i wanted to show you how i stack the tapes. I have three in right here, um, typically, there's no rhyme or reason. I kind of just like mix and match colors and do what i think is best based on like the dominant tone in her hair and where i want pops of color to be, but if i'm doing them all together in a sequence like this, i always make Sure that they have some sort of pattern, so it doesn't look weird so, for example, these three right here are all stew on top, but then, when you flip it up, i did kendra on bottom for these two and then brook on bottom for that one. So then, when we bring it down, we have a little more depth here in the center and then brightness on this side. So i'm going to kind of follow that same idea, um, making sure that it's a little brighter towards the front. Okay. So now that we're in front um, her weft ends right here, so i want to fill in that gap, so i'm basically kind of like rippling over that left and acting like this as a continuation of the left to fill it in. So i am doing kendra right here and then stew. You can see how that just putting that little tape right there just helps it look even more filled in then i'm going to do the same thing right here, working on an angle, and i'm actually going to do brook right here. Just to give us like a pop of that dark so that it doesn't look like it's just in the west, but then we'll do stew on top. So it's not too dark. It'S so pretty, and you can see how, before, when we had like all of the dark shades out. It looks really scary because it's like so solid dark compared to the lighter ones, but now that it's in you see how they all work together to create that subtle dimension. Give us that depth, but also keep in mind like the tones of her hair. All right now, i'm going to do one right here at the center i'm going to do tendra, oh okay, that looks amazing and you can see she has this money piece right here and we want to kind of connect that in so i'm going to do. One final tape right here and it's going to be on an angle right here to fill in this area and once again do kendra and since the stew has those pots of that brighter blonde, that's gon na complement her money piece so that her money piece extends Into the extension, so it doesn't look like just her hair and then the extensions that are darker okay, so we have all the extensions installed. You can see that the color looks incredible. We just have like depth and pops of blonde, and i love it now. You'Re going to blend a little bit so we're basically just going to skim off some ends and layer, her up a teeny bit just so that it blends super well, but we are not wanting to take off a ton of length right, okay, so i'm gon na Pull it forward and i am just to point my baseline - i took about half an inch off and then her turn around and i'm just going to connect that in the back and then once my baseline is done, i'm just going to slide cut some layering in To help her natural hair blend with the extensions, this is also going to give her some texture so that her style holds a lot better. Okay, you guys. This is the final result, so we have four different extension colors mixed here. We have kendra brooke, nikki and stu, it's so crazy that it can look so intimidating and then you put it in and it all just flows so well. I love these color combos for something like this, where she's brunette she has some depth, but then there's also those pops of color. It turned out. So so pretty i'm obsessed with it. Let me know if you guys liked this video, if you have any further questions, leave them in the comment box below and i'll catch you next time, and you guys. I just wanted to remind you that in this video i kind of showed you how to mix and match colors. I didn't show you a ton about like install and placement and all that, because we teach extension certifications at jay-z styles. So i'm going to leave the link below and you can register for a class if you're interested, we have a ton of trainings coming up throughout the end of the year in different locations, it's 1500 to get master certified and you also have the option to do A payment plan and split it into two payments. We also have a color class coming up. So if you are interested in learning about extensions or color check out the links below - and i would love to see you there - you
Comments
Michelle Stewart: so beautiful!!!!! i am considering geting extentions, watching this video and seeing how thin each row is, is really ncie, I always thought they would be too heavy for me, I get migraines and i really dont want them to pull on my hair, they just look full. Thanks for posting! I am also considering signing up for your master class with the blonding class as well!!! Oh, and i would love to come to shadow sometime.
Coffee Before Beauty: LOVE THIS VIDEO!! SOO GOOD! I love that you also showed how to stack with the j tied. Side note WHERE did you get the wood shelves in the back ground??
Wendy Rowe: Absolutely love your technique and color matching. Xx
Beeber Taylor: So I'm not asking exact pricing but how do you add in the extra for the tapes? Per tape? Per pack?
Serene Galloway: You are real life the GOAT. We shall meet and learn together in due time . Appreciate every single one of your videos.
Luna Snow: How much did this cost? I’d love to save and get my hair done by you
Melody Patterson: For the amount of hair you used, the ends look really thin?
Smile Jesus Loves you: Yes I have tried and tried to find a video like this !!!
Illume: are you phasing out clip ins? I like to add them with my extensions . I dont see the jessi extentions anymore
Megan Williams: I’m New to sew ins! so can you answer why you didn’t just go closer to the front with the beads so you didn’t have to do tapes ?
michelle clinch: Love this wish u was in the uk x
Olivia Jones: How many grams did you use for her hair?
Alina Tullius: could you tell me what the length of these are?
Monique Franco: Are you phasing out clip in's on your website?
LP: i like mixing and matching as well, but this was kinda maybe a fail. that bottom dark color and so much going on that it distracts from her pretty face
Riley Montgomery: I want my hair extensions the salon and color my hair extensions pink