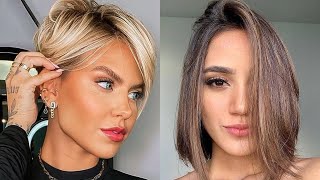
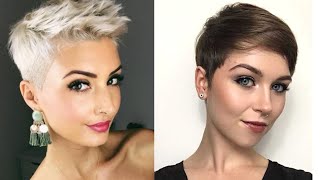
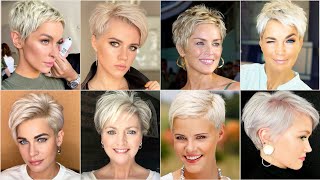
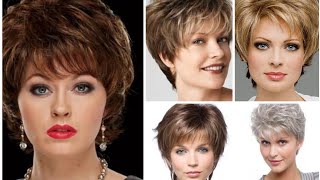
How To Cut Pixie Haircut Step By Step Tutorial For Beginners,Short Haircut For Women #Pixie#Haircut
- Posted on 03 March, 2020
- Hair Knowledge
- By Anonymous
How to do pixie haircut easy way for beginners
PLEASE FOLLOW ME ON:
Instagram►https://www.instagram.com/uniquehairr
Snapchat►https://www.snapchat.com/add/barcanoz
Twitter►https://twitter.com/barcanoz
Facebook►https://www.facebook.com/wcuniquehair/...
What'S up guys, how are you today and, as I said, every Monday we gon na, have a new video on my channel and today we're gon na do amazing, beautiful pixie haircut and this haircut. Hopefully you like it and it's one of my favorite actually. So, let's start so the first thing you wanna do when you start any haircut to section the hair and you take a clean section, guys it's very important to take a clean section. So, as you see now, it's very simple sectioning you take it on the the partial Ridge and you make sure you don't take it very wide on the top, because you don't want the hair to hang out from the side and the final look so make sure Your section is a clean as as much as possible, because this is gon na make your haircut stand out and make your haircut easier and faster, and you don't have to go back and again and again and fix it. So now, as you see, I started with a diagonal line because we know the agonal line. It adds movement, I don't want to do horizontal or vertical and you can do on different haircut, but this haircut I decide. I want to do a diagonal line and I start you can start from the right from the left. It doesn't matter, I start from the right side and then I will go all the way back to the center of the head and just when you cut your guideline, make sure the next section is gon na, be it's gon na, follow your guidelines. So don't lose your guideline like when you cut the next section, don't cut into your guideline, because when you cut into your guideline, what's gon na happen, you're gon na make your guideline shorter again and then you can lose it and then, when you finish the haircut, It'S gon na be in balance and you will have one side longer than the other so make sure to cut on your guideline na na. So it's very important when you take the next section: don't take it too big, so half inch section or one-inch, so the smaller section it's cleaner and we wan na lose your guideline so try to not take big sections. So here we move to the other side and, as you see and doing the same again and look every time I cut, I left the hair with my razor blade and to make sure I'm following my guideline and I'm not losing it. So here we go again. Look, I lift it and make sure this is my guideline and then I cut on it. I follow my guideline. I don't cut my guideline again. It'S very very important guys, and this is the big mistakes. A new hairstylist usually do when they take the next section. They cut into their guideline again and this the final results gon na be one side longer than the other, so make sure consistency and you focus on your guideline and the section you take don't take big big sections. So after I finish look here, I'm checking my balance make sure everything is right. This both sides the same length. Then I move to the top. So now, when I move to the top, as you see, I'm taking the backside little piece of the backside to connect it to the front, so this is my guideline, as you see guys now and now I start cut short to long so from the axe from The crown area, as you see this little piece of the hair, I start cut toward the face and I'm cutting diagonal lines too. So I'm cutting in short, too long so on the crown is gon na be short. Closer to the face is gon na be longer and longer, and this is what I want, because I want more hair around the face, and so when I style it, it's gon na look more sexy, and this is how I want the ship to be. It'S very important again as your sectioning and when you take a new section, try to not take too much hair. This is gon na. Keep you consistent and organized and you don't have to go back on dry cut and fix a lot because you did try it on wet hair. So, as you see I finished the top now, I'm I sprayed a heat protection and it has some medium control. You know, because you know, when you put any heat on the hair like a blow dryer or flat iron, you want to protect the hair, you know so you spray some products to protect the hair. So now I'm, I just add the blow-dry on the hair, and this is heat protection actually for the dry hair. So this type of protection you spray it on the head only when it's dry, because I'm preparing it to do a flat iron, but the first one. It'S actually for heat protection, but it's actually, it has some medium holding it and it's very good when you start the hair - and you will see later what's gon na do so now, what I'm doing right now, a flat iron, so this is gon na do make My job easy when I do the dry cut and now I'm starting my dry cart. And here when I put the definition in the hair and I put the details so guys when you do any haircut on, especially when we start with wet hair. You determine your length, you determine your shape, but the final details - it's always always on dry cut. So here, if you notice my shear, the one I'm using right now, it's not the same shear I started with so this year. Actually, it has a thicker blade on the back and thinner in the front, so what it does when I close the hair, the blade on the hair, it pushed the hair away from the blade, and this blade is for texturizing, hit the hair and do usual slicing Technique and point cutting technique and also stop so this blade is not the same blade. I cut the hair with when it was wet because the one first one I did it was a thin blade and very straight. So I can take this straight line and press it. It'S more for precision cut, you know I mean so it's not the same shear for the whole hair, lots of styles. I think the same sheet. You can use it for everything, it's actually every technique and when the hair dry or wet it has a different blade, because if I cut the hair, when it's dry was the first sheet, I did the hair when it was wet. I'M gon na ruin the blade. So now here I'm doing point cutting technique to balance the shape and make sure there is no bulkiness in the head. Because there's some area - and maybe you see some bulkiness or you see lines and you want to blend it all together. So you do those point, cutting technique and very important guys. I want to mention that make sure the hair is handed percent where there is no moisture and it because if there's any moisture - and you do point cutting technique where you gon na ruin the haircut and get, maybe you kind of create, halt and the hair. So here, as you see on the fringe area, what I'm doing I'm doing slicing technique I slide out and to make those pieces, those beautiful texture, PC, look around the face and, as you see there is the fringe area, it's very short and then the the head On the top it comes is longer and to make this a beautiful effect. Now I put some cream style and it's little waxy feel to give this beautiful faces around the face, and this is sit and please guys if you liked this video, don't forget to like my video and subscribe to my channel and see you soon in another video Ciao for now


Comments
Linda Dillon: Thanks so much for your video on this particular pixie cut. I've worn an undercut pixie for 3 years and I was searching for a different pixie style which no clippers are used. I hate my neckline in the back after they "shear" it off. After about 3 weeks passes, it begins to look better. So - I'm going to try and cut my own pixie, like you cut in your video here. I've cut my own hair for years and years. I grew up around my Mom's beauty salon and learned very much during my teenage year's. That was a Loooong time ago!! lol I love your style in this video. My hair grows toward my face so it should do well with your pixie style. I appreciate your videos and will let you know how mine turns out (good) hopefully!! By the way, the short "clip" of you shows all of us women how good looking your are!! Take care, be safe and be healthy. Linda, from Texas.
Onlytymewilltell: Thank you very much for this informative video! I cut my elderly grandmothers hair for her since her mobility isnt all that great and cant get out to have someone cut it for her so I do it for her. Issue is I'm no professional lol and basically self taught so as you can imagine my technique is by no means perfect. And I haven't the foggiest on why I never thought to see if anyone on YouTube uploaded videos like this one. Nevertheless here I am and will definitely give this a try the next time I cut her hair! THANKS!
Kathy Knuteson: I LOVE the longer layers in the front on top with the short bangs!
Grace Elaine: Love it but I find most stylists want to leave it longer and a bit heavier in the front on top. I prefer the opposite. Shorter front/bangs and a bit longer in the back.....just long enough to keep it soft and feminine around the ears and neck. Nice and short in the front. Please cut my hair!
Cen Ming: Good i really understand and i love the way you explain about haircut.
Heike Meier: Hi, I'm watching from germany and I love your videos please more
Marketa Jilkova-Dumas: LOVE the cut!!!!
VerdureVision: Had to break up with my salon today. Gosh, I really enjoyed watching this video. Wish I could have this style right now. Girl can dream…
Teresa Dutton: Thanks for a great instructional video..very well done!
katty white: Do you shave the nape first? And whats the length?
Marja: Offel model you take so much time for this easy cutting!!!
Layali Wissal: شكرا على مجهودك ربي يخليك للحلاقين المبتدئين مثلي هههههه
beauty by Hind: شكرا الك كتير على كل مجهوداتك تعلمت منك كتير شغلات لله ارحم والدينك
Karessa Marshall: If i wanted to be a barber or cut hair u would be my choice of tutor
Soni Karia: How to take angle which comes both side equal
fluffieDOOM: OMG! Do my PIXIE!
Hassna Oum: Cool