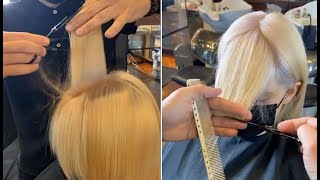
Curly Mullet Haircut For Women 2020 - Easy Haircut Tutorial Scissors - Curly Layered Haircut
- Posted on 09 September, 2020
- Hair Knowledge
- By Anonymous
Curly mullet haircut for women 2020 - Easy haircut tutorial scissors
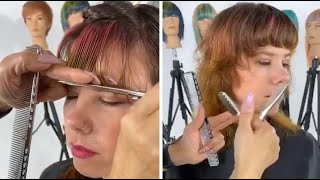
Curly Layered Haircut Tutorial | Full Step By Step
*Giving is hold forever*
Hi brand, i'm michael pizzelli. This is the beautiful, marina we're here with georgia, hills behind the camera and he's going to be here to ask you all the questions you have all right. We'Ve got a really exciting haircut for you today. It'S a mullet, but it's not a normal mallet, it's a special kind of mullet. I call it a bullet right, because what we're gon na do is we're. Gon na have the front nice and short, so we're gon na connect it to the fringe area and there's a little bit of disconnection, it's to all come short in the front and then what we're going to do is we're going to create a really blunt one Length bob in the back and what that's going to do it's going to create this really cool expanded shape in the back while following this kind of a mullet feeling, so it's going to be really graphic and cool for you guys to see. So, thank you for tuning in don't forget to like and share, and don't forget, to tell us where you're tuning in from george is going to say all the comments that there is so feel free to. Let us know where it is: what time is it where you are? What'S the weather like as we go through this lovely bob mullet variation for you today, so what i'm going to be doing is i'm going to be starting with the top of the head at the front? So i have a guideline and the guideline is actually the fringe area i have from before. So if i start to lift the hair up, what you guys are going to be able to see in a minute is the length that we have in the fringe area, and so what's very important for me now is that i want to start flattening this area And so what i'm going to do is i'm going to be looking to really flatten this area down? So i'm actually going to be starting this haircut at the widest point of the head, so the widest point of the head. If you put your kind flat you're going to feel where the widest point of the head is and if you go from there and you lift it up, you find the length that you want to create and you can start cutting there immediately. So what i know is from now i flatten the shape down. I might want to flatten it a little bit more, but for now i'm happy with it i'm happy with the length so we're just going to lift everything up, but we're actually cutting quite a square. Cutting angle right now now, the reason why we're doing something quite square is because we want to flatten the shape you don't want to see it come out. We don't want to go longer in the back. We just want to see when we bring this hair down, that it sits really nice and flat and goes with this soft texture that we have. So that's the reason why we wanted to make sure that it's nice and flat, and actually now that i've done the first section and i've let it fall. I think it's pretty good. I don't think we really need to go shorter than what we've got already in it, so it's really cool. What i might do at the very end is just extra flat in the back, but for now i think that's perfect. So, if you're just tuning in, let us know where you're tuning in from big thank you to the hair brain community for always supporting us. We really really love being with you guys it's over two years of hair brain lives now, and we can't thank you guys enough. So let us know where you're tuning in from don't forget to like and share. Let us know if you like it. This is going to be a fun one guys: people from uk iowa, cold 40 degrees, nice beautiful guys, thank you so much california and london - amazing, very nice, all different parts of the world guys - and this is such a cool haircut - that's going on right now. I'M loving seeing all these bob variations with mullets and everything, so i think it's saying it's going to be really interesting and because it's got this natural curly texture, i love seeing it take shape. So what i'm doing is i'm just taking vertical sections coming across the head, i'm pulling the hair slightly towards the middle, but not too much because i'm looking to create quite a nice square feeling in the top once i've done that what i'm going to be doing Is i'm then going to be connecting the sides afterwards? So first i'm just focusing on the top and then after that, i'm going to focus on the sides beautiful. So we can start to see that taking shape already beautiful. So if you have any questions for us, technical questions feel free to ask them. We love technical questions, cool so again, just a bit of repetition. What i'm going to be doing is again i'm going to be lifting up this hair and trying to get rid of all the excess length that we have. So i'm just looking to remove the excess length that we have in the top. So i always start at the top with these, because it's so important to start to see what shape you're building in the top here, so that you know whether it's going to visually blend or not with the rest of it. I don't mean blend, is in action. Connect but just visually what it's doing so, i'm really happy with that. I'M going to start cross checking this one side cool, and so what i'm going to do is, as i'm cross checking this one side. I'M not going to go too crazy because i have to do the other side as well, but i'm going to start removing the excess hair towards the perimeter. So i've gone from working in a vertical section to now coming across horizontally and we're going to do the same thing on the other side, because i really want to have a clean base to work with. So i want to have a clean base on top to know what i'm going to do there afterwards, don't forget to like and share guys, don't forget to. Let us know where you're treating him from have uh margarita saying i love mallets, i'm hoping to get one soon, but i have to find the right dresser. Where are you guys located? So we have slave hair educations in london. So i don't know if you're from london, but you can always come and be a model for us in our london academy. But if you're in the states there's loads of cool places to go drop us a comment where you're from and we'll see. If we know a good hairdresser in your area, we've always got friends about it. So we've got this really nice first bit done so for those of you that are just tuning in we've just done the top of one side and now what we're going to do is we're going to repeat the process on the second side. So if you're just tuning in don't worry, you haven't missed anything yet so we have a fringe area in the front and we have the length that we want to create in the back. So what we do is we start to connect the fringe into the rest of the hair, beautiful, and so what we're looking to do here is just flatten the head shape. So, by taking these nice square sections and working across with a square cutting angle, what we're doing is we're flattening this top area, so we're encouraging the hair to stay flatter, which is just going to make this whole thing pop, even more so for those of you That are just tuning in we're going to be doing a bit of a mullet variation. It'S going to be a bob in the back, so it's going to sit quite expanded out and it's going to be nice and short and cropped in the front. So it's going to have that really graphic shape to it. At the end that i really love, i think it's going to pop and it's going to be really unique, guys i'll have people tuning in from michigan from toronto, canada, new orleans, miami, ireland, beautiful thanks. So much hawaii texas. What time is it where you organizing the world? Let us know what you're doing right now, what time is it you waking up? Are you going to bed? There'S people actually excited to see a mullet haircut today, but the thing i love is this is not ordinary mother. This is going to be a next level. This is what we call a bullet. It'S a bog mullet we're creating a new thing here. Man, i'm loving it so we're just continuing what we were doing before we're creating a nice square padding line as we're going through the top we're taking vertical sections, and what we're going to do is afterwards we're going to start cross checking horizontally just to make sure It'S nice and clean and after we've finished that what we're going to be doing is we're going to start to work on the sides. So i'm just putting all the hair up, i'm being very blase about it, because i just want to get rid of any excess hair at the moment so that it's easier for me to work with and then we're going to come and start cross-checking. So first thing i'm going to do is say: hi, i'm michael casallitis. This is the beautiful marina we've got georgia, girls behind the camera. So any questions you have just please let us know if you do like the video don't forget to like and share it. The share buttons below just go hit that now and what we're going to do for you today is we're doing a really interesting bond, mullet variation. So at the top we're just going to go for this nice short crushed, look and then, as we go through. We'Ll start to create this expanded shape in the back, so i'm just flattening the top making sure we've got a nice clean baseline to work with from the top and then after that, we're going to be coming through and just making sure it's flat on the sides. As well so don't forget guys if you have any questions, let us know if something i say doesn't make sense, please you know don't hesitate to just drop a comment. George will try and ask me as many of them as possible and more people tuning from belgium. Apilene some people said good morning. What time is it there beautiful guys? Thank you so much for everyone. That'S cool, coming along very nicely. So what we've got now is we've got this really cool kind of short crappy thing going on. On top, i love the texture. I love the softness. We just got all the sides that we need to get rid of now and deal with as well. So we're going to start by softening the sides out, i'm going to be working through the front and then i'm going to be working towards the back. So i'm just going to take a diagonal section. It'S going to come slightly back and we're going to be trying to create something that goes a little bit longer in the outline and a little bit shorter, internally beautiful, and then we just see that that just flattens things quite nicely. And if it's not quite enough, you just raise it up a little bit more and it just helps flatten things out a little bit more. It'S looking very cute, so what i want to do here is, i want to start going a little bit tighter with it. Now the reason is, we want to see a difference in the lens, so we want to see a difference in the lens between the front and the back. So that means that we have to start going a little bit tighter so that we can start to see that difference between the front and the back okay. So if you kind of don't do enough of a difference, it has a tendency that people won't really be able to tell that you did it on purpose. So for me, i always feel like when you create something it's very important to try and think about how people perceive it as well. Design has to kind of look intentional, so people have to think that that was what you were going for. So i think, when you do this connection and things like that, they have to be profound enough for people to understand that that's what you're meant to do to have a striking image with it. So i hope that makes sense what i said, but whenever i try and create a look, i'm always trying to think what is the the special thing about the look that i'm going to create? What makes it different to anything else, i've created before. What'S the unique feature to it - and i think always by starting with that - you kind of then end up with something. Quite special. I'Ve got our first question for the night. Yes, so entire cat has used one guide so far yeah, so the entire thing was basically by taking the fringe at the front and not wanting to lose that fringe length in the front and then what i did was i decided the length internally by how heavy Or how wide the head shape is, so i had the length in the front i lifted it up, and i knew that i wanted to create something quite flat, because if i went trying around sorry, i would create too much heaviness here and it would be bulky Again, if i went this far, it would stick out quite a lot, so what i tried to do was make it as flat as possible by creating a square shape. So we did that we came across to the sides and we worked it horizontally as well across both sides and now what we're doing is we're connecting it with a vertical cutting angle. But what we're doing is the first section we're coming a little bit more out. So we keep the softness and then what we're doing is we're coming in a little bit tighter on the sides. So we don't want to break the waviness of the hair, but you know i just think it's super cute when it's kind of short tucked behind the ears and we've got this soft flow to it. You are over directing on the side so on the sides. I was pretty much working on the base each time, so the front is disconnected and on the second section i literally changed my angle and then i worked on the base coming forwards. So i'll show you again on the second side for those of you that missed it anyway, you just add a little bit of water to it. Beautiful so give us a thumbs up if you like mullet skies, and what we're going to do is we're going to start to create the next part on the sides. So we're going to be taking a section which comes from the top down. Okay - and we want to keep the length in the bottom here, so what we're going to do is we're going to just lift up the hair and we're looking to create an angle that kind of saves the length at the bottom but starts to work up to Connect the hair, okay and if you feel the wideness of the head and you think it's a little bit bulky, you can always slim it. So i always try and feel the bone structure and the widest point of the bone structure, and i always try and slip that area. So for me now, we've got like quite a lot of length there to play with. It might even be a little bit too much so i think what i'm going to do is i'm just going to take a bit more of the hair out yeah, that's better! So now we can see where that's sitting. What i'm going to be doing is i'm going to continue to take these sections that come from the top and come towards the bottom of the head, but what i'm going to do now is i'm going to try and change my angle, okay, so i'm going to Take a little section away just so i don't cut all of it up and i want to start working now with more of a flat angle. So if you just tilt your head over it'll, be easier for me to shovel on the camera i'll come down and i'll be looking to cut it quite flat, okay and then what we can do is we can start to see how well that's looking and how Flat, it's looking! If it's a little bit bulky, it's probably going to be at the widest point of the head. So if you feel the bone structure, it's a bit wide and you just come down and flatten it. So that's really nice we're just going to keep doing the same thing. So the important thing here is our angle has gone to quite a flat angle. So if i show you the head up, it's quite flat, it's not come out like that. Like the first section, it's not graduating if it's gradually it's going to stick out. If it's like this, we've got too much length, so we want to keep it quite flat there afterwards, so moving the head over is just easier for me to make it flat. While i'm standing behind so you guys can see in the video better and we start to cut it from the top to the bottom, if this is making sense guys, what i'm saying just give us a thumbs up, give us a little comment. Let us know we're doing well. We really appreciate it guys so again, just keeping it nice and flat working through each time beautiful. So i'm just going to take it a little bit tighter at the bottom and i can start to visually see how it's sitting as well around the ears, and i really like how it's looking. I like the softness, it's beautiful. So we'll just do one more section here and then we'll be ready to move on with the rest of the haircut. So we're just going to lift this one out and again, starting from the top such a nice feeling watching the hair drop. All hairdressers isn't the same beautiful. So what i'm going to do now is i'm just going to come back again and have a little look, but this time i'm going to come from over the top, because i want to make sure that it's a bit flatter. So will you leave the pack that long almost yeah almost that long, so it will be shorter, but it will be a real variation of shoulder. So what i want to do the is shape the same. Now you can see, i'm not checking the front, because the front was disconnected remember so the front is not part of it, but as we work our way up, everything should blend better. So we're just looking to make sure that across the top, everything sits nice and clean, and this will just help everything blend on that roundness of the head. So, where the head rounds a little bit that'll just help everything stay a little bit flat, looking beautiful. So i'm just going to do the same thing on the second side. Thank you beautiful cool, so we can start to see that softness that muddiness coming through as well. What i'm gon na do is i'm just going to actually point into the top a little bit. Just to flatten at the very very back here we don't want the connection between the back and the front to be too obvious. We want a little bit softer through the top you, okay, there yeah jenny peter says nice cross check. I still do the same thing after 23 years. It'S one of the best is sitting ways all across the hair. James says hi from london academy, with our two students in london, oh beautiful james, has been busy teaching today this is cool, so i'm loving this. So far, i think we've got a really nice first part of this mullet mix going on nice bit of curliness in the hair, a nice bit of texture and movement. So what i can do now is, i can kind of forget about the mullet side of it. Now and focus on creating just a really strong shape in the back, so i'm looking to cut off actually as little as possible in the back. To be honest, i just want to clean the shape and make it as heavy as possible. So as close to a one length as i can right now, it seems like it's almost the opposite of a one length. At the moment, the outline length is slightly slightly shorter than the the lathe length. Is that because you cut your hair yourself yeah, that's probably because she cut her hair herself, very nice cool. So what we're going to be doing is we're going to be separating from the back in the center parting, so we're going to be separating the center parting, and what i actually want to do here is: i want to create something, that's very, very heavy. So i'm looking to create something as more of a one length than anything else, so i'm just going to take horizontal sections lifting the hair up. So you can see that the the top was very much kind of freehand soft and now what we're going to be going for is something a lot stronger, something a lot cleaner, very beautiful. So i'm using my fingers, i want to create a lot of tension in the hair as well, so i really want to see a lot of tension when i work because the tension is going to create more of an expanded shape. So the fact that this is curly means that actually, when you do a one length, it becomes like the heaviest form of graduation, you can imagine it becomes very, very stacked and very heavy, which is exactly what i want to see this time. So i think it's going to be just a cool little interesting variation for you guys, a bullet above my lip okay, so i'm just taking these horizontal sections across the head equal on both sides. When i do these things, i always work both sides. At the same time, it helps me keep my flow and my balance better beautiful, so this is really going to start to stack out. So what we're going to do is, after we dry we're really going to start to see this expanded shape, but then we're going to start to freehand it a little bit to make the whole thing. Look a bit softer really cool, though beautiful nice and so we're starting to see the bullet very cool. So mike, are you having her keep her head tilted down the whole time? So the reason why i'm getting ready to keep my head since it died is most of people at home can see. Normally when i create bobs, i try and keep the head upright, because i can see the shape i'm creating better. When you have the head down, you have to think that if you cut a straight line, it's going to become a bit rounded when the heads up, if you cut a kind of triangular line with the head down, it's going to become square when the head comes Up but unfortunately, if the head's up it's very hard for you guys to see what i'm doing so, i try and just put the head down a little bit for you to see later, but that mullet is looking cool, loving little sideburn bits, that's amazing! So what we're going to do now is we're just going to start to freehand very, very softly, some little pieces, so i don't want to have such a harsh difference between the hair. So what i'm going to be doing is i'm going to be creating a little zigzag, and so what i've done is i'm just creating a little zigzag. So if you see the hair there, it's just a little zigzag throughout and i'm gon na start to freehand. Just a little bit into it, what this is going to do is it's going to just create some random bits in between that just help blend the hair through it's just these tiny little zigzags, and then we just kind of freehand a little bit as well. Just those couple just help everything look a little bit more natural with it very cool, you're cool. I like it so guys to be honest, that's it so far. We'Re gon na do a bit more freehand when it's dry, but just to do a little recap. What we did was we started to create the top nice and square. The reason why we wanted it square was to keep it nice and flat all right. Once we've done the top mask and flattened the square, the first two sections we angled them a little bit out so that they came a bit softer in the outlines. We then changed our angle after that first section, which made it disconnected and we came square across which flattened everything to the sides. After that, we created a nice one length so that it's really when i dry it you're going to see this is going to really become huge, which is what i want, and then we took some random pieces and little zigzags and we just blended them in afterwards. Now i'm going to grab some product to dry, okay, that's really cool and then what we're going to do after we're going to freehand that fringe in a bit. But maybe you want to get a bit of a close-up okay. So what we're going to do? We'Re going to start putting in a little bit of curl cream, and then we have to start drying it in as well beautiful. It'S looking very cool. We have a comment from our model for our model. Sorry stunningly gorgeous tell her. We say so. Thank you around the world man where, because somebody reminds me in the 80s, i love the 80s. He it's says back around okay, so i'm going to give it a quick glass just to get some of the extra moisture out of the hair sunshine coast, canada. You have a fun in canada, you're trying to kill the models; okay, just when it's too hard to scream; okay. Okay, hmm! So you come back so so um! So people like the curly mallet, it's not a monitor, curly bullet! It'S a bug said kelly. The bullets. So cool, so so, if you guys, like the ballet, the bob marley, just let us know give us a thumbs up. So if you guys, like the video, don't forget, you can watch loads of other live videos. We'Ve done for free on our website. So if you go to george, if you go to slatehair.com, you can find lots of different videos for free that we've done live for you yeah. I love it. Let me know what you guys think that's looking super cute, though just some last details and then we're done, i'm already like that. So we really do. You know the one cool thing about what we've done here is we really didn't cut a lot of the fringe off? We were very, very careful with the amount of hair that we were taking off from the beginning, so i measured the length of the fringe, and i took that as a guideline for the rest of the haircut. So if i hadn't have done that, there is a chance that it would have ended up being too short, and so i really like the fact that we worked with the lengths we had and not against it. I really hope you guys liked it as well as much as i did, because this was a lot of fun to do okay, so i love that looking very nice, all right i'll, do a quick recap. If you want you stand up for me. Okay, i'm michael good sweeties. This is a beautiful marina. So what we're gon na do is we're going to just explain to you how we've done it so far. So if you start on the side for me, what we did was we cut the top flat nice and square, so we went through the whole top making it nice and flat and square what we see is also horizontally. It was nice flat and square when we came to the sides. We had these two longer pieces and what we did with these was. We actually took that first section we angled our fingers a little bit out. So that's why we had a little bit more of the hair we did was we took quite vertical sections and we cut everything quite flat, so we took everything really nice and flat after that. What we did was we created a one length in the back which helped everything to stick out a lot more and it just creates this really cool expanded shape. So that's a really cool expanded shape that we got, and, after that, what i did was. I took a couple of random sections through the top and just cut them in so there's a bit of a visual blend, at least so at least it looks like in some ways it has that visual blend. What i would like to do is we'll take the gown off and then, when i leave and i'm far away, you can take the mask and george will just show everyone, the haircut okay. So, let's just make sure there's not too much hair going on here. Now. That'S a reveal that looks. Super cool, fine touches, absolutely love it guys. It'S been absolutely amazing i'll! Let you enjoy the finished result and i'll come back and say goodbye beautiful. So, let's see the whole thing from left and right. Thank you so much to everyone for tuning in it's been unbelievable. We will see you next month for our monthly hair brain live. Thank you to the hair brain community for having us. As always, don't forget, you can watch other free videos, we've done on our website at slaterhead.com, goodnight from us lots of love from the slavehead team, guys bye,

Comments
Hakan Gonzaga:
brunette .dilemma: hello LGBTQIA community