Flawless Fade Technique - Barber Tutorial
- Posted on 09 February, 2020
- Hair Knowledge
- By Anonymous
Step-by-step tutorial on how to achieve the "picture perfect blend" or "photoshop fade" in under 30
minutes.
Executed using 3versince PDR Fade blade.
PDR Fade blade: https://www.3versince.com/products/pdr...
HERE'S WHAT WE COVER:
1. Zones of the head.
2. Cleaning the canvas.
3. Reference points for consistent blending
4. Angular positions that decrease clipper-to-skin friction.
5. Low light atmospheres.
6. Removing weight.
7. Corresponding guidelines.
8. Corner blending.
9. Hair Fiber Enhancement.
10. Proper edge-up technique.
11. Softening technique.
12. Clipper over comb.
WHAT IS 3versince?
3versince.com is the only company in the industry that offers superior modified AFTER-MARKET blades designed to deliver the sharp performance that experts demand. We specialize in creating innovative new tools and equipment in order to foster peak performance results in the barber shop. Whether you're trying to achieve sharper edge-ups, speed your way through a fade or simply get the most performance out of a clipper, we've got you covered with our wide range of superior modified blades.
Together with Immersive Barbering, we provide the resources, knowledge and education that foster peak performance within every barber, regardless of background.
To Your Success!
- Enrique Tapia (Aztroo) & the team at 3versince.com.
If you enjoyed this video, subscribe to our channel as we will be posting more instructional videos like this filled with genuine value.
Also, if you’re interested in more instructional videos, career advice or interested in learning how to cut hair as a complete beginner, check out our online courses for more.
Thanks for watching! :)
Immersive Barbering Online Courses: https://immersive-barbering.teachable....
FOLLOW US AT:
Facebook: https://www.facebook.com/3versince/
My personal Instagram: https://www.instagram.com/aztroo/
3versince Instagram: https://www.instagram.com/3versince/
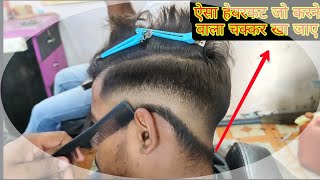
So we begin this 30-minute fete signe by using the number two guard with the lever closed this movement, you know up and down flick out, ask your client if he can tilt his head and maintain that position, as you guys create your initial guideline. We begin by going just beneath the parietal Ridge area all around right in this area. Here we begin to flick out now to blend in this area. The number two, with the bulk up here, we're going to use clipper over comb, exposing just a tad a bit amount of length. That way, we match the number two lane and transition that over to the top of the head, establish the guideline right above the bottom corner of the temple right about here. As you guys reach, the back occipital zone of the head make sure you guys did fly below the occipital bone next step, create the proceeding guideline with the lever open, very consistent. All the way through this guideline will be about a fingers length. Now we correspond to the ceiling hit the ceiling zone within that guideline, using the entire blade here hitting the ceiling. Okay, now put the lever at Midway closed and hit it Midway within that guard line, using the full blade first on the first pass notice. How I'm hitting it made away and then flicking out with the entire blade? Now we can go back to the ceiling and blend in these little spots here and as we close the lever, all the way we're going to hit the bottom part the skyline the floor. You can call it the floor, you can call it the bottom. You can call it the last line, whatever you want to call it. That'S a reference point that we're hitting right now next side same thing Midway. Now we can open it a tad bit and go a little bit farther up. Okay, now all the way close hitting the bottommost side or the bottommost zone of this guideline. The next step, we use a half guard the lever open same exact thing notice how I'm holding the skin down here. That way, whenever you guys do this, the skin isn't moving as much same thing lever corresponding to the ceiling, mainly using our corners or half of the blade, instead of the full blade. For this part, all we saw your clients have tilt his head half way now. Working that lever back down back to open that will we blend in any little disturbances or dark spots. Now the lever fully closed to get rid of that last shade. You can remove the guard using the blade itself with the lever open and the corner, we're going to blend in right beneath the area that we hit with the half guard to close just going in and polishing real quick working in between these two positions. Here he's in the corner and repeat the same process here on the other side, quickly: polish, with the blade itself now using the number one guard with the lever open going straight up, flaking out right about this area here, so the clients head huh again we're doing This motion straight up and flicking out using the one and a half guard lever open and then working to fully close using the corners softening up this area here with the lever open using the corner here. What we're doing here is we're kind of just dissipating away any dark. Any dark areas up here: corners of the blade to the number one guard and work that lever from open to close you you now we grab the half guard and polish all around being very consistent being very consistent. All around that's another key to getting a clean 30-minute fade once you guys are working within the guideline going all across and not just skipping over guidelines. Now we grab our trimmer here right above the area that we just balled it out. We want to stay consistent. Choose our area so in this case is going to be right about here and make sure you guys are consistent. All around flaking out, as you guys go high up then begin to shave and scan the bottom of the fayth. A quick edge up right here near the sides you always want to keep it natural. The overall fade is pretty much done in order to polish this area. Before we actually line it up. We'Re going to use a clipper over comb technique that I love using right before I edged up my clients. You know mainly for clients that have long hair, but still want an edge up still wanting to look clean, just taking the tad bit of length here. Exposing just a tad bit that way once we go in with the trimmer, then it's gon na look a lot more sharp and precise, and up here, just try to blend in anything that seems out of place is very, very gradually very subtly. You know not too hard. We want to apply a little bit of hairspray that way it holds everything as a place and makes you know the process a lot easier. Now we begin so the technique to getting a clean line up. Is you always want to start in the middle? You don't want to push the client back so right where you can establish a line without pushing too much back that'd, be the perfect spot. You can begin to travel that line to either side either corner using a card here, a business card to apply the topic hair fibers. So the line is right. There I place place it right about here, not exactly at the position, but just a little bit in front that way. You guys can razor off any extra or excess fibers. So you guys can watch, learn and apply I'll see you guys on the next one.


Comments
BLUES1905: I asked my barber for this cut and that MF did his own thing and I had to correct his mistake at home with my clipper. I’ll cut my own hair f**k it. This cut looks sharp and clean AF!
Scorpio Cisneros: I've been fading my boys hair an this video has helped me out so much. The cleanest very crisp fade I've ever seen EXACTLY what I wanted. Thank you so much for sharing your talent!!
Saul Olvera: i love this video because you explained your process for the blending, and managed to fit the 30 minutes in less than 10 minutes. great video. thank you!!
Mel Gonzalez: i'm doing my first practice fade test today, i studied this whole video & jotted down 20 steps, super detailed & super helpful!
Julia M: I love how you’re using the correct terms in your videos. In cosmetology school they give us a lot of shit for not using words like Occipital bone, apex, etc. You’re work is very detailed and your explanation is very thorough!
Amaterasu: This literally went perfect. Usually there is a tiny bit wrong or another little detail but this right here, can't even find a single hair that isn't faded perfect. Amazing job!
Alyssa Gregory: This is amazing and will definitely help me at my job. thank you!
GeeHeavy: I have been cutting my own hair for around 10 years but I always look at ways to improve. Nice job!
muhammad shahzad: I gave my brother a skin fade and it came out pretty good! It only took 1.5 hours. My first ever cut lol! Wish I watched your video earlier, now I’m more assured in staying in place. It’s easy to get lost in my guidelines, with your method it’s simple to keep intact and on point!
Senses: This is my go-to self-haircut during quarantine ! Already cut my hair over 10 times using this.
US Marine Patriot: Best fade I've seen. I've been cutting for 40 yrs and I can't get a fade like that lol. You have a gift son.
David Rey: Great video! Straight to the point and simple!
Clint Zoidberg: Thank you for the great tutorial and excellent craftmanship,Sir!
Ragnarok: Used a few tutorials but found this gave me the best fade ive ever done very simple and easy to do 10/10 mate! Sickiest fade ever
bbb: Such a sick fade! This was like a school lesson of barbering learnt a lot from this thank you dude
A.h.t: I'm only 1 min in and I can tell this is gonna be a good clear and understanding tutorial. Also tells where to cut which most people dont do
House of Shaves Barbershop: Man you do some of the most detailed tutorials on YouTube! Amazing
Alexander Sandino: I love how organized you are. No skipping guards. For a beginner all the guard skipping can sometimes confuse a noob.
LVGames: Best video for learning to do a fade haircut. I like the detail explanation, now I can follow along with my 30 minute timer. Thank you
Kaitlin Baum: Thank you!!!! I don’t get to do a lot of fades, but I want to be the best I can be at them. This helped a lot!
Uptopswag 84: Im a barber for 8 yrs now and love watching vids like this. Always looking to learn new techniques
Brow Ming: I tried to do this to myself and now I'm Rocking that Stone Cold Steven Austin look
Shaun C: Thank you for sharing your art here. You are a true artist. I've learn't so much watching this. Your teaching method is so easy to follow and understand.
Toxic People 101: Great technique! The tutorial is easy to follow! Your method on how to fade between the line is !!!!!!
DaroProduc: I subbed, I liked and I shared. Omg I’ve attempted watch a thorough guide everywhere. This has been amazing. Simply amazing!
JJ T: Great tutorial! I learned a lot from this video and can only hope to be half that good someday!
Alexis Arteaga: GAME CHANGER. Very nice tips for rookies! I think a moderate to pro barber can easily execute this video. Thanks for sharing.
Kevin O Gomez: That was a clean and great job buddy. Thanks so much!
Gdk AC: Did my own taper on myself for the first time using this video honestly your da goat thanks for the step by step
Joel Elford: This was excellent. You're a great teacher.
Cajun Boy New Orleans: You make it look so easy! It's not easy to make it look as good as you did
christian D: Great Video, I followed step by step and did my sons haircut, this was my second haircut following your procedures and came out really good. Only thing I didn’t do was the shaver
jmyout Pigeon: Appreciate the time you took for this video boss! I never used the 3/16 guard like that. I will try this technique fade looks killer.
darealmikeg: Would love to see video on cutting low taper fade vs mid taper vs high taper fade. And seeing all three results. Your technique to cut is way easier to follow. Nice job!!
Jiovanni Cintron: Finally someone explains it step by step Thank you!!
CCC Videography: I’m glad I learned to cut my own hair two years ago. Been using some cheap wahl clippers and trimmers. Honestly gets the job done pretty good and also made my own self cut mirror
Ayaan Khan Pathan: Bro so much respect for that tutorial, by far the easiest one to follow!
yambackla: Very good explanation...easy way to learn...thank you!
Paolo Monsayac: Man I actually loved this video it really helped me to get better at fading!! Keep making tutorial videos like this man it really helps a lot
Richard Jadison: Esse vídeo matou todas as minhas dúvidas
beauties_byClaudia: I’m a new cosmetologist, they thought us man cuts but I dint get it the way they explained it you make it feel like a breeze And like some one commented “you are gifted” thank you ☺️
94Elantra: What I would do to find someone who could do a fade like this. It seems recently that nobody cares about the quality of the cuts they give. This is truly a form of art!
Brandon Rizzo: This is probably the best tutorial I’ve watched since starting my barber career. Thanks!
Bo Kennedy: When making your guidelines, is it important to have a light touch with the clipper that way you don't make hard lines that are difficult to get out? Thanks!!
Tacoshell33: this is actually the cleanest fade i have seen so far
ReadyIzFreddy: This is awesome bro literally one is the best vids I’ve seen nicely edited and explained. Good vid
Ben Reriti: My man thank you iv been doing my son's hair and kept messing it up, this was the easiest video to follow and understand, thank you my brother.
umar shahbaz: This fade is great man! Keep up the good work!
Fairy godmother: My absolute favorite tutorial!!! Thank you
DianeCanDoFlamtaps: Wow! That is a perfect fade!! Thanks!!
Rhonda Love: Great tutorial, very helpful.
Luis Mendoza: Excellent tips. That helps me a lot, I have have 3 boys, and I cut ✂️ their hair, and now that they are older, is more difficult, because they want to look good
Red Stang: Because of this video, I was able to cut my husband’s hair! It turned out so good! Thank you!
Ernesto Davalos: I did my son's hair today came out good thanks for the tutorial
365 Dasher: Man this video caught me by final look. After watching it was very efficiently done on point fam I been cuttin a min and that is true craftsmanship. Real Barber
Lmao: Thanks brother! The long way! I will start cutting up for profit soon. You taught me most of my tricks. Thanks again.
r4lara: Hey man I’m currently cutting everyone’s hair right now at work and this video really helped me out. Thanks !
SLISKI JOHNNY: Damn, this is so satisfying to watch. By the way, does the lever position matter if there's a guard on? I have never used clippers with a lever but I just ordered one to improve my fade
Josué Vasquez: Muy buen corte excelente técnica... Si puedas poner aún que sean subtítulos en español,
james beasley: Good technique. I was a little confused when you skipped the one and went right to the one and a half guard instead of the one guard fully opened. I wish I understood your theory behind that
Hoonigan: This was a very detailed tutorial, can I request you make a similar tutorial for people who have not cut hair, going into depth of the parts if the trimmer? So we can familiarize with the 'barber' language?
J BOSS: Nice tutorial explained perfectly thanks
ForkU: Just a side note coming from 35years experience, the hair has to be like carpet before you can get a great skin fade,so the canvas you work on does matter.Do this on hair with tiny bald spots or and your skin fade will start at the side part. I'm not saying it's easy to do but every hair follicle missing does make it harder unless you use hair spray paint
JC TALK: Great work! Great tips!
Matthieu Belmont: i'm going to a hairdresser school and this was very helpful. thank you a lot :)
Iosmar souza: Parabéns irmão sua técnica e massa .
Clyde Tatum: I don't know how 1.9k people don't like this video. This young brotha laced this other young brotha's hair. That fade is tight. Great job brotha!!!
Mario Versace: Few days into lockdown and I suddenly want to become a barber , This was very helpful, I’ll be giving it a go!
Nee: Very important! Note how he uses the blades corner. If you dont do this youll leave dark patches because the skull is filled with dents
Alex Silva laubaka: muito bom
Jim Lim: For skin fades, is the shortest guard always 0 or can you have 0.5 as the shortest guard?
Linh Nguyen: Tried this on my boyfriend tonight and it turned out amazing!! It’s only my second time cutting his hair and we were both shook
Reemara Abdul: amazing work, and amazing explanation.. thank you..
Andrew Pena: Aye man my mom cuts my hair and i like how you were very detailed about what you were doing thanks for this vid i liked and subed thanks for helping !
Kenneth Brad: You make it look soooooo simple getting more clients now
Jesse C: Literally the cleanest fade I've seen so far.
Sonny Piston: In the ocean of fade demos here on the tube, this one is the best hands down. Thx.
Barbero Mick: LIKE!! Resultado TOP
Zephyr Magnus: A few questions: What's actually happening mechanically when you open/close the lever? And what does opening/ closing the lever do for your fade? Coronavirus is gonna force me to finally live my barber dreams
TheBlackMarket336: I TRYED THIS YESTERDAY. TODAY IM "ROCKING THE ROCK" HAIR CUT. MY WIFE SAID I LOOK JUST LIKE DEWAYNE JOHNSON PS. I LOVE THE DEDICATION ON THE EDITING I NOTICED CERTIAN PARTS YOU WENT BACK OVER AND SPOKE, AND TURNED YOUR CLIPPERS ON WHILE SPEAKING. KEEP UP THE WONDERFUL JOB MY MAN. ON A SERIOUS NOTE THIS VIDEO HELPED ME REALLY CLEAN UP AND BLEND IN MY FADES BETTER. A SIMPLE THANK YOU IS IN ORDER HERE.
YBN Hemuli: That fade is amazing
Salon Success Academy: Thank you for this tutorial!
Plastuski: Amazing tutorial
Julie Kim: Awesome tutorial! Thank you!,
RoyceGetit: I love watching different barbers and their techniques and types of buzzers they use but this... might be the blurriest butteriest cleanest fade I ever seen. Nice shit
Paul Sutton: Beautiful!! I wish I'd watched I this Before.. I've never been taught how to do this and always just bumbles my way through... most of the time I just have to tell clients I can't do them
John Amaro: U made it look easy..i am still struggling to make a perfect fade:(
Omar Barber Díaz: Excelente trabajo master.
1uP: When fading, do you use 'C' motion or up and down?
Jim Vincent: Awesome tutorial mate, thanks. What make is that clipper comb? looks really effective with barbed teeth.
sassi121412: Love the cut and your techniques
JL BREMER: Been cutting my own hair since late summer. Always have a hard time with making the fade blend out. Maybe it’s the fact I’m not using the corner of the clippers
G Harris: Question for the barbers out there. Do we have to close the lever when cutting? Can't you fade a No Guard (Open), into a # 1/2 guard (open), into a 1 guard (open) without having to close the guard?
Gio Cuthbert: This has to be the CLEANEST fade ever. This was on my recommended and I ain't complaining.
Nelly Highwind: Hey can you use this method on coarse hair? For example the second guideline being the 1/16 instead of the 1/8?
Micah CooLer: The Beat Tutorial For Fades In Details On YouTube… Hands Down ✨
M M: I’ve never seen a barber so well versed in human anatomy
Brian Laverde: Bro not even trying to fan boy but the way you elaborate on every step is bomb af especially for some one just starting to get my feet wet in the fam business this gave me some huge insight.
Amos Dukes: That’s a clean ass cut bro! Looks a lot like mine but 1000 times fresher
Az cardinalds23: I’m gonna get my first pair of clippers for my birthday and I can’t wait to cut hair. I feel this is my key, a key to get me off the invisible chain around my ankle that holds me to a job I will hate. I don’t want to ever work under anyone and this career will make me feel free