How To Style Fine Thin Hair/ Hairstyles For Thin Long Hair And Round Face| Holiday Hairstyles 2021
- Posted on 12 December, 2021
- Hair Knowledge
- By Anonymous
HOW TO STYLE FINE THIN HAIR/ HAIRSTYLES FOR THIN LONG HAIR AND ROUND FACE
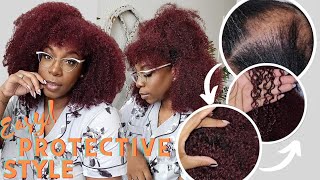
In todays video I will share 5 easy hairstyles for fine thin hair. From easy everyday hairstyles, to wedding dow do's. Also these are heatless ways to style thin hair. No heat what so ever. So if you want to learn how to style fine hair, how to style thin hair, or just learn more hairstyles for long hair, this hair tutorial is perfect for you.
Dutch braid videos:
1 - https://www.youtube.com/watch?v=_J9tZr...
2 - https://www.youtube.com/watch?v=9p3eWQ...
3 - https://www.youtube.com/watch?v=fLjsOW...
TIMESTAMPS
0:00 intro
0:27 Side swept down do
3:10 Double dutch braided ponytail
7:43 Quick half up half down hairstyle
8:50 Quick low bun tutorial
10:01 Textured low ponytail
12:55 outro
▶Click to find more:
➨ 9 TYPES OF FLAT IRON CURLS / HOW TO TUTORIAL - https://www.youtube.com/watch?v=wdsrS...
➨ Simple ways to lose weight and how to start your health journey - https://www.youtube.com/watch?v=nFkgu...
➨ 9 TYPES OF HAIR BRUSHES - https://www.youtube.com/watch?v=ZpaAn...
➨ HOW TO BRAID SERIES - https://www.youtube.com/playlist?list...
➨ HEATLESS CURLS - https://www.youtube.com/playlist?list...
➨ 11 TYPES OF HEATLESS CURLS ON LONG HAIR / NOHEAT CURLS / HOW TO TUTORIAL - https://www.youtube.com/watch?v=AnzXh...
I hope you will enjoy it and if you did give it a like and turn on that bell ;)
Don't forget to subscribe - https://www.youtube.com/watch?v=2w9P1...
[FOLLOW]
Facebook page(my hairstyles portfolio) - https://www.facebook.com/sukuosenumod...
Instagram - https://www.instagram.com/dovilee_vie/...
Hello, my name is Dovilė. I'm a Lithuanian, English speaking YouTuber and hairstylist. On this channel, you will find themed videos about beauty (mostly hair, cause I am not into makeup and I don't want to be a basic YouTuber), lifestyle, self-development, many more fun things that would be helpful and enjoyable for you. If you enjoy my content and found it helpful in any shape or form I would very appreciate you subscribing to my channel and to join my community ;)
In today's video i will share five types of hairstyles that are great for fine thin hair could be dressed up or dressed down from hairstyles that are great for working out or any kind of physical activity up to wedding hairstyles like this one. So if you are interested and want to know, keep on watching i'm starting this look by adding some curls into my hair, what i did i took half an inch iron in a twist wrap motion. I curled big sections, so i would be able to achieve these kind of waves, but you can go ahead and use a heatless method to achieve the same result. Of course, the curl pattern and the curl size is definitely up to your preference, but this is personally what i like to do. The second step that i do is: do you separate the curl okay? So, as you can see, i'm just think tuning on the strands, helping you to separate them individually into individual curls. Now we can move on to another step which is separating and pinning this portion of hair. Now you, if you want, you can always use the roots. Add some volumizing powder or volumizing spray. If you're lacking a little bit of volume, i wore this kind of hairstyle to a wedding. All i did was just add some volumizing powder underneath and i was good to go. I'M just gon na turn. It slightly. I'M gon na be taking both of these bobby pins, i'm gon na crisscross them on over china, because crisscrossing any other pin or a hip grip, or anything like that is going to give you 10 times better hold, rather than pinning them besides each other. You want to, you can definitely leave it pinned like this, and this is great hairstyle on its own. However, this is a really great style for any kind of occasion and could be accessorized with different types of accessories. Doesn'T matter if it's a birthday, if it's a wedding, if you're a bride or just you know a guest or whatever, you can go ahead and decorate it. However, you want to one of the things that you could decorate is, of course, by adding some really simple flowers, maybe because hair accessories plays a really big big role. You can add only this one and it would be a really great bridal hairstyle. So i'm going to show you as an example boom. One thing that you probably would have to do is to kind of like pin this down. If you like, to have a messy hairstyle for your wedding, this is literally it only one hair accessory. Add a veil at the back and you're good to go. If you want to achieve a non-messy version, i can show you guys on how that looks like now. This is the one that i created on my mannequin, so the hair may look a little bit of like stiff, adding a few decorations, a few hair accessories. You can really transform something simple, like all hollywood waves into beautiful wedding down. Do if that's you know what it you are into as you can see, this also put on the side, but i added this beautiful crown if you want to be extra put on a crown and you are good to go so as always, i'm starting with freshly Washed hair plus, i have already combed my hair to make sure that there are no tangles when you have this part down right there, because sometimes in this hairstyle, not like sometimes, but always the part shows up. So. For this reason, you can start with a pot right there, and then you take a comb. It could be teasing brush or right telecom, something that would have kind of like the end little thingy. That could help you to separate or create a part in your hair and i'm going to create a zigzag part. I'M going to start right there and just go like this all the way down and when you will finish both of your braids, you will able to loosen up those sections that you have added into hair and automatically is going to kind of cover the pot. So you know nothing is going to be visible now there are two ways on how you can braid the dutch braid uh. You can start and braid this way and your braid is going to be more close and near your face and you can take a section from top of the head start braiding like that and go like this. In this way, your braid is gon na, be more like this, i'm starting off by taking a section of hair near the pot line and splitting it into three even pieces, just like so going underneath underneath one more time underneath i'm grabbing a section of hair from The top and add it in then i take this section, go underneath, add a piece and add it in you can braid as tight as you want or as loose as you want, but because i'm going to fan another spread later on, i'm making sure that i'm Not braiding too tight because in another way it's going to be harder to pull. If you want to see a more depth tutorial on how to do, the dutch braid feel free to watch these videos link will be in the description. So i did my braid like so, and i'm going to go back and gently start pulling the braid apart to get more volume and fullness start pulling little by little. Okay and i'm moving on to this side, and i'm going to be doing exactly the same thing. Once you have done braiding both sides join the both braids at the back and secure it into a low ponytail. You can do the higher ponytail if you wanted to, but the ponytail. This is just my personal preference, then undo both of the braids from the ponytail, and this is what i'm gon na have. As you can see, the zigzag potting covers most of the parts plus my braids are going closer to my face, and now i'm going to pancake the braid to make it really really big. If you want to, you can leave it, you know just like it is, but i'm going to be taking little by little, every piece of hair and just pull it like. So, even though the hair is into a ponytail, and normally i don't really pull my braids like that, it really helps to give that giant, braid and volume effect and once you've done pulling both of the sides. This is what you have look at: how big and voluminous these braids are and partially you can't even see the part line at the back now. You can leave it like this. This would be a great gym, hairstyle or like an everyday hair snack if you will for work or whatever or you can add a little bit of possess to it and decor with some accessories. In this case, i'm using this silk scarf. I'M not really used to tying the scarves into my hair. So excuse me if you will see a really big old knot. So what i did i just pulled through the scarf through the hair tie and i am taking and tying a knot. You can do this a bit more precisely, but again, i'm not really great at this. Oh yeah! This is my finished dutch braided ponytail hairstyle. So i'm starting off the next hairstyle by separating some hair from this side and from this side this is just gon na, be like a half up, half down, look with some texture. If you will, if you have curtain, bangs or any shorter pieces, you can definitely go ahead and pull them out. This is going to help to frame your face and what i'm doing here, i'm just twisting slightly pushing for some volume and pinning down. You can pin the section all the way at the back and accessorize it there. If this is your personal preference, but for me this on the side, pinning situation is definitely enough. With this front section, you can kind of loosen up the very top layer to frame your face. You can do whatever you want. I will show you how it looks like in a photo. I twist it. I do exactly the same thing, and this is what i left with. I will show you the photo of how i did the front sections, but this is basically, if you have a texture, you have pin size and this is kind of like your half up half down. So, as you can see, i stretched the front piece. I added a flower as a decor, and this is my quick half up half down hairstyle. So i'm going to start by combing my hair at the back and signing it into a low ponytail. Once i secure my hand to a low ponytail, i'm going to be taking this bun maker. That looks like this. I find these to use way easier, rather than donut shea butter makers. What i'm going to do i'm going to take my hair and roll it towards my head, and i will continue this action until i will reach the hair tie once i will reach the hair i'm going to join both of these bands off the bun makeup and I'M going to spread my hair around it to make sure that the bun maker is not seen and use the bobby pins to secure, and this is how my bun will look like you can accessorize it in many ways you can put any ribbons buns scarfs. All of it or you can make it faster than bridal and you know, add a blingy blingy accessory, and this is my easy, quick little low, bun hairstyle or you can decorate it by adding this really pretty scarf. What i did i just wrap around a couple times around the bun and i'm making a little bow white at the top - and this is great summer - hairstyle great for those hot days great for having oily hair, because it really helps to hide that oiliness good morning. Folks, i'm starting this look with some overnight bathrobe curls. You can use an iron to create a curl. You can use a heat-free method to create a curl. My point is curl your hair in the way, so that it would change the direction. For this reason i chose this kind of method, because one curls will go away from the face and the other towards the face, and this is gon na help me to create that messy texture. But again you do what is easier for you. Just once i release my curls out, then next step that i'm going to be doing, i'm going to be separating and fluffing out the curls by shaking the roots separate each other to make it more voluminous a bit more full next thing that i'm going to do. I'M going to separate the section from the product line down is the ear from both sides, and this is going to be our size sections that we're going to be adding into a low ponytail. Once i have done that, i'm going to be taking my crown section gently with the same texture that i already have from the curls like if it's a curve, it's a wave whatever i'm going to twist them like that, i'm going to be taking a couple bobby Pins and secure them crisscross to make sure that it stays in place and then what i'm going to do, i'm going to be using a hair bungee now, hair bungee is basically a hair tie that has two bobby pins on each side. You take one bobby, pin you stick to your head, then you wrap around the remaining hair tie around at least like two times or as much as possible, and then you stick another end of the bobby pin at the other side, and this is great, if you Want to kind of have smoother bottom sections like to avoid any bumps that might be, you know appear if you would use a normal traditional way to secure your ponytail, and this is how it look looks like now. Moving on to size sections, i'm going to be separating both sections individual curls again to create more volume and more texture. If you want this culture to be more, curlier use a small iron to curl your hair, or, if you want this to be a more smoother use, some hair gel some hair, pomade or even a hair mousse to create that more textured curly sleeve. Look as you can see, i'm taking the sections looking through from the front, if i'm happy with what i have and basically what i'm taking with both of these i'm wrapping them right around. That hair tie that i secured my ponytail with and i'm going to pin this down again, you can, you know, do it differently, but this is just what i like to do, and this is my textured messy loki voluminous pony. Thank you guys so much for watching. Today'S video, i hope you found it helpful and a sample any shape or form if you did give it a big thumbs up, and i will see you in the next video bye. You


Comments
All about hair with Dovile: Dutch braid videos: 1 - https://www.youtube.com/watch?v=_J9tZ... 2 - https://www.youtube.com/watch?v=9p3eW... 3 - https://www.youtube.com/watch?v=fLjsO... TIMESTAMPS 0:00 intro 0:27 Side swept down do 3:10 Double dutch braided ponytail 7:43 Quick half up half down hairstyle 8:50 Quick low bun tutorial 10:01 Textured low ponytail 12:55 outro
merleugeen: Your hair looks nice n thick with the curls
Garden Reel: Amazing